HOW TO POSTS: LIGHTING AND COMPOSITION

top 5 photo editing tips for beginners
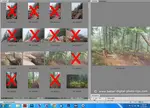
These photo editing tips are basic and can become second nature to you quite quickly. Just make it a habit to edit the photos that are worth keeping and discard the rest.
You can dramatically improve an ordinary or average photo and tweak it into a very good or sometimes stunning photo. Here are the top 5 editing tips for beginners:
BASIC EDITING TIPS FOR NEW PHOTOGRAPHERS
| EDIT | DESCRIPTION |
| 1. CROP IT TIGHTER | It's a powerful way to improve the composition of almost every photo you take. |
| 2. ADJUST BRIGHTNESS/EXPOSURE | Depending on your software, you may be able to adjust either one of these or both. There is a difference. Do this before you adjust the color. |
| 3. CHANGE COLOR BALANCE | Correct the camera's mistake or tweak the color for a special mood or effect. | 4. ADJUST SATURATION | Don't overdo this one, but most images are improved by increasing the saturation at least slightly. |
| 5. RENAME YOUR PHOTO | Use the "Save As" function to name your photo with helpful information such as "2021-july4-parade-edit.jpg". |
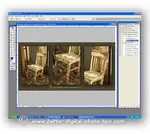
1. start by cropping your photo
I put this technique first because it's one of the most underutilized ways you can use to improve your photo. Modern day digital cameras are extremely good at getting exposure and color balance right more times than not. That leaves composition as the most important aspect of your photography you can improve upon.

If you don't get that composition just right in the camera, you can improve it with cropping afterward. Before you do anything else, experiment with cropping. Your cropping tool will allow you to come in closer to your subject, or cut out some of the distractions in the background, or get better balance in your overall composition.
 Uncropped - straight out of the camera
 Cropped, sharpened, and dust spots removed.
Maybe your photo is off-center or the horizon is crooked. See if your editing software will allow you to move the cropping window around or tilt it. You can save different crops of the same photo. Just save them with a new file name each time 9See tip#5). For more on cropping and resizing, visit this post: How to Resize.
2. adjust brightness, exposure, and/or contrast
Sometimes you digital camera will not give you a perfect photo exposure. A very bright area of the photo my throw off the camera's averaging meter and cause underexposure. Photo editing software has either a brightness or exposure adjustment button or slider. Some software has both.
You should adjust the overall brightness or exposure before adjusting color balance. In the photo below, the only editing I did was with adjusting the overall contrast. This snow scene had enough contrast without any adjustment (middle photo)
 Edited contrast examples
The low contrast edit produced a flat image, the original image had medium contrast, and the high contrast edit was too much.
3. adjust color balance
Color balance has a huge effect on the impact of every photo you take. Check out the exact same photo of this medical facility interior with 3 different color balances.
 Flash color balance
 Tungsten color balance
 Fluorescent color balance
Adjusting the color balance to a fluorescent setting during the editing process to match the type of lighting used inside this surgical center was the right move.
4. add saturation
 Edited saturation examples
The most saturated areas of an image are overdone when saturation is adjusted too high. In instances like that you can adjust the vibrancy instead. You can see that the high saturation photo looks a little strange. The low saturation photo has a subtle, softer look to it.
 Oversaturated Image Edit
If your photo looks like it's lacking a little pizazz, try adding some saturation. Saturation will add some colorfulness to all of the individual pixels, so you have to be careful not to overdo it.
If you have Vibrance as an option, that will increase the colors more in the muted areas and will affect the already saturated pixels to a much lesser degree.
In the photo edit of the surgical center the grass became too saturated and looks unnatural.
5. rename your photo after your edit
This is the last tip, but perhaps the most critical. You don't want to accidentally overwrite your original photo with the edited version of it. After you download your digital photos to your computer, you most likely will have file names consisting of zeros and other random digits or letters.

Be sure to rename the files ("save as") so that they make some sense. "Chicago-Sunset-2019-brightened.jpg" is easy to recognize. The original file name "IMG_2437.jpg" looks like computer's system files and doesn't help you when you want to recognize or organize your photographs.
These are just a quick, few photo editing tips to enhance your digital pictures. There are more advanced tips on taking digital photography editing to whole new level in other articles. As always the most important digital photo tip of all is to have fun with your photography.
additional resources for photo editing tips
Digital Photo Editing Software. Tips for helping you choose the best digital photography editing software for you to use.
4 Basic Photography Tips. The 4 basic photography tips in this article will help you avoid spending lots of time editing bad photos. Discover how to take better photos using the secret CLEF Formula.

I hope these photo retouching tips give you some incentive to adjust your photos a bit before you post them on your favorite site or save them in a folder. We live in an amazing time with respect to the possibilities we have in front of us with photography.


ABOUT BRUCE LOVELACE
Bruce is the publisher of this website. He is the author of the book "Improve Your Photography Instantly." Read more on Bruce on his Bio Page. He's been known as The Traveling Photographer ever since 1994. Read more about this website.
View some of Bruce's photos on Instagram. Visit the Facebook Page. Watch him on YouTube. Bruce runs photo workshops for kids and adults, and provides one-on-one photography coaching.
Digital Photography Education Location on Google My Business
You might like these
3 Simple Tricks on How To Blur The Background In Your Photo
How to get a blurry background on purpose, Tips on how to blur the background to get a better digital photo
How to Resize Pictures For Free, Using Software or Free Online Service
Easiest way to resize pictures. Updated for 2023. Helpful guide on reducing or enlarging your photos for emailing, printing or sharing at no cost to you.
10 Best Website Posts For Digital Photo Software Reviews in 2023. List
This list will save you time with your search for the best editing software. Here Are the Best Websites on Digital Photo Software Reviews.
3 Digital Photo Editing Steps To Take in 2024 Before Anything Else
Don't retouch your photos until you read this. Before you get bogged down with editing software, save time. Use these 3 digital photo editing tips first
How Professional Photographers Do Digital Photo Editing-For Beginners
Unlock Pro Secrets: A Look Inside a Professional Photographer's Digital Editing Workflow This is how the pro photographers do their digital photo editing.


Recent Articles
-
12 Unique Camera Tripod Accessories. Get The Most Out of Your Tripod
May 12, 26 06:47 AM
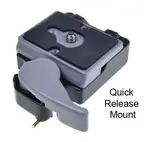 Tripods are essential in some situations, optional in others, but also vital is the tripod head + other camera tripod accessories. Check out these cool gadgets.
 -
Macro Photography Lighting Tips For Indoor Photography With Flash
Mar 29, 26 11:21 AM
 What is the best macro photo lighting set-up to use? Strobe lighting or spotlight? Several articles covering macro photography lighting tips.
 -
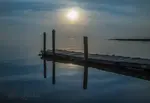
Nature Photography Composition Tips- Guide on How to Nail it Everytime
Mar 28, 26 01:46 PM
 Read these Nature Photography Composition Tips. Improve your digital photography technique.
 -
Are HDR Nature Photos Overdone? Answers to Your Questions About HDR
Mar 27, 26 03:44 PM
 Do you want high-impact HDR images rfor personal use? You're looking for the "wow factor" that High Dynamic Range provides. Is HDR photography still overdone
 -
20 Photography Tips-How To Instantly Improve Your Photography in 2026
Feb 09, 26 07:09 PM
 How to easily get better photos. These simple photography tips will steer you in the right direction for quickly improving your results as a photographer.
related posts:
- How to Resize Your Images
- Editing Tricks in Photoshop For Photographers
- My Favorite Photographic Resources
Improve your photography instantly. Get the 2 most important chapters of my photography book for free.