HOW TO POSTS: LIGHTING AND COMPOSITION
top 20 digital photography tips for 2026
ultimate Photography guide
WRITTEN BY: BRUCE LOVELACE
UPDATED: February, 2026
YOU CAN IMPROVE YOUR PHOTOGRAPHY FASTER THAN I IMPROVED MINE. I PROMISE. READ ON!

This post gives you the best 20 digital photography tips you can start with. Begin with these and your photography is sure to improve a great deal. I'm sure of it. Cameras are remarkably capable in 2025, but that doesn't automatically mean all your photos will come out great.
Just browse through these tips and start with one that interests you.
The Better-Digital-Photo-Tips website has hundreds more free tips on using cameras, lighting, composition, and how to articles. Dive into more advanced topics to improve your photography to an even higher level. You'll can also get helpful advice on photography gear, including cameras, lenses and other important camera accessories.
Okay, if you're ready to dive in, choose any one of these top 10 photography tips from section 2. They'll help you with your photography as you shoot. Get ready to surprise yourself with how much they'll help you.
There's so much valuable information and technology available for you to use to improve your photography now. You've got a big advantage over what I had to start with as a young photographer many years ago.

These first 5 tips in section 1 can be used before you even click the shutter. Section 2 includes the tips you use while you're actually taking photographs. Section 3 has five photography tips geared to properly using your camera.
1. HOLD YOUR CAMERA THE RIGHT WAY
It drives me nuts when I see how a lot of photographers hold their camera. Just like a golfer, a baseball batter, or a chef knows so well, the grip you use really does make a big difference. The diagram below shows you a good way to hold your camera.
Of course, this is optional. You can hold your camera anyway you want, but how you grip your camera may help you take sharper photos by steadying your camera.

Holding the camera in a more stable position will help improve the sharpness of your photographs, particularly in those situations where your shutter speed is not exceptionally fast.
2. Adopt a Childlike curiosity

Kids are born with an innate interest in everything and always ask "why" of just about anything they don't fully understand. You can do the same thing as you explore photography.
Ask yourself why parts of your image are sharp and part are blurred. Explore the reason your flash automatically fired. Find out why you like your 2nd try at an interesting composition of a subject.
Investigate why a faster shutter speed might mean raising your ISO setting to a higher level might help.
“The important thing is not to stop questioning. Curiosity has its own reason for existing."
Albert Einstein
You'll begin to see and learn things you'd otherwise be missing.
3. practice noticing the light
Lighting is EVERYTHING in photography. The most remarkable photographs often have the most interesting lighting. Make it a habit to just notice the light. Throughout the day, you'll be able to observe where the light is coming from, how it is revealing the visual qualities of any object.

Lighting is EVERYTHING in photography. Make it a habit to just notice the light. Throughout the day, you'll be able to observe where the light is coming from, how it is revealing the visual qualities of any object.
Don't judge it as bad or good lighting, just how it is illuminating the scene in front of you. When you're actually taking photos, you'' have more experience evaluation the light.
4. Plan to fail
Be prepared to fail. This can be the hardest to accept for new photographers. Sometime it seems like taking an amazing photo should be real easy, but it takes a bit of practice to get good at most things. Photography is no different.

The most successful photographers had made the most unsuccessful photos. Think of a disappointing photo as an opportunity to learn, just a small step toward a successful photo, rather than a "failure"
Thomas Edison tried thousands of times to design a light bulb that would work. Fortunately, your camera is your best friend. It has a lot of technology to prevent you from having thousands of photo failures if you just learn to know her a little bit first. Digital cameras are amazing pieces of technology that can handle just about any situation for you.
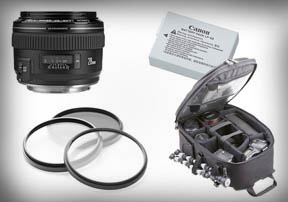
5. be prepared - Digital Photography tips
It's that well known Boy Scout Motto of Be Prepared, but oriented to photography. There are 3 parts of being prepared. Parts 1 and 2 are obvious, but we need to be reminded of the basic need to be ready with a camera that has fully charged batteries and plenty of space available on the memory card.
If you prepare by taking a real camera, with no offense intended toward those quite capable smart phones, with you, you'll be reminded to look for photography subjects during your everyday activates. That's how you really grow as a photographer.

6. PLAY WITH PERSPECTIVE
This is perhaps one of the best photography tips to try first. You're going to shoot from different angles and different heights. Most photographers just automatically bring the camera up to their eye and shoot everything from that vantage point.
For the best results try several different vantage points and distances of the same subject. There are many different perspectives to take that will dramatically affect how your subject looks.


Here's another example of why this technique is a good idea to try. Check out the perspective I chose for this photograph of my grandson.

Another way you can change your perspective is to shoot a subject with either a vertical or horizontal camera view. Try holding your camera both in the up and down (vertical) position as well as the (horizontal) side to side orientation. Some subjects look much better photographed one way rather than the other.
 HORIZONTAL - Typical Perspective
 orientation works much better with this particular up and down subject.") VERTICAL - Better Orientation
VERTICAL - Better OrientationIt is often better (not always) to match the the direction you orient your camera to the shape of your subject. You can shoot both very easily and decide later which photo you like better.
7. USE A FEW SPECIFIC COMPOSITION Techniques
Get a grasp of just a few composition techniques and it's amazing how much better your photos will come out. The easiest digital photography tip to play around with first, in regards to composition, is the rule of thirds.
It's very popular in landscape photography, but can be used in portraits, nature photos, and many other types of photography. Simply stated, this rule says you should place your main subject very close to or aligned with imaginary lines at the 1/3 distances from either edge of your camera's frame.

You can also place the subject at the intersection of two of those 1/3 lines. Some newer cameras have the ability to have those lines show up on your LCD screen or inside your viewfinder. For more examples and tips on composing photos and the rule of thirds, there's a separate article on just the rule of thirds here and a very detailed article with 10 composition techniques here.
8. BECOME a "CAPTAIN CROPPER"
Eliminating clutter in your photos can often give them a lot more visual impact. Crop in closer to emphasize your subject more. It's simple to do.
While teaching a photo workshop last year at a local high school I realized how much my students could benefit from this technique. I use this technique frequently and like to crop in closer and simplify many of my photos. I confessed to my photography students in that class how I often turn into "Captain Cropper" and it really will help you improve a lot of your photographs.
You can do some "cropping" in two different ways. The first is the easiest way. You can simply use your zoom lens and zoom in closer to your subject while you are composing your photo. This makes your main subject more dominant in the photo. The first photo below is a nice photo with depth, but look how the emphasis is changed. The orange sky and cloud details are more prevalent when I zoomed in closer.
 Wide angle - 40mm lens setting
Photo has Depth
 Zoomed in to 105mm lens setting
Sky is Emphasized
In the case of this sunset photo I included the fencing and some of the blue sky in the wide angle shot. In the 2nd photo, I zoomed into a telephoto setting and the sky became more of the prominent part of the photo.
The second way you can crop in tighter is by using photo editing software later. Look at the photo of this young couple in front of the Gazebo. Cropping in tighter often simplifies the photo and eliminates background distractions and makes your subject more dominant in the photo.
 Too wide of a view
 Cropped closer = better photo
Being a editing/retouching geek I often shoot my scenes a little wide at first and then I'll experiment later with exactly how I want it cropped. It all depends on your preferences. This requires a little more effort on your part, but it gives you the time and flexibility to really nail down your cropping just right. If you want to get it right immediately and not have to mess around with software, do all your "cropping" with your zoom lens on your camera.
9. LEARN APERTURE PRIORITY AND SHUTTER PRIORITY CAMERA SETTINGS
 Automatic Mode
 Aperture Priority Mode
 Shutter Priority Mode
I know it's a little scary for some of us photographers to venture away from keeping your camera set on Automatic, but once you play around with these two semi-automatic camera settings, you'll see why so many pros use them to get really remarkable photos.
Hey, I get it. I know there's nothing wrong with going automatic, but you want to take advantage of your camera's technology expand your creativity and take better digital photos. This is one way you can do it. What you want to do is experiment with photos when the results you get don't matter. In other words, play around with the settings when the pictures aren't important.
WHEN AND WHY TO USE APERTURE PRIORITY
If you use Aperture Priority Mode you'll set the aperture (the f/stop number) and the camera will set the right shutter speed for you to get a good exposure. Setting the f/stop number means you'll get to control exactly what is and is not in focus in your photo. That's called depth of field.
Aperture Mode and you'll get close and far things all in focus.") Use a small aperture to get everything in focus
Use a small aperture to get everything in focus and you'll get just your subject in focus.") Use a large aperture to get a blurry background
Use a large aperture to get a blurry backgroundUse aperture priority and a large f/stop number like f/11 or f/16 when you want everything to be in sharp focus like this first photo, the landscape photo of the babbling brook. Use aperture priority and a small f/stop number like f/5.6 or lower to get a blurry background on purpose, like this photo of the sea gull.
 Aperture Priority Situation
Another situation where you can use this technique is when you are shooting portraits. You can improve the visual separation between you subject and its background. You'll be using a shallow depth of field to your advantage.
If you "open up" your lens in aperture priority mode to the biggest opening (the smallest f/stop number you can) you'll get a nice, pleasing, out of focus background.
This is why portrait photographers love and use aperture priority mode.
WHEN AND WHY TO USE shutter pRIORITY
If you use Shutter Priority Mode you'll set the shutter speed and the camera will set the right aperture for you to get the correct exposure. When you control the shutter speed, you get to control how much blur, if any, that you want in your photograph.
Here's the complete post on setting the Right Shutter Speed.
Shutter Mode Set your shutter speed fast, 1/200 second
 Set your shutter speed slow, 1 second
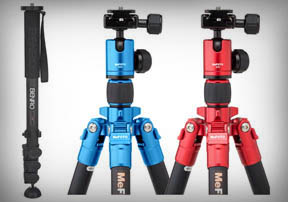
10. USE A TRIPOD
Yes, there are obvious situation when you'll need a tripod as a necessary camera accessory to get the shot you want. There are other benefits to using a tripod too when you don't have to. More on that in a second.

First, you will need a tripod in many situations where the shutter speed is too slow to get a sharp photo. Use a tripod when you're shooting at night or in a dark room and you can't use flash. Tripods are also great when you're shooting a subject where you are prohibited from using any flash at all.
 Much Better Results By Using a Tripod
 Tripod Needed For Car Light Trails
Using a camera tripod often leads to sharper pictures in general and also gives you the ability to stop down your lens to a smaller aperture setting and get more depth of field. Tripods also have many specialty reasons to be used:
- Time lapse photography
- Event photography of a recurring occurrence
- Eliminate arm fatigue from holding a long lens
- Shooting smoother video
- You get more respect as a photographer
- Self portraits
- Astrophotography
- High Dynamic Range (HDR) photography
THE HIDDEN BENEFIT OF USING A TRIPOD
There's a hidden benefit of using a tripod, and it could be a big benefit for you. Tripods slow you down. Rather than use the quick look-aim-shoot method, setting up your tripod forces you, in a good way, to take more time to view your scene.
You become more of an intentional photographer, thinking of what you like about a potential subject and how you want to photograph it. Here's how to get the most stability out of your tripod.
11. KEEP A CAMERA WITH YOU AT ALL TIMES.
 My first Take-It-Anywhere Camera
Whether it's your DSLR, a point and shoot camera, or your smartphone, you want to make it a deliberate practice to have one ready and use your camera frequently. The best photographers are the ones who've practiced more and have taken the most photos.
Practice sounds like a dirty word, but make it playful practice in your mind and then it becomes a fun activity.
Even if it's only a cell phone camera, you can practice your technique using most of the top digital photography tips in this post. The more you look to take interesting photos for practice, the more photo opportunities will present themselves to you.
Avoid that sinking feeling of seeing an opportunity for a great shot and not having a camera with you. That's really one of the biggest mistakes you can make with your photography.
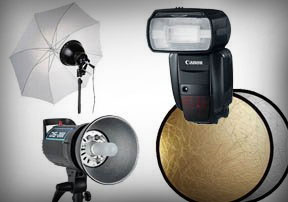
12. AVOID USING YOUR CAMERA'S POP-UP FLASH

Yes, I know what you're thinking. How can you take a picture with your camera if it's too dark? Sometimes you have to and you SHOULD shoot with your pop-up flash to get the "safe shot." After you get that photo, then let's go into experimental mode.
You can use your pop-up flash for emergency situations, but it generally disappoints when it comes to using it as the main source of light to illuminate your subject. You have a few other options with your DSLR camera.
You can set your ISO to a high number so that you can get a good exposure without any flash. This will give you a much more natural look. You can also use a wide-open aperture to let more light in.
You can also use an external flash gun and bounce the flash against a nearby ceiling or wall to get a much more flattering light. Look at the two different results you'll get by following this tip.
 Lit by direct flash
 Lit by bounced flash gun
I did this comparison in lighting techniques by photographing a frosted light shade hanging over our billiards table. The first photo on the left is with the pop-up flash activated. You get a distracting shadow on the wall behind the light. If you use a separate flash attached to your camera's hot shoe, you can aim it at the ceiling and get the softer, more natural lighting shown in the second photo on the right.
13. WATCH YOUR BACKGROUND - Digital Photography Tips
Choose a perspective that gives you a background that won't be distracting. It's easy to focus on your subject and fail to pay attention to the background behind your subject. Look at the two backgrounds behind the camera photographed below.
 Distracting background
 Simple background
I set my camera on the table and took the first photo on the left with a plant behind it. Can you say distracting? Then, simply by changing my angle just a little, I shot the next photo from a spot that gave me a much simpler background.
Sometimes it takes a little more effort than this simple example. Simply noticing the background will make a big difference in your photography. Take that one extra second to notice the background and figure out what you can do about it.
14. have a back-up plan

One of the most emotional mishaps that my students sadly share with me happens when they tell me their hard drive crashed and they've lost all of their precious photos. Don't let this painful experience happen to you. Perhaps 98% of the time you're going to be safe by only having one copy of your photos, whether their sitting stagnant in your camera or waiting to be called into duty on your computer.
What good is it to follow all of these tips for improving your photography if you don't have a plan on how to avoid losing them to a corrupted camera memory card or a crashed hard drive? Backing up used to be a painful process for me and I know it's not on your list of fun and engaging activities you want to put on your growing "to do" list.
Whether you burn a DVD or Blu-Ray backup disk, save your photos to a external hard drive, or use the internet "cloud" to copy your precious photos, it's important to have a plan in place that works for you. I've struggled with 4 or 5 different methods of backup over the last 18 years before finding an automatic system which I'm now hooked on. Here's more on photography backup systems.
15. adopt the best attitude for exploring these photography tips

Seriously, adopt an attitude of exploration and playful learning. We are all on this Earth for a limited time. I changed my attitude dramatically about photography when I was diagnosed with cancer. Don't waste your time getting frustrated with a bad photo you took.
The most important photography equipment you'll ever own is nestled in between your ears.
Attitude is everything. Don't get ticked off or stressed. Get inquisitive about what you can do differently the next time you take the shot. The most successful photographers are the ones who've taken the most photos.
Use just a few select digital photography tips and the right camera equipment, mix in your own unique talents, and take truly great photos. It really is a magical time to be interested in digital photography.

digital photography tips for using your camera
Section 3 of this post gives you specific tips related to using your digital camera. I save these for last because they're not that exciting. Don't forget them-they are important-I just separated them because they're specific photography tips related to your digital camera.
16. Know thy camera
Your camera is a great tool with many specific functions and abelites to help you take great photos. It can be intimidating when you look at the back and top of your camera.

You have 2 options to take. Browse through your camera manual and find the diagram showing you the different buttons and dials on your camera. The more familiar you are with them, the less intimidating your camera will be.
That leads to enjoying your photography more as well as taking better photos.
17. camera memory

No list of digital photography tips would be complete without a reminder of the need to have an extra memory card with you. There's no good excuse not too. Memory cards for digital cameras are dirt cheap and have huge storage capacities for cheap prices.
The alternative to a 2nd card is to keep the card empty by copying over to your computer and having a good back-up system in place.
18. camera batteries

A spare battery is another needed accessory to be add to a list of accessories for reliable digital photography success. You can save money by buying an off-brand battery rather than one sold with the same brand name as your camera.
Batteries can appear to have a full charge, but go dead quickly, particularly as they go through several charge cycles over time.
19. select focus

You will improve your photography significantly if you understand how to control focus. That's not just using the correct aperture to control the depth of field, but also the focus mode you select to use on your camera.
Tip: get a basic understanding of your options such as focus tracking, spot focusing, or zone focusing.
20. Say Hello to ISO

The final digital photography tip is to understand the ISO setting. Although you usually want to keep it low to get the best photograph quality, you'll run into situations where you're going to want to raise the ISO.
Higher ISO may be needed when you're shooting in low lit situations, where you need a very fast shutter speed, or a very small aperture. Review the chart of ISO settings that I included in this article on Auto ISO.
EXPLORE popular photography TOPICS:
The readers of this site frequently explore these topics for more photography advice. You're welcome to dive into these topics too!


my CONFESSION about my digital photography tips website
Here's the honest truth.
I've made plenty of mistakes shooting photos. I wasn't born with a natural talent. Maybe you've made a few mistakes too. I've either used the wrong camera setting or I've used the wrong technique plenty of times. Sometimes it's just a matter of using the wrong lens or not having the right accessory. I didn't blow it on purpose. That's just how it goes sometimes.

Well the good news is that you don't have to waste as much time and make the same mistakes. I learned mostly by trial and error, long before the internet was even a thought in somebody's mind. This web site gives you shortcuts to taking better photos by using the right equipment and adding in your unique talents.
Digital Photography Tips You can Use Right Away
On this Better Digital Photo Tips website, I've written it so that...
- You have access to hundreds of articles on camera equipment and accessories.
- You can get help with composition, lighting, and posing.
- You can find tips on cameras, lenses, and tons of digital photography equipment.
final tip: Keep your photography simple
If you've gotten this far in this post, pat yourself on the back. You must truly be interested in exploring this website. Use the simple photo tips on lighting and basic composition found on this website and you can take photos as good as or better than these recent photos that I am sharing with you below.


The reason behind the digital photography tips website
Who is this post on digital photography tips for?
- Do you have a nice new digital camera but your pictures are still not so great?
- Are you frustrated with how your digital photos come out? Are you tired of making several of the most common photo mistakes?
- Are you perhaps a little confused about which camera setting to use, or maybe you're getting blurry photos?
This site with tips for taking digital photography was written with the idea of educating people in photography by using many photographic illustrations within each of the hundreds of articles. There are many digital photography tips web sites that are full of fluff and don't really give you good, step by step photography tips.

On this site you will learn:
- Better Composition, better pictures of people, nature and vacation photos
- Photo lighting tips, how to use natural lighting and flash photography
- How to edit photos, cropping, adjusting brightness and color
- Portrait Photography Tips, Ideas on how to photograph people and create great family portraits
- How cameras work, using the right camera setting to get the best pictures
where to find more digital photography tips
I hope you found these top 20 digital photography tips helpful. Find more tips using the tabs at the top of the page or you can search for ANY photography topic on my site by using the search box below.
If you like my website, please give me a thanks on Google Business.
Search for a new topic on this site:


ABOUT BRUCE LOVELACE
Bruce is the publisher of this website. He is the author of the book "Improve Your Photography Instantly." Read more on Bruce on his Bio Page. He's been known as The Traveling Photographer ever since 1994. Read more about this website.
View some of Bruce's photos on Instagram. Visit the Facebook Page. Watch him on YouTube. Bruce runs photo workshops for kids and adults, and provides one-on-one photography coaching.
Digital Photography Education Location on Google My Business

Thank you for visiting!
Can I ask you one question before you go?


search for anything on this site
Search for a new topic on this site:
Recent Articles
-
12 Unique Camera Tripod Accessories. Get The Most Out of Your Tripod
May 12, 26 06:47 AM
 Tripods are essential in some situations, optional in others, but also vital is the tripod head + other camera tripod accessories. Check out these cool gadgets.
 -
Macro Photography Lighting Tips For Indoor Photography With Flash
Mar 29, 26 11:21 AM
 What is the best macro photo lighting set-up to use? Strobe lighting or spotlight? Several articles covering macro photography lighting tips.
 -
Nature Photography Composition Tips- Guide on How to Nail it Everytime
Mar 28, 26 01:46 PM
 Read these Nature Photography Composition Tips. Improve your digital photography technique.
 -
Are HDR Nature Photos Overdone? Answers to Your Questions About HDR
Mar 27, 26 03:44 PM
 Do you want high-impact HDR images rfor personal use? You're looking for the "wow factor" that High Dynamic Range provides. Is HDR photography still overdone
 -
20 Photography Tips-How To Instantly Improve Your Photography in 2026
Feb 09, 26 07:09 PM
 How to easily get better photos. These simple photography tips will steer you in the right direction for quickly improving your results as a photographer.

popular ARTICLES:


what you can learn here:


If you ask yourself to complete this sentence: " I wish I could learn how to........... How would you answer it?

Improve your photography instantly. Get the 2 most important chapters of my photography book for free.