HOW TO POSTS: LIGHTING AND COMPOSITION
beginning photography tips
ON understanding shutter speed
WRITTEN BY: BRUCE LOVELACE
UPDATED: November 20, 2024
Looking for some beginning photography tips about shutter speed? This post will help you understand everything you need to know about shutter speed. You'll learn how shutter speed affects your exposure, why it's so important and how you can control it to get great photos.
Shutter speed comparison
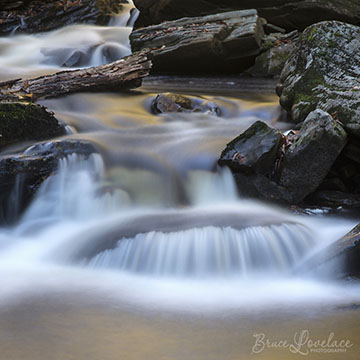
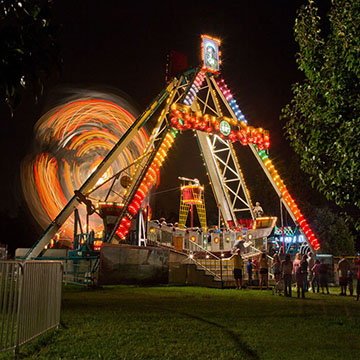
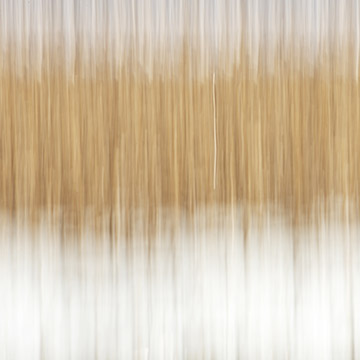
Here are shutter speed examples that will give you a taste of the type of creative photography you can do by using specific shutter speeds. Which one of these unique uses of changing the shutter speed is your favorite?
Slow Shutter Speed Examples
Fast Shutter Speed Examples
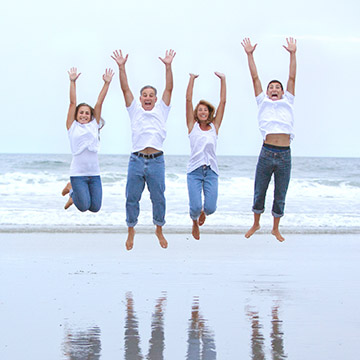 1/400 second exposure
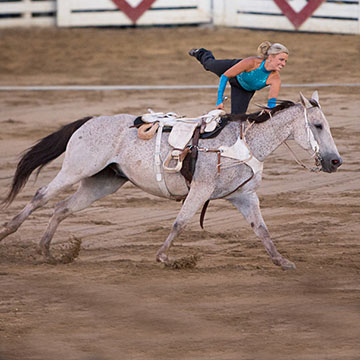 1/640 second exposure
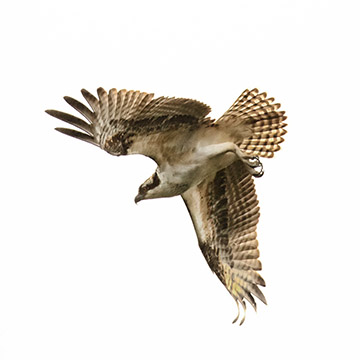 1/8000 second exposure
I get it. I know it's easy to just set your digital camera to one of its automatic settings and be done with it. However, you want to advance your photography skills and a basic understanding of shutter speed will help you choose what the best camera setting to use to get the desired effect you are trying to create.
Once you get it, you'll have a big advantage on choosing camera settings based on shutter speed. Let's dive right in with a guide on the best shutter speed to use for portraits, for video, landscapes and a few others.
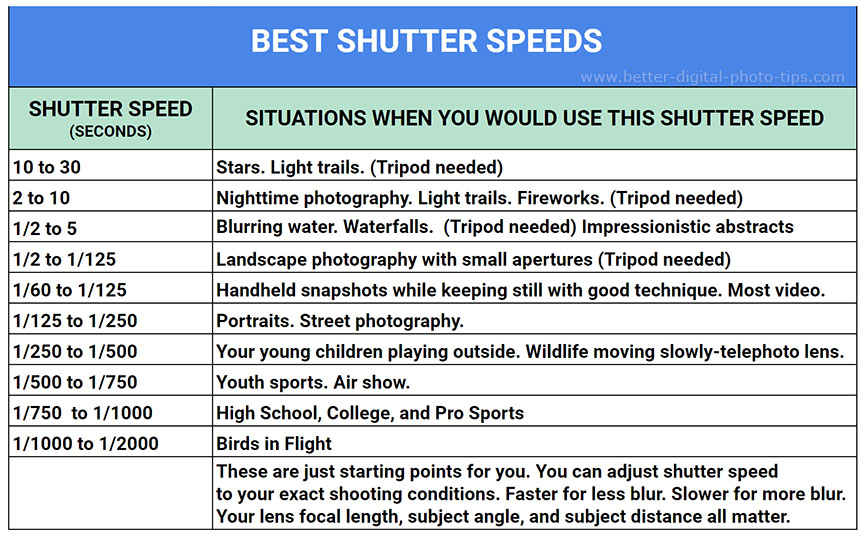
shutter speed chart for specific situations
I'm sure you're just like me when you don't have experience with a new type of subject to shoot. You ask yourself a question like, "what shutter speed should I use?" Well, here's a chart to give you suggestions for a starting shutter speed.
Some of the most common situations for what shutter speed should be used for portraits, sports, and video are included in the chart above. Using a shutter priority setting on your camera lets you adjust it slightly faster or slower to get the exact effect you want. Shutter priority is an automatic setting where you set the shutter speed and the camera chooses the best lens opening to give you a proper exposure.
shutter speed and exposure for beginner photographers
DEFINITION. Shutter speed can be defined as the length of time the shutter is open. Big deal, right? Well here's a useful analogy that will give you a better understanding of how shutter speed affects exposure.
Imagine this. Your camera is like a fully enclosed room with no window and only one door. You're in that room and it's warm and cozy inside. If you open the door just briefly, only a small amount of cold air will get in. Now, if you leave the door open longer, more cold air comes in. So far, so good, right?
It's the same with your camera. If the door (the shutter) isn't open very long, not much light can get in. If you leave it open longer with a slower shutter speed, more light can enter and make your photo brighter. Okay, now stay with me, because here's the valuable insight that matters.
how shutter speed affects exposure
If you keep the shutter open twice as long-and no other settings are changed-then twice as much light enters the camera. Correspondingly, if you make the shutter speed quicker and make no other changes, then your picture will come out darker. But, how can we let more light if we desire a certain shutter speed for a certain subject? Well, what would happen if we made the door in that room twice as big? We'd get twice as much cold air in and we could cool the room down the desired amount.
With your camera, to allow more light in without changing the desired shutter speed, you can enlarge or "open up" the shutter by using a larger aperture opening or larger f/stop.
If you double the shutter speed, you can maintain the proper exposure two different ways. Either change the aperture to 1/2 as big manually yourself or have the camera automatically adjust by using shutter priority mode.
Comparison of stopping Versus creating a feeling of motion
You can stop the feeling of movement by using a fast shutter speed.
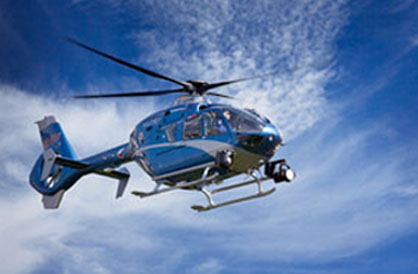 Intentional Motion Freeze
Helicopter blades rotate at about 400 revolutions every second. That's fast. Your shutter has to be open for a seriously short duration of time to eliminate the appearance of any movement.
Setting your camera to use a slower shutter speed would have given you some blur in the blades and a more natural looking photograph.
As the creative photographer, you get to make the decision on what shutter speed to use and how much blur, if any, you want to have.
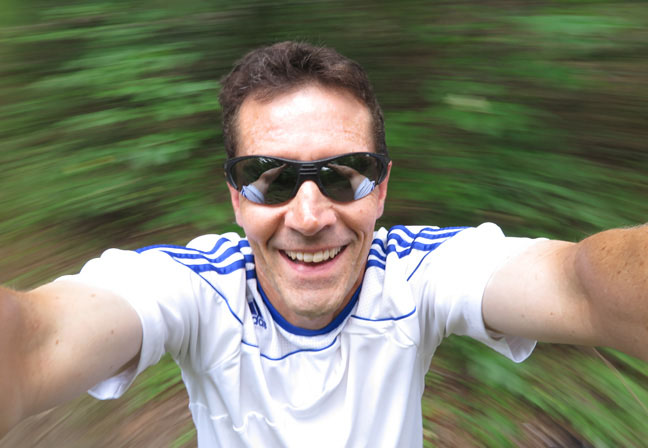
Another reason to grasp an understanding of shutter speed is to purposely create blur and a sense of motion in your photography. You'll have the ability to get creative by using slow shutter speeds. This selfie photo gives the appearance that I was spinning really fast.
Here's an example of using a much slower shutter speed to create the feeling of motion. In this case I chose a 1/8 second exposure for this photo I took to include in an article about photography projects for children.
I stopped for a moment during a hike in the woods and held my camera at arms length. I slowly spun in a circle and made the exposure while spinning. The slow shutter speed was slow enough to create the illusion that I was spinning fast, but was plenty fast enough to photograph my face without blurring.
Shutter speed will affect the sharpness of your photo. That includes the overall sharpness as well as the individual subjects within every photo you take.
With your camera set on a shutter priority mode, it will also affect what lens opening or aperture will give you the correct exposure. It may mean you will need a tripod, flash or image stabilization to get a sharper image at slower shutter speeds.
Shutter speed is almost always expressed in fractions of a second. It is simply the length of time the light is allowed to enter the camera and strike the sensor. With most cameras this is indicated by a number within your viewfinder or on your camera's LCD screen.
Notice that this fast or short exposure was enough to almost perfectly "freeze" the motion of the helicopter blades. Here's a series of photos with varying shutter speeds using billiard balls for this article on how to stop taking Blurry Pictures.
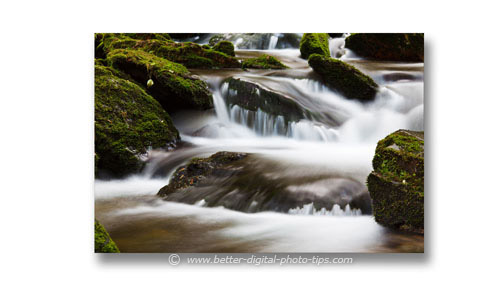
When the shutter is left open for a full second, you can get really cool nature photos involving water like this sample photo of the small waterfall. The shutter speed on many cameras will then put quotation marks around the number like this: "1" That means it's shutter speed of one second.
For a more complete article on shutter speeds and landscape photography, you can jump over to an article I just wrote specifically on how to set shutter speeds for landscape photos.
It is also useful to know as a beginning photography tip what shutter speed to use to intentionally just blur the background to create a sense of speed or action: Blurry Background.
One common photography mistake that beginners make is to forget that changing the shutter speed will mean that your aperture will have to change to get the right exposure. The new aperture will then change the depth of field or the range of things in your photo that are in sharp focus.
how to set shutter speed on your camera
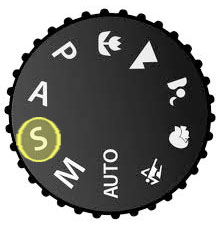
The best way to have control of your camera's shutter speed is to set your camera on Shutter priority mode. Each camera has its own way of doing this. Some cameras have a dial on top of the camera and you'll rotate it to the "S" or " T" (stands for time). With some cameras, you can access a menu with a button and almost all other cameras will let you set aperture priority directly on your camera's touch LCD screen.
Set your camera on Shutter Priority Mode, and your camera will automatically set the proper aperture to give you a good exposure.
Use your camera manual or search Youtube or Google for instructions on how to set your specific camera model to its shutter priority setting. This setting will maintain your cameras automatic exposure system. The alternative is to go to full manual mode where you set both the shutter speed and the aperture.
When shooting in manual, you may have to adjust the settings a few times to get the right exposure, but that's a great way to learn as you go.
This takes a little more in depth knowledge about your camera settings and you may also have to adjust the ISO (sensor light sensitivity) of your camera to get the correct exposure.
links relating to beginning photography tips
Definition of Aperture. Exposure is determined from shutter speed and aperture. What is it and how does aperture affect exposure and how does it effect the important element of depth of field?
Other definitions used in photography. A huge list of photography terms and links to many realted articles, great for beginning photographers to search.
Macro photography for Beginners. If you have an interest in macro photography and are a beginning photographer.
Back from Beginning Photography Tips to Beginners Photography. Four general tips to lead you to better photos and a more enjoyable experience with taking digital photos.
Back to Digital Photography Tips Home Page. Where it all started with the top 10 tips and also links to the hundreds of other articles about digital Photography on this website.
Keep shooting. Keep learning. Keep improving.


ABOUT BRUCE LOVELACE
Bruce is the publisher of this website. He is the author of the book "Improve Your Photography Instantly." Read more on Bruce on his Bio Page. He's been known as The Traveling Photographer ever since 1994. Read more about this website.
View some of Bruce's photos on Instagram. Visit the Facebook Page. Watch him on YouTube. Bruce runs photo workshops for kids and adults, and provides one-on-one photography coaching.
Digital Photography Education Location on Google My Business
