HOW TO POSTS: LIGHTING AND COMPOSITION
5 creative Photography Projects For Kids ANd parents: prevent CHILDHOOD and adult boredom
CONTENT AND PHOTOS BY: BRUCE LOVELACE
UPDATED: March 22, 2025
 Learn Photography Together
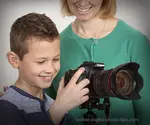
These 5 photography projects for kids are tons of fun to do and they'll teach you and your child simple photography techniques. By doing them together, you can also strengthen your relationship with your child.
I had a lot of fun trying these photography activities. They're taken from a detailed book that I am publishing in the near future, but I just couldn't wait to share a few of them with you right now.
the 5 Photo Projects for you and your child to do together


Projects using digital photography are great for you to enjoy doing with your child for lots of reasons. There are life-long benefits for your child to reap from completing these projects.
Just imagine for a minute, the great feeling you'll have when you spend quality time with your child, doing a project together, where you both have fun and learn!
Digital photography is a great hobby that can be enjoyed by both young and old. We are visual creatures and photos are everywhere around us. It's even more worthwhile to enjoy a hobby when a student and a teacher already have a special relationship and can do projects together. Also, see my post on how To Help Kids Take Better Photos.
Why photography projects for kids?
These fun photography activities for kids are powerful for two reasons. First, photography is everywhere around us, both in our physical world and the electronic world of the internet, our cell phones, and tablet computers.
Secondly, active participation in learning a new skill is a far superior way to learn over just watching or listening.

Photography is everywhere. Not only in terms of actual photos, but also in terms of the number of people who have a camera, even if many people just use a cell phone camera. We're all visual creatures by nature.
Kids need positive guidance. Adults can use the magic of photography to have a positive impact on children. Photography can be experienced together as a family and experimenting with digital photography will strengthen the family ties that today's fast-paced lifestyles sometimes pulls apart.

Photography is a ton of fun and kids and adults learn easier when something is fun.
the benefits of photography for children
- Improving skills with a hobby like photography help build a child's confidence and self-esteem. Kids feel a sense of accomplishment.
- Children who have well developed character traits become happier, more productive adults.
- The visual abilities learned in photography can carry over to other creative endeavors too.
I became a professional photographer because of the great memories of the fun I had as a young boy learning darkroom techniques with my father.
Rather than just give photography lessons, we're going to discover by actively participating in making photos. Okay, on to the photography projects for kids. Each one may take maybe an hour at most to do. We start with ourselves as the subject, but with a twist.
1. the Creative Selfie
The taking of selfie portraits has been criticized and some of the complaints are legitimate. I confess I was very critical and avoided taking any selfies for many years, but they've become quite prominent in today's world. Why not use that trend to our advantage and do something positive with them?
If you look back in history, many accomplished artists have done self portraits. The tools of digital photography make it so much easier and fun to create selfies.
Shooting a self portrait takes a little courage and it's a great way to learn about yourself.
You're not doing the selfie photography project to draw attention to yourself in a narcissistic way.
 Leonardo da Vinci Self Portrait
The goal is to learn how to be creative and find a specific photography technique to use. We're not talking about the teenager selfie in front of the bathroom mirror. No, we're talking about getting creative with ideas that create visually interesting images.
Where to get ideas for selfies
You're reading this post via the internet, so finding some ideas for you is quite easy right now. Open up a new browser window or tab and search. Or click Facebook-creative selfies or search "creative selfies" on Google or any photo gallery website with a search function.
Here are a few selfies I did for an article post on another photography blog. Have some fun with this project! Do a little brainstorming. Write down some ideas on paper and think up a few variations.
 Puddle Selfie
 Van Window Reflection
 Brick Shadow Selfie
If you get something you really like, you can even be courageous and add it to the post on Creative Selfie Ideas on this website.
2. motion Blur On Purpose
Blur? Don't we want all of our photos to be sharp? One of the biggest photography mistakes written about is with taking blurry photos. Usually it's a matter of too slow of a shutter speed or of a focusing issue.
We're going to travel in the opposite direction and go for creating blur on purpose. By slowing the shutter speed down and using either camera movement or subject movement we're going to create photos with motion blur.

The amount of blur depends on both the shutter speed and the speed of movement of the camera or of the subject. You just have to play around with different times to get an interesting photo.

Intentionally made blurry photos can give you and your photography student some really fascinating effects. They can also make you feel a little dizzy, so proceed with caution.
 Using a tripod and a long exposure at a carnival gave me
a combination of blurred parts and sharp parts of the scene.
Carnivals, traffic at night, waterfalls, and sports are all good subject matter to experiment with for creating intentional blur in your photos. The key is to find the right lighting and the right shutter speed that gives you the desired amount of blur.
3 Ways to Create Desirable Motion Blur in Your Photo
The shutter speed has to be slow enough to allow some blur to happen. The correct speed depends on too many factors to give you a formula. Trial and Error is the approach to take.
- Move the camera during exposure. Whether it's a spin, a rotation, or a panning motion, this technique could involve the smallest percentage of successes per photos taken.
- Use a tripod to keep the camera perfectly steady. You need to use the camera's self-timer function or use a shutter cord. Allow some or all of your subject to move.
- Zooming your lens when the shutter is open. You can do this hand held for some combined blur or use a tripod to create zooming blur alone.
Rather than use light to sculpt our subject, our next photography project for children involves looking at areas that lack light for the main subject. Let's look for and create our own interesting shadows to photograph.
3. shadow Photography Project
 Simple and elegant
Photos, just like your own shadow, are only two dimensional, but you can get 3 dimensional effects by finding interesting surfaces where the shadows get cast.
Taking shadow photos gives you a great opportunity to play around with different compositions.
Sometimes the best shadow photos really only have two main elements, the shadow and the surface it's landing on.

Here's an example of a more intricate set-up to create an R2-D2 shadow. If you're like me, you wouldn't have the patience to set this up, but you could do your own simpler version with an easier effort.

The key to this project is to find an object or a subject that is interesting to your child and to explore how you can get an interesting shadow photo of it. Sometimes ordinary, everyday objects that are everywhere around you can make the most visually interesting images.

The shadow photo of the fork is more "artsy." Many kids and adults wouldn't find it too interesting, but I like the simple elegance from the simple subject and simple lighting. You and your child get to be the creators and you can decide on any subject that interests you. I like this topic so much I wrote a lengthy post just on experimenting with shadow photography. You can read the article on shadows here.
How to Light Your Shadow Photography Project
You should start with a single light source. The further away and the smaller the light source is the shaper the shadow you get becomes. Examples of light sources that will work well are:
The Sun
The Moon
A Flashlight
A Bare Light Bulb
A Candle
Electronic Flash Gun
A Spotlight
A Movie Projector
Your next adventure is one of the most well-known photography projects for kids and you can have fun with it in a variety of ways. This photography project can be great for the very youngest of children.
4. treasure Hunt
You can easily adapt it to best fit the age and abilities for your young photography student. This photography project is one of the simplest to start. You have many variations of this project to play with. Also known as a scavenger hunt, you seek out objects to photograph based on a list.
Here are a few ideas and examples of how you can have fun with this photo project:
SEARCH FOR
EXAMPLE
1. Hunt for subjects that start with the same letter of the alphabet. This is easy for many letters like A, B, or C, but will be real rough to try with other letters Q, X, or Z.
Automobile, Ankle, Asphalt, Airplane...
OR Bank, Ball, Bucket, Bench
2. Seek one subject for each letter in the alphabet or try to spell out a word like C.A.R.T. or L.A.M.P.
Apple, Bike, Car, Dog.....
3. Seek a subject that looks like each letter of the alphabet or that spell out a specific word. This is a much more challenging project to complete.
The longer the word gets the more challenging this project is.

4. Any other type of list with a common theme. List of a certain type of photo like close-ups, or nature photos, or objects with the same color or shape or texture.
Shooting subjects all the same color or all the same shape is a great photography project for very young kids.

When you do the treasure hunt photo project, make sure the difficulty appropriate for your child's age group. If it's too hard your child will get discouraged. If it's too easy, he or she might get bored.
5. the Final Photography Project for your child -
Painting With Lighting
This is a great project for children to have a blast with and you'll love playing around with it too! Painting with light involves keep the shutter open for a long exposure while you or your photography partner creates a special effect using uses some sort of light source.
This project usually involves using a tripod and a camera that is capable of long exposures like 15 seconds or more. The photo below was taken in my TV room at night.
 My first "successful" painting with light project.
I used a 30 second exposure with my lens aperture set at f/9.
how i completed this photography project on the second try
In complete darkness, with my camera mounted securely to a tripod, I opened the shutter. I walked around behind my couch and spelled out "Pooh" backwards with a tiny flashlight. I then briefly aim the flashlight at Winnie the Pooh on the couch and then closed the shutter on the camera.
I got lucky on this one as it was only the second photo I took when I tried this composition. The red streaks are from the LED flashlight when I had my thumb held over the bulb.
Likely the most common use of the painting with light technique is with sparklers that become so popular around the 4th of July celebration.
 Using a sparker is common, but can be dangerous near children.
I get a little nervous when you put a sparkler or candle in the hands of a young child, so use common sense and be safe when choosing your light source. Make sure you're safe with all the photography projects for kids you particpate in.
What You Need for Doing a Painting with Light Photography Project With Children
- A dark room or a safe location outside at night.
- A camera that can be set to take long exposures of 15 seconds or more.
- Sturdy tripod to keep your camera still during long exposures.
- A light source like a flashlight, cell phone, or LCD light.
- Dark clothing and dark gloves if you don't want yourself to show in the photo.

The simplest shadow painting can be done by spelling out words or drawing out shapes. It might take you several tries to get one that you like. That's okay because that really is the best way to learn a new skill or concept.
 My first painting with light using only handwriting.
You can take a quick peek at your LCD screen, observe the results, and make another photo right away. If you stand behind your light source you've got to learn how to write backwards. It make take a few tries to conquer writing backwards. Its definitely feels awkward at first.
 syzlack.deviantart.com
This is another photography project for kids and adults. With a little bit of imagination there you can paint anything you want. Here's a detailed article on How to do Light Painting.
What's the best age to use photography assignments for kids?
Photography activities are good for students of any age group, once they are able to hold a camera. Kids seem to naturally gravitate to taking pictures.
Photography for preschoolers must involve cameras that are super simple to hold and use. Teaching them to hold the camera right and to get in close are the best ways to start.
Photo activities for elementary students can be tied into lessons in other subjects very easily. Photography projects for middle school and high school students can involve getting to know more camera settings and advanced techniques for getting creative.
These 5 photography projects for kids are great to start with. If you only spend an hour on each, you've likely doubled your skill in 5 hours. You can only learn so much by reading about photography techniques. Dive in! Active participation is the best way to learn.
So, get going! What are you waiting for? Start having fun doing photography assignments with your child! That's what childhood and parenting should be all about.


ABOUT BRUCE LOVELACE
Bruce is the publisher of this website. He is the author of the book "Improve Your Photography Instantly." Read more on Bruce on his Bio Page. He's been known as The Traveling Photographer ever since 1994. Read more about this website.
View some of Bruce's photos on Instagram. Visit the Facebook Page. Watch him on YouTube. Bruce runs photo workshops for kids and adults, and provides one-on-one photography coaching.
Digital Photography Education Location on Google My Business
You might like these
Freezing the Action: A Guide to Kids Soccer Game Photography
Photography Tips for Kids Soccer Games. Capturing the Excitement of Kids Soccer. How to photograph a kids soccer game. Camera and lens settings.
Best Digital Cameras for Kids. Review of Top Children's' Cameras
If you're looking for the best digital cameras for kids, don't make the biggest mistake by choosing the wrong kind of camera
Best Toy Cameras For Kids - Are Kids Cameras Really Any Good?
What about toy cameras for kids? Should you get a fun toy, a decent camera, or maybe you can get two for one.
Is The New Barbie Camera for Kids The Best or Worst Idea Ever?
Here's a look at an interesting children's camera that Mattel came up with. Is the Barbie camera for kids any good good?
Why Kids + Cameras Are a Perfect Match-Teach Kids Photography Methods
Kids & Cameras: A Bright Idea. Why we should teach photography to kids. Discover how handing a camera to a child can unlock a world of creativity + confidence.


Recent Articles
-
Macro Photography Lighting Tips For Indoor Photography With Flash
Mar 29, 26 11:21 AM
 What is the best macro photo lighting set-up to use? Strobe lighting or spotlight? Several articles covering macro photography lighting tips.
 -
Nature Photography Composition Tips- Guide on How to Nail it Everytime
Mar 28, 26 01:46 PM
 Read these Nature Photography Composition Tips. Improve your digital photography technique.
 -
Are HDR Nature Photos Overdone? Answers to Your Questions About HDR
Mar 27, 26 03:44 PM
 Do you want high-impact HDR images rfor personal use? You're looking for the "wow factor" that High Dynamic Range provides. Is HDR photography still overdone
Improve your photography instantly. Get the 2 most important chapters of my photography book for free.