HOW TO POSTS: LIGHTING AND COMPOSITION
Shadow Photography: 10 Tips on how to take great shadow photos
WRITTEN BY: BRUCE LOVELACE
PUBLISHED ON: NOVEMBER 14, 2023

Taking shadow photos can be a lot of fun. You can also use shadow photography as a great exercise in practicing rules of composition and improve your photography. It's a great way for you to learn how to use lighting to take interesting photos.
Whether you are a lighting geek like me, you're a beginner wanting to learn a little bit more about lighting, or you just want to have fun getting creative with your photography, shadow photography is easy to try.
This post covers how to get nice sharp shadows, shooting shadow photography at home, and 10 handy tips to get you started.
A Word About Shadow Lighting
The most successful shadow photos usually involve shooting with "harsh" of "hard" lighting. Essential that means the light source is small, such as the sun, a flashlight, a single bare bulb, or electronic flash directly aimed at your subject.
Softer light, such as window light, a cloudy sky, or light reflecting off large surfaces produces softer, less edgy shadows. It all depends on the look you want to achieve. Scroll down through all my shadow photo examples in this article and you'll see that I prefer harsh lighting in my shadow photos. I like the added contrast and sharper edges you get with harsh lighting.
Shadow Photo TAble of Contents
The shadow photography project
These first 3 examples of interesting shadow photos comes from children
It's one of the assignments I like to give for my young photography workshop students, as part of the Inspire Kids Project. The goal is simple. Create intriguing shadow pictures. The kids always surprise me with what they come up with
Here are a few examples of their images, that interestingly enough, all involve people within the photos.


One of the easiest ways you can make a simple photo involving shadows is to find a sidewalk or a parking lot on a sunny day. You can use any object, including yourself, and see what kind of shadows you can form. All of these 3 student photographers decided to make the shadow the most important part of the image.
Sample shadow images from other photographers
I've shot quite a few shadows, but I didn't want to hog the article by showing all of my photos first. To get some shadow photography ideas, check out these examples provided by other photographers. Then we'll jump into a few of my photos and the specific tips on shadow photography.
 High Perspective Shadow Photo
Photographer: Don3rdSE on Pexels
This photograph called "State Fair Shadow Walkers" was taken by photographer Don3rdSE.
When the sun is low in the sky, the shadows get longer. If you want long shadows try to shoot just after sunrise or a little before sunset.
This is a very interesting photo because of the perspective of the photographer, the touch of colors, as well as the unique shadows formed by the five subjects. I really like it because each person was captured in a different pose.

One of the special characteristics about shadow pictures is that they often can have black and white photo qualities because the shadows are so dark.
Photos of shadows often look better as black and white because they really emphasizes the patterns, shapes and textures when color is minimized in your photography.
Using rules of composition, such as diagonals, leading lines, balance, and the rule of thirds in photography will help your pictures come out great. Tips on taking digital photography are plentiful as well as many sample photos on my web site that illustrate the points in the articles on photography.

Look at the texture and contrast brought out by the strong side lighting in this picture of the bee and its shadow.
I would have loved to see this photo taken even closer to the bee, but it may have resulted in a painful retaliation by this insect.
I was not there when this photo was taken, but it would have been interesting to see if the camera could have been moved to the side instead of straight at the subject. Often shooting with a different photo perspective will create diagonal lines in your image which create additional visual interest.
 Lamp Shadow
Here is an interesting shadow photo of a lamp and it's shadow on the building's wall. This photo is called "Lamp and Shadow" and was taken by PhotoBob#.
The diagonal lines from the lamp to its shadow contrast nicely with the vertical and horizontal lines of the building.
Whether you are just learning beginners photography techniques or you are an advanced amateur, make sure to take advantage of the related articles on lighting and composition tips on this site. Always keep it fun, with a childlike curiosity.
How To Do Shadow Photography at Home
Shadow photography can be done conveniently at home. Just set aside some time. Start with a general purpose lens mounted to your camera that's mounted on a tripod. This will give you the sharpest results and slow you down to be purposeful when you compose your photograph.
To see some examples of shadow photos at home, scroll down to tips #1, #3, #5, and #9. All of these pictures were taken at home. Here are 5 ways to take successful photos that feature interesting shadows while you're in the comfort of your own home.
- Shoot your photo at a time when the sunlight is streaming through one of the windows. Make or clear off a surface to make an uncluttered background for your subject.
- Wait till after dark. Turn all your lights off and find a completely dark spot in your home.
- Take your photos in an attic, in the basement, or another room with out windows, like a closet or your garage.
- Use a small light source like a flashlight, a single light bulb, a flash gun.
- Photograph small objects at first. They're easier to work with and adjust the position and the lighting.
10 Shadow Photography Tips
I can't tell you how much fun I've had shooting shadows. Every since I was a boy I've been fascinated with light-I guess that's why I became a photographer. I've learned mostly from trial (and a lot) of error. The following ideas should help you achieve taking better shadow photo faster and quicker than I have.
1. pay attention to the background
We've all done it. We focus so much on the subject that it's easy to forget to see how the background is affecting our photograph. If the background is too "busy" looking, it will detract from your photo. This applies to all types of photography, not just shooting shadows.
 Early morning kitchen floor shadow
The background is relatively solid, not distracting, and adds some interest to the photo
Make a conscious decision to observe how the background is affecting your photo. If you're not sure if you like the effect you're getting, shoot that photo, then shoot it again in a different way. You can pick a favorite afterwards.
2. make the shadow the main subject
More often than not, the shadow is more interesting than the subject that created it. We recognize ordinary everyday objects very quickly when we first see them, but the shadows of those objects often have an element of mystery to them.
Shadows become 2-dimensional and often give us a more interesting perspective on an ordinary subject.
Whether you include any or some of the subject in with the shadow has a big impact on your final composition. It's usually a good idea to shoot a few variations each way.
3. find ordinary objects THAT can be POSITIONED in different ways
If you find small objects to photograph, it's easier for you to spin them around as well as move them to different locations to get an intriguing shadow.
 I set the watering can within the "splash" of morning sunlight.
The low angle of the sunlight enhanced the texture of the carpeting.
With this photo of the plastic watering can and it's shadow, I didn't like the busyness of the kitchen floor as the background. I moved the subject into the living room, then rotated the camera so that the spout was pointing upward in the photo.
4. be PREPARED for opportunities when you're not in photography mode

You don't have to lug your DSLR around with you all day long. You've got your smart phone with you almost everywhere. The fact that you're investing your time reading this article will notify your brain to notice shadows even when you're not in a picture taking mode.
It could be as simple as carrying your cell phone with you while you walk your dog. This photo was taken in the evening when the sun was close to setting. You often get funny distorted shapes with this kind of lighting.
Another good source of shadow subjects can be stumbled upon when you're walking in a downtown area. Buildings and other tall objects will still give you plenty of shadow when the sun is high in the sky.
5. go black and white
Shadows often appear black and make your photo appear somewhat monochromatic and even look like a black and white image. In the original version of this photo of my dining room window, I didn't like the color tint at all, so I used software (A filter in Photoshop) to convert it to black and white.

6. grow with shadow selfies
Yeah, I know what you're thinking. You don't take selfie photos. Stay with me here for a second. Wouldn't you agree that these shadow selfies aren't so much about drawing attention to me as the photographer? Aren't they actually more about lighting, creating a mood or a composition that is visually interesting?
 Detective Shadow selfie
 Parking Lot Selfie
 Thumbs Up Shadow Selfie
You might really surprise yourself by trying a few shadow photos that are selfies. It's an opportunity for you to grow as a photographer.
7. go abstract
Look for closer in type of photos where you can lose the identity of what you're photographing. You'll often get this abstract effect when your photo doesn't have anything that's recognizable. Without any frame of reference with respect to size, your mind interprets shapes and colors. Any idea what this is?
 Veggie Shadow
This photo is the underside of part of a leaf of kale. Shortly after picking this leaf from my garden I was rinsing it and noticed the patterns and, being the camera geek that I am, I decided to photograph it. I used my Wimberley plamp again to hold it in place near a window where the sun was blasting through.
8. seek out harsh direct lighting
 Good shadow maker!
What is harsh lighting? It's the opposite of soft lighting. The smaller or more distant the light source the harsher it becomes. A harsh light source will give you sharper, more graphic edges of the shadow area.
You've already gathered that the direct sun is a harsh light source. The small pop-up flash on your camera is a good example to, but it's so close to the lens that your shadows will be behind your subject. This is a great opportunity to try using a flashgun off camera.
Why the full moon photo? You'll likely need a tripod to do it, but on a clear night, the moon will give you some nice sharp shadows.
How To Get Harsh Shadows in YOur Photography
There are several techniques you can use to make the shadows harsh. Generally harsh shadow photos are more intriguing to look at than less defined softer shadow photos.


Here are 6 ideas on how photographers get harsh shadows.
9. experiment with different light SOURCES
Because the sun is so far away, it's a great light source for making sharply defined shadow photos. That's great when it's daytime hours AND it's a cloud free day. But, what should you do when it's cloudy or you want to create some shadow photos at when the sun sinks below the horizon?
 The setup
(With room light on)


How about using a flashlight or a spotlight? The simple set-up with the whisking brush, a small flashlight, and a photographer's clamp was all I needed to get this shadow composition. You can also use a remotely fired flash gun, but it's so much more challenging because you can't see the shadow until you look at the image on your camera's LCD screen.
Practicing shadow photography will help you develop all of your composition and photography lighting technique.
10. Get Bold with editing software.
Whether you're just going to play with some creative cropping, or you're going to transform your shadow photograph into black and white, try some bold software manipulations. Crop in tight to get a detail shot of the shadow or try a contrasty black and white conversion.

This is your chance to turn your basic shadow photo into an artistic abstraction and open up the creative floodgates. Rather than just take what the camera gives you as an accurate rendition of a particular subject, try making something unique using software.
Equipment for shadow photography
Some shadow photos can be taken without any specialized equipment except your camera. Conversely there are situations like rainy days, time of day, or environment where' you'll need some lighting help. I use and recommend the following gear the following gear for photographing shadows.
As an Amazon affiliate I may receive a small commission from qualifying purchases, at NO added cost to you.
Although I use profession Canon Speedlites, you don't have to. These Neewer speedlites are very reliable and a whole lot cheaper. I also recommend Yongnuo speedlites.
They have auto-exposure and 8 different manual power settings, along with a tilting/rotating flash head.
These flashes are ideal for experimenting with shadow photography even in somewhat bright environments.

An extension cord gives you the ultimate flexibility in using a flash unit for lighting up your subject. You'll also be able to use the flash for all kinds of photography, not just shadows.
Use the cord for shooting portrait photography, macro photography, and action shots where you don't want the flash mounted on your camera's hot shoe close to your lens.

Small flashlights are great for creating shadows similar to speedlites, but with the ability to see the light as you shoot.
What I like most about the Gearlight is its zooming function. You can adjust the beam to be very narrow.
This makes it ideal for creating many different effects with your shadow photography. You can definitely go much cheaper than a Gearlight and not get the durability, weather resistance, brightness, and versatility.

 Holds your flashlight
The Wemberley Plamp II has evolved with several improvements over the years. It's extremely versatile.
You can use it to hold your flashlight for shadow photos. You can use it to hold a small light reflector.
You can use it to hold certain subjects in place. You can use it as a light blocker.

I hope you found this article helpful. Keep your enthusiasm high for experimenting with different photography techniques. Stay inspired!
Bruce
Search for a new topic on this site:


ABOUT BRUCE LOVELACE
Bruce is the publisher of this website. He is the author of the book "Improve Your Photography Instantly." Read more on Bruce on his Bio Page. He's been known as The Traveling Photographer ever since 1994. Read more about this website.
View some of Bruce's photos on Instagram. Visit the Facebook Page. Watch him on YouTube. Bruce runs photo workshops for kids and adults, and provides one-on-one photography coaching.
Digital Photography Education Location on Google My Business
You might like these
See The Magic of Light! Everything That Light Touches is Your Subject
Photographers react to remarkable side by side comparisons. See how everything that light touches is your subject for great photography.
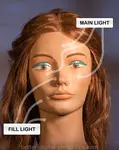
What is fill flash photography? When and Why You Can Use Fill Light
You've heard the term fill flash photography. Now get an easy understanding of fill in flash here.
Photography Lighting Made Simple. Lighting Tips. All You Need To Know!
Stunning photo lighting examples. The simple tips you really need to know to take remarkable photos. Complete helpful guide to photography lighting.
Lighting Ratio. Simple Explanation Will Help You Understand and Use It
Keep it Simple. Understand lighting ratio and use it to your advantage. So many digital photography courses make it so complicated.
Photography Lighting Equipment For Portraits-Must Read Before You Buy
Helpful Guide to read before you make a big mistake with buying photography lighting equipment for shooting portraits. Studio lighting kits for beginners


Recent Articles
-
Macro Photography Lighting Tips For Indoor Photography With Flash
Mar 29, 26 11:21 AM
 What is the best macro photo lighting set-up to use? Strobe lighting or spotlight? Several articles covering macro photography lighting tips.
 -
Nature Photography Composition Tips- Guide on How to Nail it Everytime
Mar 28, 26 01:46 PM
 Read these Nature Photography Composition Tips. Improve your digital photography technique.
 -
Are HDR Nature Photos Overdone? Answers to Your Questions About HDR
Mar 27, 26 03:44 PM
 Do you want high-impact HDR images rfor personal use? You're looking for the "wow factor" that High Dynamic Range provides. Is HDR photography still overdone
 -
20 Photography Tips-How To Instantly Improve Your Photography in 2026
Feb 09, 26 07:09 PM
 How to easily get better photos. These simple photography tips will steer you in the right direction for quickly improving your results as a photographer.
 -
How To Fix an Underexposed Photo + Simple Steps to Avoid Dark Photos
Feb 08, 26 07:18 AM
 Dark photos? How to avoid an underexposed photo. 5 simple ways to on how to fix underexposed photosed photos. Easy correction steps
 -
10 Useful Nature Photography Tips For Beginners That You Must Know
Jan 31, 26 08:12 PM
 Want to take better pictures of nature? These simple nature photography tips are sure to help you take better digital photos with your camera.
 -
What is Bulb Exposure And How to And Why Use Bulb Mode To Take Photos
Jan 31, 26 05:59 PM
 What is the bulb exposure mode setting and tips on how to use it. 6 examples of when you should use the "B" bulb setting on your camera for breathtaking photos
 -
How to Buy a Digital Camera (2026 Guide): 7 Tips + The SLAP System
Dec 29, 25 11:44 AM
 Confused by camera specs? Stop feeling overwhelmed. Avoid the 3 costly mistakes-find your perfect camera. Easy 4-step SLAP guide for 2026. How To Buy a camera
Search for a new topic on this site:


Improve your photography instantly. Get the 2 most important chapters of my photography book for free.