HOW TO POSTS: LIGHTING AND COMPOSITION
blur the background
Deliberately, intentionally on purpose
This post will give you 3 simple ways to blur the background of your photo. You can dramatically change the impact your photograph has by intentionally blurring your photo's background. It's agreat way to visually separate your main subject from a distracting background.
 Before and after the background blurring was applied using a free online app.
You've got to be extra careful when you're picking exactly what and how much to blur in each photo.
A blurry background can visually separate the subject from distracting things in the background of your picture. That makes a better photograph. There are two ways to do this when taking pictures.
- You can get a blurry background by selectively controlling focus. Having a small range of things in focus can create a sharp subject and a blurry background. This is called a narrow depth of field.
- You can blur the background by using motion blur to get a blurry background while keeping a sharp and clear subject.
Additionally there are also many ways to do this after you take your photo with photo editing software. This article, blurring your background with software, gives a few of these blur techniques in detail.

If you use Camera Settings that give you a small depth of field, your subject will be sharp and your background will be blurry. Use the largest lens opening (smallest f/stop number) you possibly can. For a detailed explanation of controlling depth of field, go to What-is-depth-of-field?
I shot this photo of this toy car sitting on top of my tripod using a large aperture of f4 with my a 24-105 lens zoomed all the way to its longest 105mm focal length.
You can see the background is very blurry and completely out of focus. There is a second reason the background is extremely blurry. The car is very close to the camera, which means the background is relatively much farther away from the subject.

With this picture of my model leaning against the fence, I was able to blur the background by using a wide-open aperture of f2.8.
This is a great technique to use when doing portraits.
It's a common challenge that photographers can easily face when shooting portraits. You want the background to be blurry and you can't get enough distance between the subject and the background. A fast telephoto lens is a big help.
1. blur the background intentionally with panning
 Adopted from Dariusz Grosa on Pexels
Blurring the background can be done with camera and subject movement. We'll cover that next option briefly here, but you can get a more complete guide on that method here: blur the background with movement.
One fairly easy way to create motion blur in the background is to take your picture while following a moving subject. The idea is that your subject stays fairly sharp but the background is blurred to show motion. This is called panning and you see it a lot in motor sports and sometimes in wildlife photography.
To get this effect, the camera must track the direction of the subject as the shutter button is pressed. You can see how the background blurs from motion, but the subject stays sharp.
If the bird stays in the same spot within the camera's viewfinder while the picture is being taken, it will remain sharp even though the camera is moving.
Playing around like this, creating your own little photography assignments is a great way to improve your photography, not only when trying to learn how to blur the background, but with any aspect of photography you wish to understand better.
2. Blur the background with software
The good news is that you have several ways to blur the background with editing software. The days of being forced to buy expensive software to make your background blurry are over. Photoshop has several different techniques to use. We'll cover a few of them and also give you access to a free online app to blur the background.
Blur the background with gaussian blur in photoshop

Gaussian Blur is sophisticated way to add blur to your photo on any area of the image, including the background. In this example photo of a high school basketball game,I used a "filter" in Adobe Photoshop called Gaussian Blur.
Sometimes it is difficult to separate your subject from the background when you take the photo, so you must do some photo retouching. The spectators in the background were distracting and I wanted to blur them. Here is step by step method.
- To have the most control, in Photoshop you create an exact duplicate copy of the image, called a "layer." You then add a "layer mask" to this new duplicate layer.
- This gives you the ability to make any changes you want to this new duplicate layer mask while still preserving your original picture untouched.
- You can then "reveal" some areas of the changed duplicate layer mask as much as you want to. In the top photo, the spectators are somewhat blurred because I used a large camera aperture and got a small depth of field. I wanted to blur the background a bit more.
If you look closely at the same photo underneath the top photo, you'll see that the spectators are a bit more blurred, but it still looks completely natural. This is a good use of Gaussian Blur.
Blur the background with radial blur in photoshop

Radial Blur spreads out in a radial direction, similar to spokes coming out from the center of a wagon wheel or like the colored streaks coming out from a fireworks explosion.
In Adobe Photoshop, you can add a radial blur to the background or the subject or both. In this basketball photo I created a radial blur, centered behind the basketball. This really creates the feeling of motion toward the ball.
I then "hid" the blurred basketball in the blurred duplicate layer mask, so that it remains sharp in the final photograph.
These are just a few examples when you may want to blur the background on purpose. Remember to have an attitude of curiosity when trying new techniques with your photography. Most of all, have fun learning how to take better pictures.
blur background with an online photo editor
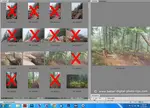
If you're like me you like simple solutions to get things done. Here's an easy to use photo editor app used to blur your background. It's called befunky. You can choose the photo to edit from several different locations.
It's free.
The user interface is really simple to follow.
You can adjust the amount and location of the area to blur with sliders.
You can save the file back to any location you wish.
I used befunky to blur the background in the first photo included in this article. (scroll to top)
Here's the link: Befunky.


ABOUT BRUCE LOVELACE
Bruce is the publisher of this website. He is the author of the book "Improve Your Photography Instantly." Read more on Bruce on his Bio Page. He's been known as The Traveling Photographer ever since 1994. Read more about this website.
View some of Bruce's photos on Instagram. Visit the Facebook Page. Watch him on YouTube. Bruce runs photo workshops for kids and adults, and provides one-on-one photography coaching.
Digital Photography Education Location on Google My Business
You might like these
3 Digital Photo Editing Steps To Take in 2024 Before Anything Else
Don't retouch your photos until you read this. Before you get bogged down with editing software, save time. Use these 3 digital photo editing tips first
How to Resize Pictures For Free, Using Software or Free Online Service
Easiest way to resize pictures. Updated for 2023. Helpful guide on reducing or enlarging your photos for emailing, printing or sharing at no cost to you.
5 Basic Photo Editing Tips For Beginners. Make Your Photos 10X Better
Easy ways to improve your pictures. These Top 5 photo editing tips for beginners are the ones to do first to turn your average photos into winning photos
10 Best Website Posts For Digital Photo Software Reviews in 2023. List
This list will save you time with your search for the best editing software. Here Are the Best Websites on Digital Photo Software Reviews.
How Professional Photographers Do Digital Photo Editing-For Beginners
Unlock Pro Secrets: A Look Inside a Professional Photographer's Digital Editing Workflow This is how the pro photographers do their digital photo editing.


Search for a new topic on this site:
Recent Articles
-
Macro Photography Lighting Tips For Indoor Photography With Flash
Mar 29, 26 11:21 AM
 What is the best macro photo lighting set-up to use? Strobe lighting or spotlight? Several articles covering macro photography lighting tips.
 -
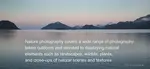
Nature Photography Composition Tips- Guide on How to Nail it Everytime
Mar 28, 26 01:46 PM
 Read these Nature Photography Composition Tips. Improve your digital photography technique.
 -
Are HDR Nature Photos Overdone? Answers to Your Questions About HDR
Mar 27, 26 03:44 PM
 Do you want high-impact HDR images rfor personal use? You're looking for the "wow factor" that High Dynamic Range provides. Is HDR photography still overdone
 -
20 Photography Tips-How To Instantly Improve Your Photography in 2026
Feb 09, 26 07:09 PM
 How to easily get better photos. These simple photography tips will steer you in the right direction for quickly improving your results as a photographer.
 -
How To Fix an Underexposed Photo + Simple Steps to Avoid Dark Photos
Feb 08, 26 07:18 AM
 Dark photos? How to avoid an underexposed photo. 5 simple ways to on how to fix underexposed photosed photos. Easy correction steps
 -
10 Useful Nature Photography Tips For Beginners That You Must Know
Jan 31, 26 08:12 PM
 Want to take better pictures of nature? These simple nature photography tips are sure to help you take better digital photos with your camera.
Improve your photography instantly. Get the 2 most important chapters of my photography book for free.