HOW TO POSTS: LIGHTING AND COMPOSITION
10 Pro Tips for Better Camera Phone Pictures in 2026
(Fix Blurry & Dark Photos)
Don't you hate it when your cell phone pictures come out too dark or too blurry? We've all been there. Well don't sweat it. You're now going to get simple tips to avoid the common mistakes people make when using their cell phone camera.
Use just a few of these tips for taking better camera phone pictures and your photos will improve dramatically. And let's face it, we all will enjoy our smartphone photos more if they look better, right?
But first, you need to know the top 3 complaints I've heard from people about the photos they get from the cameras in their phone. Which one of these bothers you the most?
"My photo is blurry."
"My photo is too dark."
"The subject is too small."
When it comes to getting blurry photos with smart phones the number one reason is too slow of a shutter speed. Phones do a great job of keeping things in sharp focus, but they're not great at freezing motion in dim situations. The blurriness is caused by subject movement or camera phone movement.
Adding light is the single best way to get sharper photos, followed by holding your camera still or shooting your subject when perfectly stationary. Light can be added in several different ways:
- Using your camera's flash
- Moving your subject to a brighter location.
- Shooting at a different time of day.
- Turning on a room light.
10 Tips For Better Smart Phone Photos
Here are the 10 best tips to insure the photos from your cell phone camera come out their best.
1. shield the camera phone lens
If the sunlight is hitting the lens directly, you'll get lens flare. This is a common photo mistake that's easy to avoid. Cell phones are extremely light and easy to hold with one hand and take a photo. It's a little awkward, but just remember to press the shutter button gently so that you do not jar the camera during exposure
Use your other hand to block the sunlight from directly hitting your cell phone camera lens. Picture quality is poor when direct bright light hits your lens during exposure. Try one with sun glare and shoot another without. Then you can choose which one you like better.
2. think sideways
Rotate your camera phone to match your subject. So many photographers are more accustomed to holding their camera certain way and ignore the choice of shooting a vertical photo or a horizontal photo.
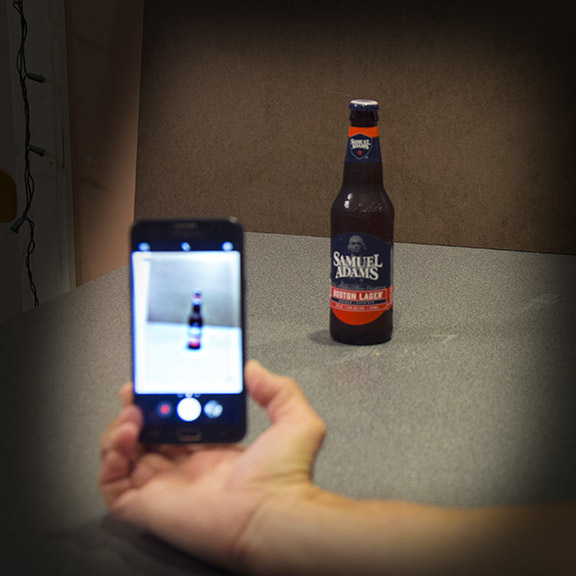 Shoot Vertical Subjects Vertically
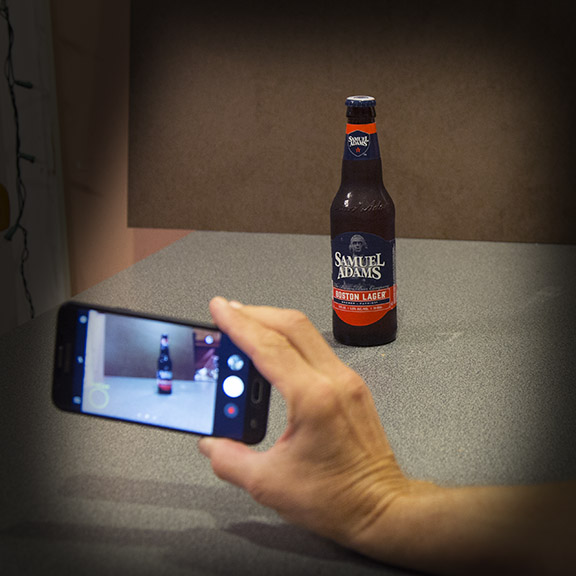 Don't Shoot Vertical Subjects Horizontally
Rotate your camera phone to match your subject. So many photographers are more accustomed to holding their camera certain way and ignore the choice of shooting a vertical photo versus shooting a horizontal photo.
Of course, you can rotate your image later with your favorite photo editing software, but why not get it right in the camera?
We are all in the habit of holding our camera upright, but try holding in one orientation while taking your photo, then switching. Sometimes a vertical ("portrait" composition) makes a better picture. Sometimes your composition will look better as a horizontal. Try both and see which composition you like better.
3. keep your cell phone camera lens clean
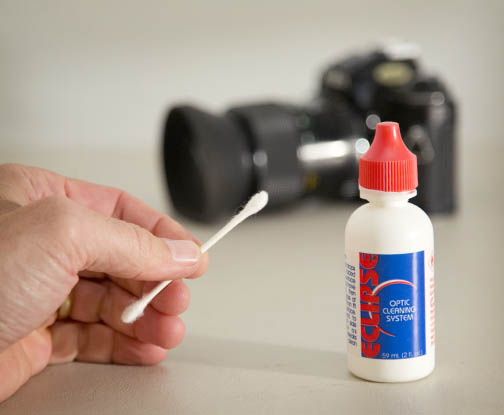 Keep Your Cell Phone Lens Clean
You handle your phone frequently all day long. It's bound to get smudges on its front and back surfaces.
It's a very small lens on your phone, so even the smallest smudge or dust can greatly affect the quality of your pictures. Using a cotton swab and lens cleaning solution is the best way to go.
Be gentle because if you scratch the surface, your only solution will be a new phone.
4. get you cell phone camera up CLOSE
You can also crop your image with an editing app later, but for the best quality, try to fill your frame with your subject. The quality of your photo won't be compromised. Your subject is too far away? If you're lucky enough to have a smartphone with optical zooming that's much better that using digital zoom.
Your camera phone also has a limit to how close it will focus on your subject. Close up photography, or actual macro photography, opens up an entire new world of photographic opportunities to take creative mobile phone pictures. You can try shooting with a magnetic attaching close-up filter or use a clip-on camera phone macro lens.
5. use your "shades"
If you have polarized lenses in your sunglasses, you already have a filter at your disposal to enhance your pictures. A Polarizing Filter can reduce annoying reflections on water and other shiny objects. It will also enhance the colors in your photo and make a blue sky look absolutely beautiful with your landscape photography.
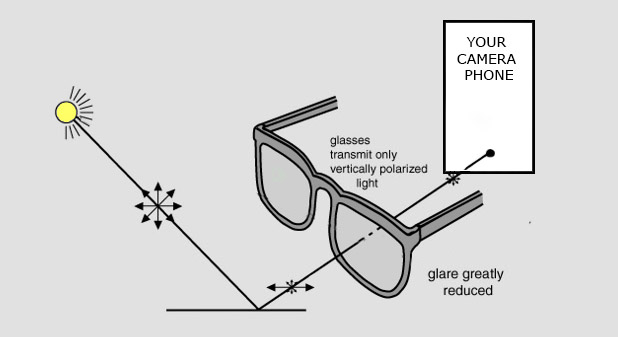 How polarized sunglasses work with camera phone
Simply hold a clean lens of your sunglasses very close to your camera phone when you take your photograph. You may have to rotate your sunglasses to get the maximum effect. It all depends on the angle of the sun at the time of your photo.
6. Use your camera phone's grid setting.
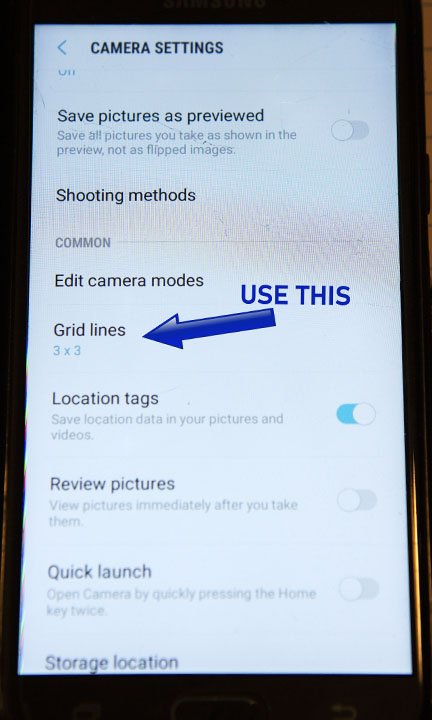 Turn on your 3x3 grid.
You can improve your composition technique by using the rule of thirds. Use this technique as a guide not an absolute rule to follow. As humans, there is something within us that finds viewing 3 subjects or subjects that have 3 zones naturally appealing.
Your camera has an option to view a 3 by 3 grid to help you improve your photos composition. The frid won;t appear on your photos, only on your camera LCD screen. Take a quick look at how the rule of third works.
You'll get a quick lesson on using this guideline and your photography will improve. Just go into your cmaera phone's settings and select show 3x3 grid.
7. steady as she goes
The biggest complaint I hear about cell phone photos is that they come out blurry. This can be caused by camera or subject movement or by focusing issues. Particularly when you're shooting in darker lighting situations, you mobile phone camera slows down the shutter speed to let in enough light for a good exposure.
This can blur your photo. You can combat this by using a solid object to support your camera while your taking your photo. Any stationary object that can support you as you gently leaning on or up against will do, provided it is stable and stationary.
There are also a ton of options for tripods and tripod adapters specifically designed for cell phone photography.
8. get creative with a different perspective
One of the biggest mistakes we can make as cell phone photographers is to take our photos from the normal eye-level perspective.
One of the first lessons I teach in my photography workshops is how to dramatically change the impact of a photograph by choosing a unique perspective.
You can accomplish this by changing the height you have your camera held as well as the angle and the distance to your subject. Take a quick skim of this post that covers composition in detail and the tips on using perspective to your advantage.
9. see the light
The second biggest complaint about camera phone picture is that they're too dark. Either the faces of people are too dark because they lighting is coming from behind them or the entire scene is too dark.
One solution is to change the setting on your cell phone's flash. Although they're not very powerful, the flash on your camera may help to brighten up the darker areas of your photo in certain situations.
 Without fill flash
 With fill flash
Strong backlighting, like shooting with a window as the background, can sometimes fool your camera's auto exposure meter and result in a darkly lit main subject. You can set your camera's phone to use the flash automatically or even all the time to help provide more even lighting.
The big thing for you to get into a habit of doing is simply observing where the light is coming from when you look at the scene in front of you.
10. start with a good cell phone camera
Thanks to technology, cell phone cameras have taken huge leaps in the potential quality of the photos you can create. If you use a phone that was built within the last 2 years you've got plenty of technology built into your camera phone. Here is an article on choosing the Best Cell Phone Camera.
Combine these tips for better camera phone pictures with the tips and techniques in the other articles on taking digital photography and you're going to get some great photos.
If you haven't read the original article on cellular phone camera tips, you can access it here: Cellular Phone Camera Tips.
Keep shooting and stay inspired!


ABOUT BRUCE LOVELACE
Bruce is the publisher of this website. He is the author of the book "Improve Your Photography Instantly." Read more on Bruce on his Bio Page. He's been known as The Traveling Photographer ever since 1994. Read more about this website.
View some of Bruce's photos on Instagram. Visit the Facebook Page. Watch him on YouTube. Bruce runs photo workshops for kids and adults, and provides one-on-one photography coaching.
Digital Photography Education Location on Google My Business
