HOW TO POSTS: LIGHTING AND COMPOSITION
What Does Blown Out Photo Mean?
This post will help you understand what taking a blown out means in photography, how to fix it and also the best way to avoid blown out pictures to begin with. First, we start with the meaning of blown out in the world of photography.
 metering to get the proper exposure.") EXAMPLE #1.
EXAMPLE #1.Blown away, overexposed photo.
Skin tones can't be recovered with software.
A blown out photo is an overexposed photo that is beyond fixing by just darkening it with photo editing software. When significant areas of the photo have no details because a large number of the pixels received too much light, the picture is said to be blown out.
How To Recognize Blown Out Pictures
There are three ways how you know if your photo is overexposed too much. You can use one of two different objective measurements or a simple subjective evaluation by looking at the LCD screen on your camera right after you take the photo.
Most decent cameras as well as photo editing software programs have the ability to display a histogram. We'll consider them first.
1. CAMERA HISTOGRAM
See the photo of my camera's LCD screen below. Don't be intimidated by the histogram on the right. Histograms are easy to learn, quick to use, and very helpful. Histogram are simple graphs that show you the distribution of different brightness areas of your photo.
If any significant area of white is against the right edge of a histogram, your photo is overexposed and even possibly blown away.
 By touching the "INFO" button on my camera
I can change the display to include a histogram
In an instant I can see if the shadows on the left, and the highlights on the right fit into the range of the histogram.
2. SOFTWARE HISTOGRAM
You can download photos to your computer and use histograms to make judgements, and small adjustments to the exposure of your photos.
 You can look at a histogram of your photo on your computer.
In this photo and its histogram of this white-feathered bird you can see that some of the photo's tones are pushed to the right edge (circled in red) of the graph. Those are the blow out pixels of the bird Here's the complete explanation of understanding a histogram.
3. VISUAL INSPECTION
The biggest advantage of all with shooting digital photography is that you can see your photo right away on your camera's LCD screen and make a subjective evaluation of your photo.


Examples Of Blown Out Photos
When it comes to digital photography there are 5 types of blown out. We're going to look at each type and that will be very helpful for you to understand how you can fix or avoid them. Blown out photos are also described as washed out.
Photos can be blown out in the following ways. The 1)entire photo, 2)subject blowout, 3)highlights blown out, 4)background blown out, or 5)color blown out. To help you know whether you have blown out issues with your photos here are examples.
1. Entire Photo
See the preschool photo at the beginning of the article. The entire photo is overexposed due to a powerful studio flash. The flesh tones are blown away beyond fixing with software. To prevent this exposure mishap, you have 4 options.
- Move the lights farther away from the subject
- Reduce the power setting on the flash.
- Use a smaller lens aperture.
- Set your camera to a lower ISO setting.
2. Subject Blown Out
Here's an example of a photo where the main subject, the most important part of the photo is overexposed. The details of the white feathers are gone. Those details are blown out, but the background is exposed properly.
 EXAMPLE #2.
Blown away subject
A white-feathered bird sitting in front of a dark green background
This happens when your camera reads the overall scene which includes a dark background. Responding to seeing the dark areas, your camera adds exposure which results in the main subject coming out excessively too bright.
Grab your camera right now and find this exposure compensation setting so that you are familiar with it ahead of time. You'll be able to adjust the exposure the next time you run into that situation and you'll be able to avoid a blown out photo.
3. Blown Out Highlights
This can be tricky to spot depending on the situations. Outdoor photography when the sun is shining can give you blown away highlights. Sometimes they're not too obnoxious and other times they can ruin an image.
 EXAMPLE #3. Blown away highlights
Caused by subjects in shade and rocks in the sunlight.
In this travel photo of the Grand Canyon, the hikers are in the shade, but the light colored rocks are in the sun. One solution to avoid the overexposure is to shoot the photo at a time of day when the lighting was the same on the hikers and the rocks behind them.
4. Background Blown OUt
In the wedding photo below, the sun was coming through a large window and striking the back of white lacey curtains behind this bride and her amazingly attractive parents (HA HA that's my wife and me).
 EXAMPLE #4
Blown out background
This is the classic example of a photo with a blown out background. This happens if you have very strong backlighting. If you pose your subject in front of a window where it's bright daylight and you don't use any fill light, you'll have to brighten your photo so much with software that the highlights will go very white without any detail.
Despite the blown out background, this particular photo is not so bad. Some would say the blown out background makes it an excellent photo because the background has been simplified and completely non-distracting to the subjects.
5. Blown Out Colors
This is a tricky one because of how digital sensors record the light from the scene in front of you, but it's important you understand that this type of blown pixels can happen. Camera sensors actually record red, green, and blue light separately.
If your subject has one of these highly saturated colors dominant in your scene, details can be lost. Your camera will meter for a good overall exposure, but at the cost of some of the pixels.

Although the photo above is very pretty, there are many of the red pixels that are blown out of detail. You as the photographer, can decide if the image you've got is acceptable or if you have to shoot it again.
Photos that have a few insignificant highlights blown up may be acceptable. Here's an example.

The exposure was good to show the details of the castle wall in Ireland, but the sun burned out the highlights in the clouds on the right.
Why photos get blown out
You're probably wondering how come some of your photos end up being blown out. There are several reasons, but the two most common ways photos get blown out are 1) the camera meter can get fooled, or 2)the wrong camera setting was used.
METER GETS FOOLED. Your camera is very good at getting the right exposure 98% of the time or more. The camera's meter does a great job of reading the light within most average scenes and giving you a proper exposure.
 Overexposed from inaccurate flash power.
The camera "reads" the scene in front of it
and "sees" all the darkness and adds exposure.
How To Fix Or Avoid Blown Out Photographs
There are 3 ways to avoid or adjust for blown out areas in your photo.
1. EXPOSURE COMPENSATION. One way to overcome overexposed photos is to use the exposure compensation feature of your camera. Advanced point-and-shoot cameras, DLSRs, and mirrorless cameras have this east-to-use setting that you can employ as soon as you see that your first attempt was under or overexposed.
 Darken your photo with exposure compensation
2. SHOOT MANUAL EXPOSURE. This is a little more advanced than you may want to go, but if you're feeling a little adventuresome, this is how you do it. Find a starting point by using automatic exposure to do a test shot. Then set your camera on those settings in manual mode and adjust the shutter speed or aperture to lessen or increase your exposure.
Adjusting the shutter speed, aperture, and ISO setting puts you in charge as the captain of the ship. It can be intimidating for newbies to learn about settings and exposure in manual exposure mode, but you get control of exposure and can avoid blown out results.
3. SHOOT IN RAW MODE: This is the technique I use 100% of the time. Yes, you read that right. Whether I'm shooting an action shoot a posed portrait I can't afford to miss. Shooting in RAW mode is perfect insurance because you can easily adjust exposure several f/stops in either direction of the exposure and eliminate the possibility of getting a blown out exposure. For a better understanding of RAW mode, go here.
Normally, many photo enthusiasts use autoexposure and allow the camera to process the data and that gives you standard jpg image files. RAW mode gives you the power to adjust color balance, contrast, brightness, and avoid overexposed photos.
I hope this post on finding out if your photographs are blown out or not was helpful. For an even better understanding of controlling your camera's exposure, you may be interested in my posts on camera settings and controlling exposure.
Keep shooting and stay inspired with your photography!


ABOUT BRUCE LOVELACE
Bruce is the publisher of this website. He is the author of the book "Improve Your Photography Instantly." Read more on Bruce on his Bio Page. He's been known as The Traveling Photographer ever since 1994. Read more about this website.
View some of Bruce's photos on Instagram. Visit the Facebook Page. Watch him on YouTube. Bruce runs photo workshops for kids and adults, and provides one-on-one photography coaching.
Digital Photography Education Location on Google My Business
You might like these
How To Fix an Underexposed Photo + Simple Steps to Avoid Dark Photos
Dark photos? How to avoid an underexposed photo. 5 simple ways to on how to fix underexposed photosed photos. Easy correction steps
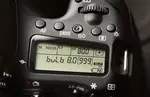
What is Bulb Exposure And How to And Why Use Bulb Mode To Take Photos
What is the bulb exposure mode setting and tips on how to use it. 6 examples of when you should use the "B" bulb setting on your camera for breathtaking photos
Simple Guide on Understanding Photo Exposure. The 3 Steps of Exposure
Definition of and The 3 Ways on how to set photo exposure. How shutter speed, aperture and ISO camera settings work in the exposure triangle. Understanding camera exposure

What is Bulb Exposure And How to And Why Use Bulb Mode To Take Photos
What is the bulb exposure mode setting and tips on how to use it. 6 examples of when you should use the "B" bulb setting on your camera for breathtaking photos
21 Digital Camera Settings. When to Use Each Mode For Great Photos
Easy explanation of how to use the best digital camera settings, digital camera functions. What digital camera mode should you use?
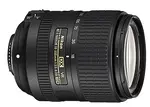
Camera Lens Basics - Helpful Guide to Understanding Camera Lenses
Ultimate guide to understanding Digital Camera Lenses-Lens Types-Specialty Lenses and Camera Lens Basics
Recent Articles
-
Macro Photography Lighting Tips For Indoor Photography With Flash
Mar 29, 26 11:21 AM
 What is the best macro photo lighting set-up to use? Strobe lighting or spotlight? Several articles covering macro photography lighting tips.
 -
Nature Photography Composition Tips- Guide on How to Nail it Everytime
Mar 28, 26 01:46 PM
 Read these Nature Photography Composition Tips. Improve your digital photography technique.
 -
Are HDR Nature Photos Overdone? Answers to Your Questions About HDR
Mar 27, 26 03:44 PM
 Do you want high-impact HDR images rfor personal use? You're looking for the "wow factor" that High Dynamic Range provides. Is HDR photography still overdone
 -
20 Photography Tips-How To Instantly Improve Your Photography in 2026
Feb 09, 26 07:09 PM
 How to easily get better photos. These simple photography tips will steer you in the right direction for quickly improving your results as a photographer.
 -
How To Fix an Underexposed Photo + Simple Steps to Avoid Dark Photos
Feb 08, 26 07:18 AM
 Dark photos? How to avoid an underexposed photo. 5 simple ways to on how to fix underexposed photosed photos. Easy correction steps
 -
10 Useful Nature Photography Tips For Beginners That You Must Know
Jan 31, 26 08:12 PM
 Want to take better pictures of nature? These simple nature photography tips are sure to help you take better digital photos with your camera.
Improve your photography instantly. Get the 2 most important chapters of my photography book for free.