HOW TO POSTS: LIGHTING AND COMPOSITION
How To Get Started In Real Estate Photography
Guest post by Timothy Ross, pro real estate photographer
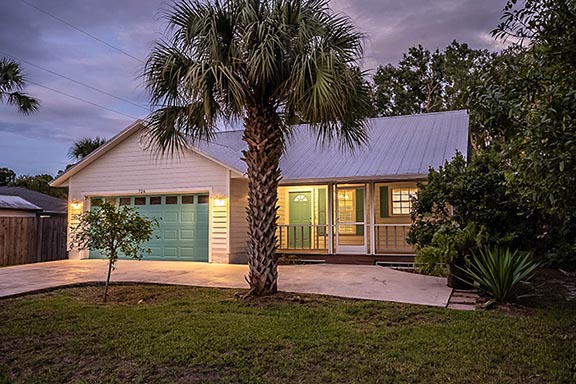 Photo of Featured Property
If you're interested in real estate photography, you're in luck! This is a very lucrative field, and there are plenty of opportunities for photographers who are skilled in this area. In this article, we will discuss the basics of getting started in real estate photography.
We'll cover equipment requirements, shooting tips, post-processing techniques, and more! So whether you're a beginner or an experienced photographer, this article has something for you!
What Is Real Estate Photography?
Real estate photography is a specialized type of photography that focuses on taking pictures of homes and other properties to market them. This can include photos for listings, brochures, website ads, and more.
As a real estate photographer, you will need to be able to capture the best features of a property and make it look as appealing as possible to potential buyers. This requires both technical skills and an eye for composition.
Reasons You Need To Know Real Estate Photography
If you're a photographer who is looking to get into real estate photography, there are many reasons why you should add real estate photography to your photography business.
Some of the reasons are:
- It's a great way to make money.
- There are always opportunities.
- Great way to get exposure for your business.
- You'll gain experience in composition and prepping
So if you're looking to get started in real estate photography, learning how to get started is key. By following a few simple tips, you can create stunning images that will help sell properties quickly.
Real Estate Photography Step-By-Step Guide
1. Use The Right Gear For Real Estate Photography
If you want to be a real estate photographer, you need to have the right gear, which includes a DSLR or mirrorless camera paired with a wide-angle lens, protection lens filter, and tripod. So which camera and lens is right and what tripod should you get?
It depends on your budget. But you can get started for under $500. You can
purchase a used Canon 60D for under $250 on Ebay. Pair it with a Canon 10-22 wide-angle lens for under $150.
Add a basic tripod and a couple of class 10 SD cards and you're still under $500. Now, there are better
options out there that would take your photos (and videos if you plan on offering them) to the next level.
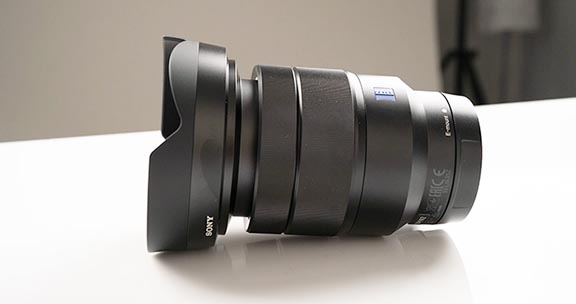 Sony wide angle zoom lens
Here are a couple of good options if you plan on offering photo and video services:
SONY A630. Pair it with a Sony 10-18mm lens. You can normally find both of these used on eBay for less than $1,200. This camera offers 24-megapixel photos and 4K video. This is the entry-level kit that is recommended as it's not only affordable but professional as well.
SONY A7III. Paired it with the Zeiss 4/16-35mm lens. For the tripod, use a Manfrotto 190x with a ball head. This entire setup comes out to be less than $3,000. This camera provides high-quality photos, and 4K HDR video and has other features like a full-frame sensor for low-light performance.
There are other options like Panasonic, Nikon, and Canon. Feel free to research other options and find what works best for you.
2. Camera Settings
These camera settings will be based on a Sony A7III Camera. Most cameras have the same options. So research accordingly.
APERTURE PRIORITY. Shoot photos in Aperture priority. This means the shutter speed and ISO are automatically selected and the aperture setting is fixed. Aperture settings are set at F8 as that's a good sweet spot for many shooting scenarios.
ISO. Now, let's move on to ISO. Your settings should be on auto with a range of 100-400. What this does is your camera will automatically select the best ISO setting for each photo. It will never go below ISO 100 or above ISO 400. This range prevents long shutter speeds and image noise in darker rooms. When you're shooting outside the camera will usually select ISO 100. When you're going indoors the camera will select ISO 400.
RAW. Next, set the file format to Compressed RAW. This allows us to have a lot of flexibility during the editing process.
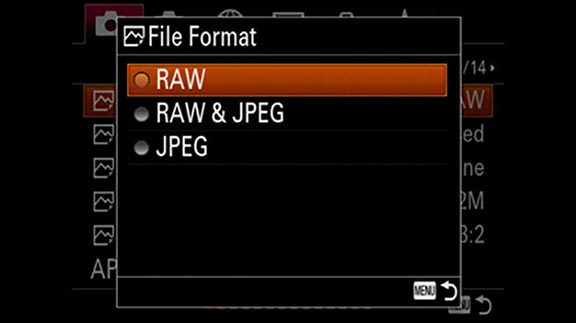
BRACKETING. Set your drive mode to continuous bracket mode. There are many options in bracket settings, but the best option is the 3.0EV three-image bracket setting.
In this mode, the camera automatically shoots bracketed images. This means every time you press the shutter button it's going to shoot 3 consecutive shots. One that's overexposed, one that's normal, and one that's underexposed. Doing this is extremely helpful when creating HDR images.
WHITE BALANCE. Next up is white balance. Your white balance setting should be set to auto. This will help to produce accurate colors every time a photo is taken. Once your white balance is set, it's time for your focus settings.
FOCUS. Your focus setting should be on autofocus with the focus area set to wide. As many of your shots will be wide shots. Lastly, save your settings as a preset so you don't have to mess with your settings during a shoot. These settings will give you a great place to start if you're new to the industry.
3. Practice Photographing Real Estate
Once you have the right gear, it's time to start practicing! The best way to learn real estate photography is by practicing as much as possible. And the best way to practice is by taking photos of homes in your area that are for sale, or even your own home.
Start by contacting a local real estate agent and ask if you can take photos of one of their listings. Most agents are happy to let you do this because it's free marketing for them. Once you have a few shoots under your belt, start creating a portfolio of your best work.
This will help you land paying gigs in the future. And as you get better and build up your portfolio, you can start charging more money. If contacting a real estate agent isn't an option for you right now, you can also
use PeerSpace.com. You essentially just rent a house for an hour or two from there and take photos. They have many options from nice middle-class homes to mansions.
4. own The Composition
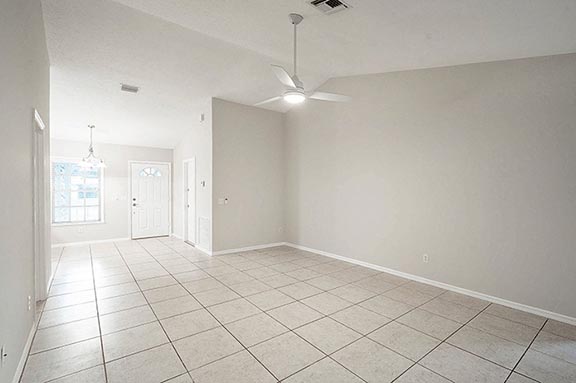
Composition is one of the most important variables when creating photos. Here
are some tips to make your compositions pop.
- Make sure your camera is leveled. Many cameras have built-in levels where you can see if your camera is straight.
- Set an appropriate tripod height. Usually, on the inside of a home, the tripod is set to the height of the chest. For the outside, you might need to adjust the height depending on if the house is a two-story house or a one-story house.
- Pick appealing angles. You want to pick angles that engage buyers. Instead of just shooting a room, pay attention to the furniture and layout of the room.
- No fixtures in the corner of your shots. Make sure not to have fixtures such as chandeliers and fans in the corners of your images. Doing this makes your fixtures look distorted. So do your best to avoid putting objects in the corner of your shots.
- Shoot towards the opposite corner. When shooting interior shots you typically want to have the opposite corner in the center of your frame. Pointing your camera too far to the left or right often messes with the room's symmetry.
5. Prepare The Home For Showing
Once you've scheduled a shoot, it's time to start preparing the home. This is especially important if you're shooting for a real estate agent. You want to make sure the home is in tip-top shape so their listing photos look amazing.
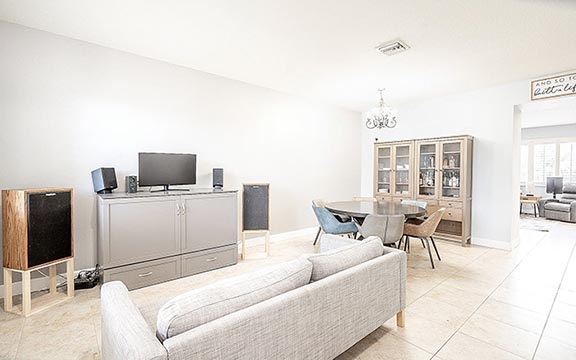 Properly prepared room for photography
The first thing you want to do is declutter each room. This means getting rid of things like clothes, toys, dishes, etc. After that, make sure all toilet lids are down and fans are turned off. After the home is decluttered and clean, you can start staging each room. This includes things like arranging furniture and adding decorations.
The goal is to make each room look as appealing as possible. You can even bring in your plants and flowers to add some life to the home. If you're not sure how to stage a room, there are plenty of resources online that can help you out. Just do a quick Google search for "real estate staging tips" and you'll find tons of articles and blog posts with helpful advice.
6. Editing Like A Pro
You can use any photo editing software to edit your photos. But typically, the best software to use is Adobe Lightroom Classic. It's fairly easy to use and it has all the features you need to edit real estate photos. Once you have your software set up, you can start editing your photos.
The first thing you want to do is make global adjustments. This includes things like adjusting the white balance, exposure, and shadows/highlights.
After that, you can start making more specific adjustments. This includes things like removing objects, adding filters, and adjusting the saturation. Editing real estate photos takes practice so don't get discouraged if your photos don't look perfect at first. Just keep practicing and you'll eventually get the hang of it.
7. Getting Work As a Real Estate Photographer
This part of the process will be the most time-consuming. But necessary if you want to land paid clients. Go on real estate sites like Trulia or Zillow and find realtors. Usually, you want to look at homes $400,000 and above.
After you find a house, send them a script like this: "Subject: (Name), would you like free real estate photos for your next listing? Body: How's your business going? Do you have any new listings coming up?
I'm a real estate photographer in the area and I'm giving realtors free photos on their first order with us! If you would like to take advantage of this offer, reply back to this email so we can schedule your next photoshoot!
You can view our website (website)." Another option is contacting them on Instagram. Instagram has a higher response rate than email, but emailing them also works as well. Also, this is a numbers game. Expect to get 100 no's for every yes. But if you're really determined, you'll see business in no time at all.
8. What Should You Charge For Your Photography Services
Take a look at your local competition and see what their prices are. You don't want to be too high or too low. You want to find a happy medium that you're comfortable with. You can start by charging $100 per photo shoot. This price includes the photo shoot itself and the edited photos. If you're just starting out, this is a great place to start.
As you get more experience, you can start charging more. It's also important to note that you don't have to offer discounts just because someone asks for it. If you're confident in your work, then stick to your prices.
PUBLISHER'S INSERTION:
According to Thumtack.com real estate photographers charge $170-$200 per house. Beginning real estate photographers charge as little as $55/hour and experienced pros charge as much as $200/hour. As a photographer, your costs are very low. Basically, your time invested is your only expense once you have the needed camera equipment.
My research also found that some areas of the country have higher prices for larger homes, such as Idaho for $500 and Maine for $225. It varies depending on the size of the home, the experience of the photographer, and the area of the country.
Conclusion
Real estate photography is a great way to make money and it doesn't require a lot of expensive equipment. If you're interested in getting started, follow the tips in this blog post and you'll be on your way to success. And remember, practice makes perfect so don't get discouraged if your photos don't look perfect at first. Just keep practicing and you'll eventually get the hang of it.
Good luck!

AUTHORS BIO:
Timothy Ross is professional Illustrator and Real Estate Photographer. He's the owner of TimmyRoss.com where he writes about everything in visual media, from Graphic Design to Photography.


ABOUT BRUCE LOVELACE
Bruce is the publisher of this website. He is the author of the book "Improve Your Photography Instantly." Read more on Bruce on his Bio Page. He's been known as The Traveling Photographer ever since 1994. Read more about this website.
View some of Bruce's photos on Instagram. Visit the Facebook Page. Watch him on YouTube. Bruce runs photo workshops for kids and adults, and provides one-on-one photography coaching.
Digital Photography Education Location on Google My Business


