HOW TO POSTS: LIGHTING AND COMPOSITION
when to use manual focus with your DSLR
(when to turn AUTOFOCUS off)
This post will help you know when to use manual focus with your DSLR. That will help you get sharper subjects in your photos in 7 specific photography situations.
In most cases your autofocus camera will do a good job for you, but here are 7 times where you'll get better results with sharpness when you focus manually.
MANUAL FOCUS TABLE
| 1. | SHOOTING THROUGH FENCES AND WINDOWS |
| 2. | BACKLIGHTING |
| 3. | WHEN IT'S DARK |
| 4. | RANGE OF FOCUS |
| 5. | MACRO PHOTOGRAPHY |
| 6. | ACTION PHOTOGRAPHY |
| 7. | STREET PHOTOGRAPHY |

1. Focus manually when shooting through glass or a fence
When this situation occurs it becomes obvious as it happens. Have you ever been to the zoo, or a museum or perhaps in your car and you tried to photograph something through the glass or with an object between you and your subject like a fence?
Your DSLR will either focus on the close-up object or go into a focus searching mode.
If you recognize this ahead of time, you'll be able to handle the challenge! You won't miss your photo because the focus was wrong. It occurs when there is a fence or glass you have to shoot through at your subject.
Your camera focus will automatically be on the closest object to the lens. The fence or glass or object in the foreground will be sharp and your subject will be out of focus. Manually focusing on your subject will overcome this situation.
2. use manual focus for backlighting and when it's dark
Your camera may struggle to find focus under two similar lighting conditions. This includes strong backlighting, like this backlit photo here, and can also occur under dim lighting conditions. Your camera may struggle to find the focus when there is very little light available. This is a good situation to switch over to manual focus.

Auto-focus lenses work great when your subject has strong lighting on the side facing your camera, but often fails when it's dark or your subject has very little contrast for the camera lens to analyze.
I took this shot this during a trip to Austria. It was extremely bright backlighting. My camera focusing mechanism was trying but couldn't find sharpness on the subjects shadowed body. I switched to manual focus and was able to this shot just in time before he decided to exit the building.
Night photography situations, such as pictures of fireworks or strong back lighting situations will cause your lens to continuously search for sharpness and will delay the shutter or won't allow the picture to be taken at all.
Give yourself little photography assignment, try this on your own and learn how your camera behaves. Look for some of these situations right now in your environment. Try taking a picture through a window. Place your subject with a large bright window behind them.
Try this with them wearing a dark solid shirt. The try it with a bright shirt or a shirt with stripes or a pattern. Your results will depend on how much fill light is present.
3. use manual focus to get everything in focus
Look at this photo of this tree photographed at sunrise. The composition included the marsh grass in the foreground and the tree in the background. The camera automatically focused on the grass in the foreground.

If I had used manual focus, and focused on a distance about halfway between the marsh grass and the tree, I could have had both the foreground and background in sharp focus.
You may want to put emphasis on something within your photograph with selective focus. You can do so by having it sharply focused and other parts of the photo intentionally blurred.
The auto-focus system of your camera may not know which part of the photo you want to emphasize. Manual focus combined with a shallow depth of field will give you more control of your intended the center of interest in your image.
how to control your focus spot without manual focus
If your camera does not have manual focus you can still control the distance your lens focuses by using this simple 3-step method:
- You option is to center your frame on an object at the desired distance and focus on it first.
- Squeeze the shutter button halfway and keep it pressed to lock the focus distance.
- Then aim your camera to re-compose your photo and gently squeeze the shutter button the rest of the way down.
4. when to use manual focus with close-up photography

I used manual focus to shoot the flower image at the beginning of this article.
Most cameras have auto-focus capabilities when shooting macro photography and with SOME cameras auto-focus can do an adequate job. The challenges come into play when you are extremely close to your subject and your depth of field is so limited.
Focusing accuracy and precise control is better handled manually, particularly in lower light situations when a larger aperture is needed for a good exposure. Point and shoot cameras definitely will fall short if you are photographing a moving target like an insect.
5. pre-focusing with sports and fast action photography
 Manual focus on barrel
before the horse arrived.
Newer cameras have fast focus tracking and are able to follow fast moving objects and keep them in focus. Some situations and many cameras won't perform this well. That's when you need to focus manually on a pre-selected spot where your subject is going to be at the exact instant you take your photo.
Auto-focusing is particularly difficult when the subject is moving rapidly toward or away from you. The point of sharp focus is changing very rapidly as opposed to a situation where the subject is traveling across your field of vision.
6. why not use manual focusing for street photography too?
With street photography, you may want to photograph your subject without alerting them that they're being photographed. Raising the camera to your eye will blow your cover. You can manually focus where your subject will be ahead of time, wait for the right moment, and casually aim your camera from your hip and get the candid photo you want.
7. Use Manual Focus To take intentionally out of focus photos
This is one that many people forget and it's a great way to get creative with your photography. You can take some visually interesting photos by purposefully blurring your subject with manual focusing. The photo below shows a unique result with everything in the image being blurred.

To get this type of shot you can use manual focus, a slow shutter speed and a moving camera to get artistic interpretations of various scenes. This was a flock of snow geese resting in the middle of a corn field, during cold weather.
why is manual focus sometimes better
The most obvious reason is that you can shoot in any lighting conditions. Those dimly lit situations when your camera's autofocus struggles can cause you to miss a great shot. Secondly, using manual focus puts in control of exactly what is being emphasized within the scene in front of you.

In this close up photo of the coffee beans, I focused on one of the letters on the scoop handle to control the exact point of focus manually. Brush up a little on depth of field techniques to see how manual focus can be used to take your creativity to a whole new level.
how to set manual focus on a DSLR
It's a simple matter of locating the correct switch, usually on the lens barrel and changing it from AF to MF. Use the lens focusing ring on the lens barrel and turn it back and forth until you find the exact point you want to focus on in your composition.
Here's a video showing you how to adjust your DSLR to a manual focus setting:
Keep shooting. Keep learning. Keep improving.


ABOUT BRUCE LOVELACE
Bruce is the publisher of this website. He is the author of the book "Improve Your Photography Instantly." Read more on Bruce on his Bio Page. He's been known as The Traveling Photographer ever since 1994. Read more about this website.
View some of Bruce's photos on Instagram. Visit the Facebook Page. Watch him on YouTube. Bruce runs photo workshops for kids and adults, and provides one-on-one photography coaching.
Digital Photography Education Location on Google My Business
You might also want to read:
What is Bulb Exposure And How to And Why Use Bulb Mode To Take Photos
What is the bulb exposure mode setting and tips on how to use it. 6 examples of when you should use the "B" bulb setting on your camera for breathtaking photos
21 Digital Camera Settings. When to Use Each Mode For Great Photos
Easy explanation of how to use the best digital camera settings, digital camera functions. What digital camera mode should you use?
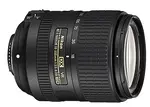
Camera Lens Basics - Helpful Guide to Understanding Camera Lenses
Ultimate guide to understanding Digital Camera Lenses-Lens Types-Specialty Lenses and Camera Lens Basics
What is Auto ISO? Tips On When to use it and When Not to Use Auto ISO
Auto ISO Simple Guide. Questions and answers on when to use AUTO ISO and when not to use it. How you can use it to improve your photography.

Search for a new topic on this site:
Recent Articles
-
Macro Photography Lighting Tips For Indoor Photography With Flash
Mar 29, 26 11:21 AM
 What is the best macro photo lighting set-up to use? Strobe lighting or spotlight? Several articles covering macro photography lighting tips.
 -
Nature Photography Composition Tips- Guide on How to Nail it Everytime
Mar 28, 26 01:46 PM
 Read these Nature Photography Composition Tips. Improve your digital photography technique.
 -
Are HDR Nature Photos Overdone? Answers to Your Questions About HDR
Mar 27, 26 03:44 PM
 Do you want high-impact HDR images rfor personal use? You're looking for the "wow factor" that High Dynamic Range provides. Is HDR photography still overdone
 -
20 Photography Tips-How To Instantly Improve Your Photography in 2026
Feb 09, 26 07:09 PM
 How to easily get better photos. These simple photography tips will steer you in the right direction for quickly improving your results as a photographer.
 -
How To Fix an Underexposed Photo + Simple Steps to Avoid Dark Photos
Feb 08, 26 07:18 AM
 Dark photos? How to avoid an underexposed photo. 5 simple ways to on how to fix underexposed photosed photos. Easy correction steps
what is a manual focus lens
 Manual Focusing Lens
In photography, a manual focus lens is simply a lens that does not have automatic focusing. You adjust the focus by turning a ring on the lens until the object you want to be sharp in your photograph looks clear.
A manual focus camera is a camera that requires you to do the focusing of the lens. Some people ask if manual focus lenses are hard to use. Not really.
I used manual focus lenses for about 30 years before auto-focusing technology came about.
Improve your photography instantly. Get the 2 most important chapters of my photography book for free.