HOW TO POSTS: LIGHTING AND COMPOSITION
beach photography tips
This article on beach photography tips will help you improve all of the beach photos you take.
You can use these ideas for taking amazing seascapes, wildlife photos, candid photos of your kids playing, and portraits on the beach with the photography equipment you already have.
Part I gives you the advice on the gear you use and specific tips that will dramatically improve your creativity with your photography.
Part II will give you tips on portrait photography on the beach. Let's face it, finding out how to take great beach photos begins with equipment. Let's dive in with what photography gear is needed and what camera settings are best.
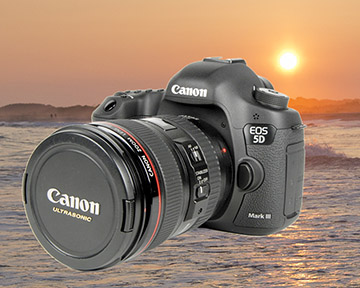
what's the best camera for beach photography?
This sounds like a sassy answer, but it's really true: the best camera for beach photos is the one you take with you. You need to take it with you-and maybe with an accessory or two-and use it.
With that said, an advanced point and shoot, a DSLR, or one of the newer mirrorless cameras are all great choices to capture the spectacular natural beauty of the ocean. Reading this article will put you in the right frame of mind to use any camera.
Although you can take some nice beach photos with your cell phone, use your camera that has the ability to set different settings. We'll get to why in just a minute.
Ideally, the best camera for beach photography should have:
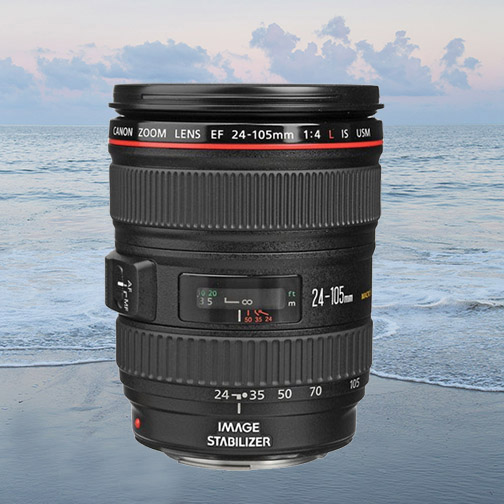
- VERSATILE LENS: Interchangeable lenses or a solid zoom range with the lens it comes with. A zooming lens will give you the versatility for wide angle compositions, zoomed in detail shots, and everything in between.
- ADJUSTABLE SHUTTER SPEEDS: Whether it's your kid running to jump in the ocean waves, or a seagull in flight, it's valuable to be able to set your camera with a high shutter speed to freeze the action and prevent motion blur
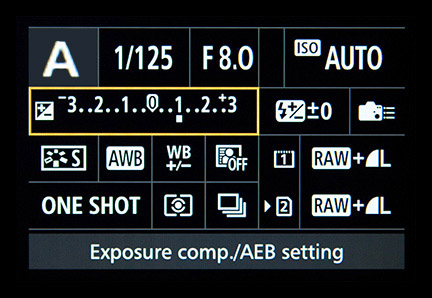
- EXPOSURE COMPENSATION: Although can brighten photos afterwards with software, you'll get the best results by getting the exposure right when you take the photo. Because of all of the white sand and bright sky, your camera's exposure meter can get fooled. You want to have the ability to add exposure to the auto settings your camera decided on.
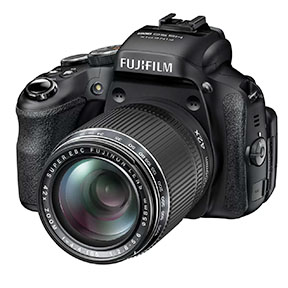
If you're concerned about the harmful environment of sand and salt water on a camera for the beach, then you want a smaller sports camera that is weather resistant , or even water proof. These point and shoot versions will have less camera setting options that a bridge, mirrorless, or DSLR camera. See some of the choices below.
As an Amazon affiliate I may receive a small commission from qualifying purchases, at NO added cost to you.
Which Camera lens for beach photography is best?
What's the best lens for beach photography? Ideally, it's better to use your camera with a nice zoom lens attached. The beach and its surroundings will provide you with a nice variety of shooting opportunities, zoomed out for wide views and large group photos and zoomed in for photography of more distant subjects and for individual portraits.
The basic kit lenses that come with DSLRs come up a little short in that department. A 3x zoom range is marginally functional, but you're very limited at both very wide settings and zoomed in telephoto settings with one of these lenses.
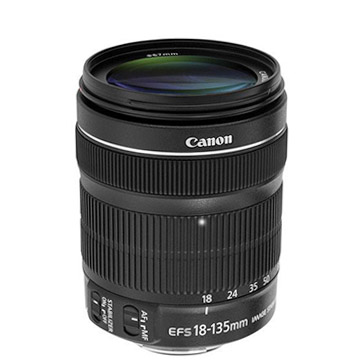
Wide angle for groups and landscapes. Telephoto for beach headshots and wildlife. Canon EF-S 18-135mm, 7.5x zoom range.
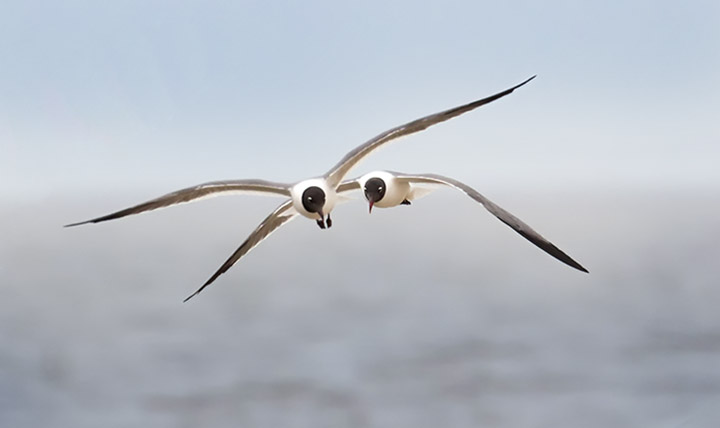 Seagull photo take with a telephoto zoom setting of 400mm
Camera set for 1/2000 second to freeze the action.
A lens that can zoom in far will give you a chance to get some great shots of wildlife, the ocean waves, a distant boat, or yes, even people. On the flipside of that, if your lens can also go wide you can get some strong perspective photos too.
what are the best camera settings for beach PHOTOGRAPHY
During daytime hours at the beach you have plenty of daylight, so your automatic or program settings will do fine to give you sharp, clear photos without blur. When it's bright like this, your camera will choose a fast shutter speed and a small lens opening, which fill keep things in focus with a deep depth of field.
Just remember to review your photo on the LCD screen to make sure your exposure is right. We talked about exposure compensation earlier. Another good idea is to use your camera's histogram. At first it may seem intimidating, but with a little practice, you'll get the best quality of beach photo with the lens and camera that you're using.
It's the special situations that cause the frustration when we see a photo opportunity, but your camera comes up short in getting the settings right for the effect we want. Here are a few special camera settings for beach photos.
special camera settings for beach photos
You want to know what are the best camera settings for beach photography. Here are some camera setting for those beach shots that are a little more challenging and and will give you more control over the success of your photo.
In the photo below the camera was set for automatic exposure, but came up short because so much of the scene is very bright. The camera's exposure needs to be compensated with an extra f/stop (a factor of 2x) of exposure.
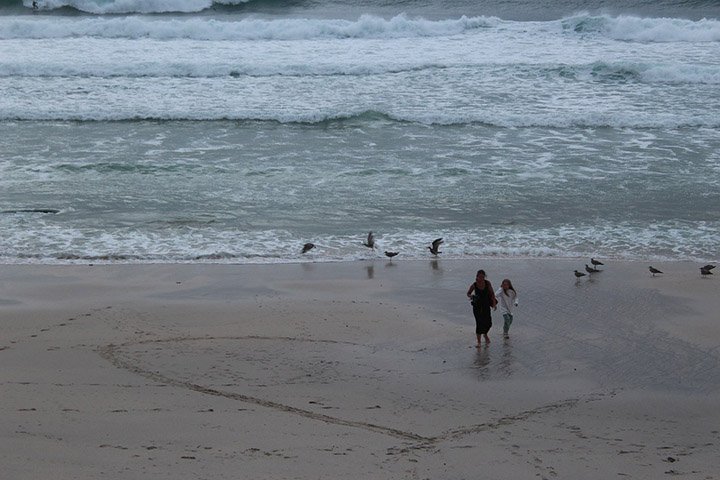 This is the typical exposure error you can get
from the basic "Auto" mode setting with beach photography.
Some situations "fool" your camera into underexposing your beach photos.
Look what happens when you use exposure compensation. You override the camera's judgement of the scene and allow twice as much light to strike your sensor.
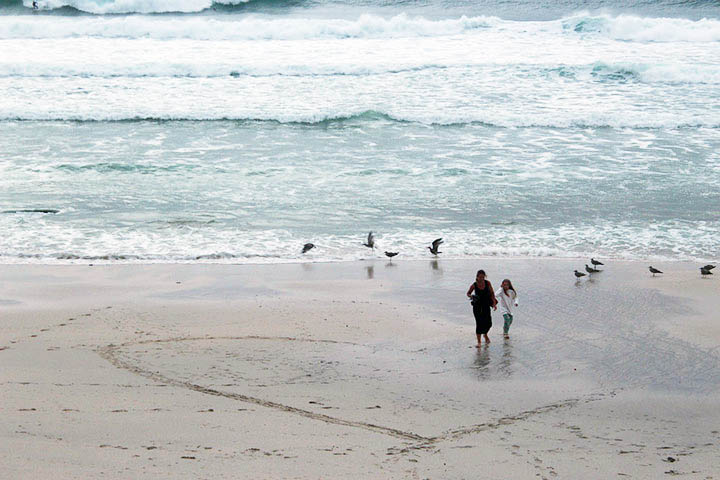 You override the settings for what the camera's exposure meter reads the scene.
In this case the original was one full s/stop underexposed.
Here are 4 scenarios and how to set your camera for the best beach photos.
- ACTION SHOTS. Your photographing the kids playing soccer on the beach and it's not a bright sunny situation. You need a fast shutter speed to make them sharp. Set your camera on shutter priority and you choose a fast shutter speed to freeze the action. See the post on the best shutter speeds for sports
- DIM LIGHTING. It's a dark cloudy day or the sun set 20 minutes ago and you see a photo you want to get. You need to set your camera to a high ISO setting, so that it doesn't need as much light for a sharp photo without blur from movement or from missed focusing.
- ISOLATE YOUR SUBJECT. You want your subject to be sharply focused but the want the background to be blurry. This is a common technique when shooting beach portraits. You need to set your camera to use a wide open aperture to get a short depth of field. That way your subject is in focus but the background is blurry.
- UNDEREXPOSURE. Sometimes your camera meter gets fooled on the AUTO exposure setting. It's not unusual that beach photos come a little dark. Use an EXPOSURE COMPENSATION setting and add an f/stop (double the exposure).
look for contrasting colors in your beach scenes
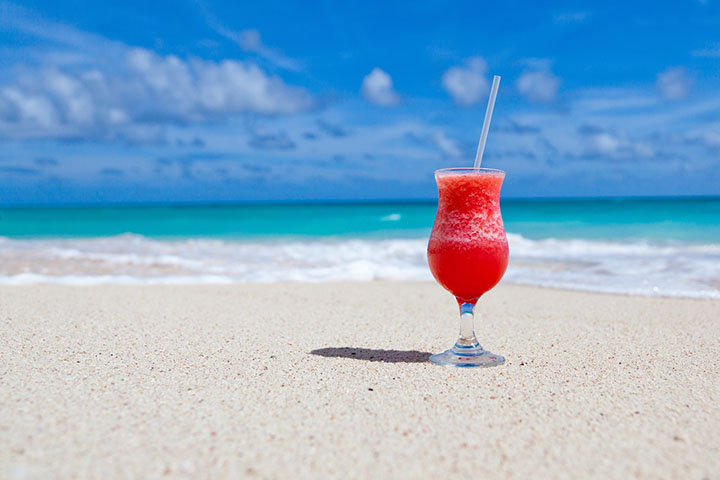
Pay attention to color and use it to your advantage. Sometimes very simple compositions are still very dramatic with the use of contrasting colors.
The other thing that makes this a well composed photo is the position of the tropical drink. Although it's off center, the image is still balanced because of the drink's shadow on the sand.
simple beach photography tips
- If the sun is behind your subject use your camera's flash to fill in the shadows. Try one with and one without flash.
- Keep the horizon level. It's distracting if it is tilted to either direction.
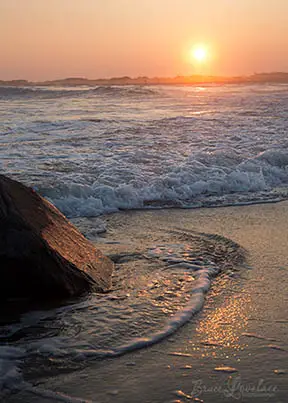
- Shoot just before sunrise or just after sunset during what photographers call "The Golden Hour." The lighting is often spectacular.
- Use a polarizing filter to enhance the colors and darken a blue sky. Use a UV filter to protect your lens from sand and saltwater.
ideas for creative beach photography
Here are 5 ideas for taking your creativity to a new level. Use them to spur your own imagination and come up with your own variation of one or more of them. The possibilities are endless. Digital photography gives you an opportunity to play around and try many variations and select the one or two you like the most. Have fun with this!
Here are two beach photography sample photos that emphasize the sand as the primary subject.
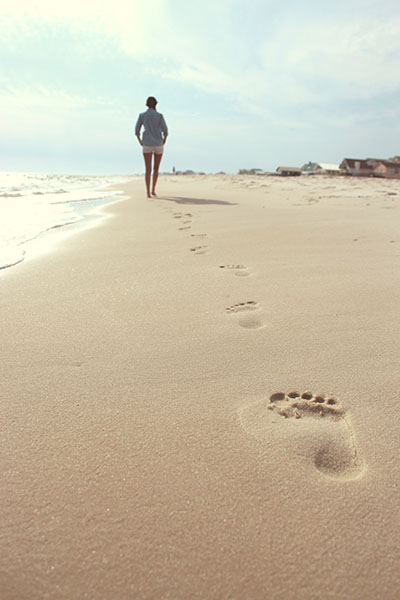
Make footprints in the sand and photograph them. You can do this as they disappear into the water. Have your beach photo tell a story.
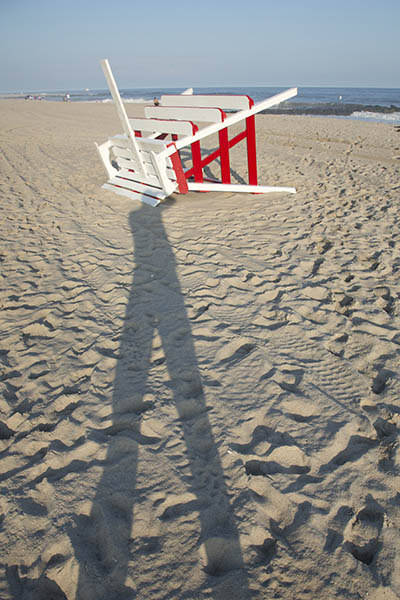
Look for interesting shadows to photograph. The shadows will be long and skinny early and late in the day. This was a selfie I took for another post I was writing.
As with many interesting photos, it's all about the creative use of unique lighting opportunities.
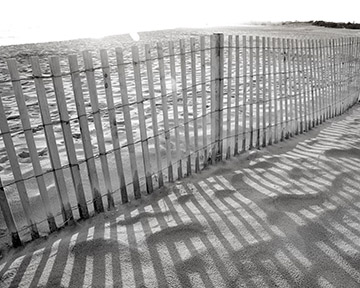
Try converting some of your photos to black and white to inspire your creativity. Shadows and abstracts are often the most interesting subjects to shoot.
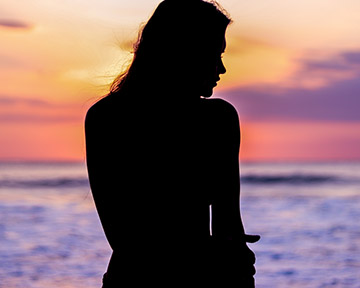
Sunrise and Sunset are the time you want to try a few silhouette photos. You may have to use your camera's exposure compensation setting and underexpose your photo on purpose.
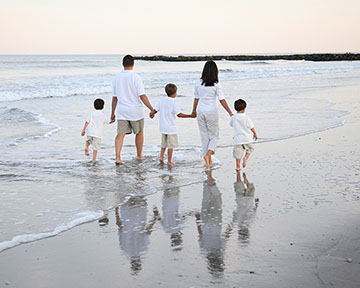
When the tide is going out, look for a flat area of the beach to try a few reflection photographs. People and wildlife work well for subjects for this kind of beach photography.
PART II - beach portrait photography
This second part of the post covering beach photography tips focuses on photographing people on the beach. Here are 5 tips specifically are to give you advice on taking beach portraits.
time your beach portraits right
The best time to photograph people on the beach is late in the day. You'll be able to get some stunning shots right around sunset. You could try sunrise too, but usually it takes a few hours for people to be wide awake and looking their best.
The light at or just after sunset is not as bright and your subjects are less likely to be squinting. You do have to work quickly though, as the amount of light at that time fades quickly.
The color tone of the light is much warmer and the quality of the light is much softer early and late in the day.
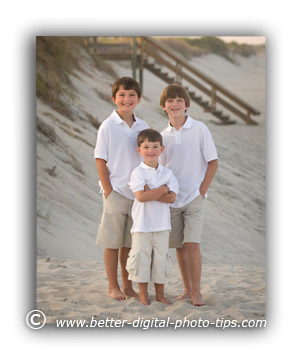
In this photo of these three brothers, the sun was partially below the horizon and partially diffused by thin clouds. you can see the sunlight is coming from the left at a strong angle, but it's not creating harsh shadows because it's diffused.
If it's not quite sunset and the sky is very clear, the direct sun may still be too strong and cause squinting and harsh shadows. If this is the case I'll look for shade.
I try to look for areas where the sand dunes are high and block the sun. That provides open shade. Another idea is that can do beach photography in the shadow of tall waterfront hotels or underneath piers if you can find a suitable angle to get a good background.
use your telephoto lens setting for beach portraits
Using a long focal length on your camera's zoom creates a more flattering look for portraits of people. Zoom in as much as you can and then distance yourself from your subject so that they fill most of your camera's viewfinder.
This is one of the secrets to making people look their best in portrait photography. This farther distance away from you, the photographer, also allow people to relax and it will include less clutter in the background becaue of the narrower angle of view.
choose your photo's background carefully
It's easy to focus on your subject and neglect to check the background before you trip the shutter. We've all made that mistake.
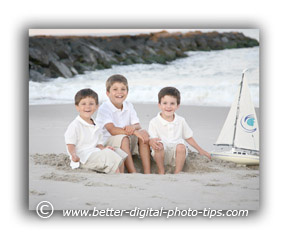
Position your camera in just the right spot so that the background compliments your subject and doesn't distract. In the photo of the three boys and the sailboat, I quickly dug a hole in the sand in just the right spot. The light was fading quickly, so I had to work fast.
I adjusted my camera height on my tripod so that the rock jetty behind my subjects acts as a framing device. The sun was already below the horizon, so the light was very soft.
Look back at the first beach portrait of the 3 boys in front of the steps. I moved my tripod to have the boardwalk and steps in just the right spot in the background.
have your subjects dress in good beach clothing
What to wear for beach photography? This clothing tip applies to all kinds of portraits, not just beach photography. Keep everybody in solid colors. Stripes and patterns are distracting and the emphasis should be on your subjects' faces.
Stay away from bright colors for beach posing. Neutral colors and pastels work great with the lighter subdued colors of the ocean sand.
One of the most favorite clothing choice for pictures on the beach is khaki and white or denim and white for good reasons. For more on clothing tips go to portrait clothing.
avoid crowded beaches
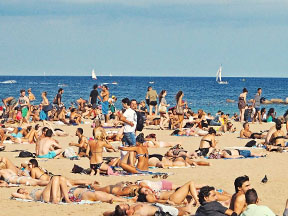
This is beach portrait tip #5. Try to find a beach that isn't full of people.
Other people have just as much right as you do to enjoy the sun and sand, but crowded beaches make it hard to shoot while keeping others from entering your composition in the background.
Yes, it may be possible to do some digital photo editing afterward, but it's a lot easier if you get your photo right when you take it. Try to find a beach that is more private or secluded when you're shooting beach portraits
Finding a beach off the beaten track may be a challenge. It will be helpful to scout out locations beforehand at the same time of day that you'll be shooting. Usually staying away from the boardwalk and business areas is a safe bet.
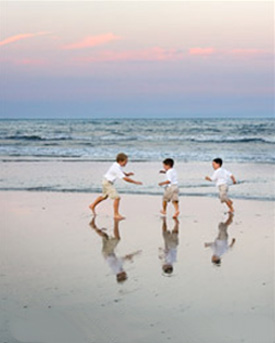
Don't forget to take the candid photos too. In this reflections beach photo, I took advantage of my DSLR and its 5 frames per second continuous speed shutter setting.
We were done shooting our posed portraits. The boys were running around and having a blast.
This would have cost me a fortune in film processing and proofing in the days of film. I shot over 80 frames in just a few minutes.
I set my ISO setting very high to allow me to use a high shutter speed in the fading light. Look at that beautiful sky and the reflections in the sand!
more tips on photography
PHOTO EXPOSURE. If you don't have a "beach" setting on your camera, you may have to adjust your settings to overexpose a little from the auto exposure your camera uses. The overall light colored sand and sky can fool your camera and beach photos sometimes come out a little darker than they should.
For additional digital photo tips related to your camera's ISO setting and how it affects exposure, you may have an interest in reading the article on exposure
BLURRY PICTURES. This is another challenge for newbie photographers. Knowing how to set your camera's shutter speed will help you avoid taking blurry pictures while doing your portrait photography. Here is more on shutter speeds.
Keep shooting. Keep learning. Keep improving.


ABOUT BRUCE LOVELACE
Bruce is the publisher of this website. He is the author of the book "Improve Your Photography Instantly." Read more on Bruce on his Bio Page. He's been known as The Traveling Photographer ever since 1994. Read more about this website.
View some of Bruce's photos on Instagram. Visit the Facebook Page. Watch him on YouTube. Bruce runs photo workshops for kids and adults, and provides one-on-one photography coaching.
Digital Photography Education Location on Google My Business
p.s. You can apply these beginning beach photography tips in the winter time too, when no one is around to bother you.
