HOW TO POSTS: LIGHTING AND COMPOSITION
The Good And The Bad of HDR nature Photos
 Photomatix Pro 3.1
My First HDR Software
Have you ever seen HDR nature photos that looks fake? Unfortunately, so have I and at first I let it destroy my motivation to play around with HDR photography. Fortunately for you, the use of HDR has achieved a better level of implementation to make it a worthwhile technique to use.
This post will help you understand when to use HDR and when not too.
The collection of HDR nature photos below shows how excessive the HDR (high dynamic range) photography technique can give you some unnatural looking photos. You can see that HDR nature photos are the most popular to take.
Does that mean HDR nature photos are all bad? Of course not! This post will give you examples of when you should and should not use HDR.
Without singling out or bashing any other photographers work, take a close look at this screenshot of what a Google search on HDR nature gave me when I first posted this article.
 Opinions on photographs is certainly very subjective.
For my tastes, some of these HDR photos look fake and overdone to me
Don't get me wrong, taking nature pictures using high dynamic range is a great photography technique to use if done right. Whether you use the recently developed in-camera capabilities or HDR software, this technique helps overcome the technological limitations of the the sensors in your digital camera. But first, a quick definition of HDR photography.
What is HDR or high dynamic range photography
HDR photography is a technique used to capture a greater range of both the lightest and darkest areas of in your photograph. More details will be revealed in both the shadow and highlight tones of the photograph. Scenes that have too much contrast in lighting make it hard to see both details in the darkest areas and the brightest areas at the same time without using HDR.
Stunning HDR Nature Photo

how to take hdr photos
Just about all newer cameras can shoot HDR images. You just need a camera that can use any one of these 3 methods. Use a solid tripod for the best results.
- Set your camera on exposure bracketing or auto-bracketing mode (or a similar term).
- Set your camera manually to overexpose, properly expose, and underexpose your photo on 3 consecutive shots.
- Set your camera on RAW mode and then process the image afterwards, using 3 different exposure levels.
when to take hdr photos
HDR photography has evolved through a few stages and is now being used with much better results. Similar to the excessive blurring of images taken with a LensBaby, and also too much portrait image retouching, it's a technology that was overused used.
When a new technique or a new technology first arises, it is often overused. Just because a capability becomes available, that doesn't mean it should be automatically used. It takes some time to learn when to use the technology. Here are two examples of when HDR technique should be used:
- You should use HDR when your shooting landscapes and there's a lot of contrast within your scene. This happens a lot with the brightest of the sky compared to the shadowed land areas of your composition.
- When a scene has strong backlighting the shadow areas go to dark and you can't see the same details that you can with the naked eye.
is hdr good for photos?
Remember that HDR photography involves taking several different photos (usually 3 or more) of the same scene and combining them. If anything in your composition moves you'll lose some sharpness and maybe even have disturbing blurry parts in your photo. Your photo won't look as good.
when you shouldn't use hdr
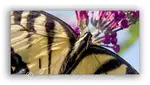
1. Don't Use HDR For Portraits
Combining more than one exposure of a person's face will result in unattractive portrait. Even the slightest movement will result in a lack of sharpness because there will be a slight change in the exact position/expression of your subjects face between each exposure.
You can however, limit the application of the HDR technique to the stationary shadow and highlight areas of the composition to enhance the overall appearance of the scene.
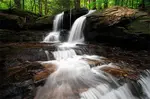
2. HDR With Moving Subjects
Motionless landscapes and nature scenes are the most common targets for using HDR techniques. When parts of the scene contain movement, such as leaves blowing in the wind or movement in water, are within the scene, you'll get distracting blur when combing those moving areas into a single photograph.
The multiple exposure technique of HDR is best used when everything within the scene is perfectly stationary.
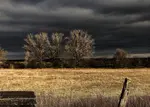
3. HDR With Contrasty Subjects
There are time when you want to keep the contrast where it is to get a certain look. Look at the contrasty photo scene below. I took this photo late on a steamy hot summer day. The air was brutally still. The gnats were viciously attacking me and the sweat was dripping down my face.
I shot directly into a mostly obscured sun and darkened the sky in Photoshop afterwards. The results were good enough for this image to be included in a display in an art gallery and as part of an outdoor exhibition in my hometown.

When Not To Use HDR
I chose to use HDR technique because I wanted to get a silhouette type of effect. I did do some editing, but it wasn't HDR in nature. Here are few situation when to avoid using HDR:
- HDR photography of people usually result in strange looking photos. You get strange flesh tones and often your subject will move between exposures.
- Don't use HDR when you have a softly lit subject with flat lighting. It looks very unnatural when you see the resulting image.
- Silhouettes should look like silhouettes and HDR photography ruins the appeal of this particular high contrast effect.
How hdr works - Example photos
How does HDR photography work?
HDR (High Dynamic Range) in cameras works by capturing multiple exposures of the same scene—typically bright, normal, and dark—and blending them to produce a single image with increased detail in both highlights and shadows.
It bridges the gap between what the human eye sees and what a camera sensor can capture in one shot, reducing overexposed skies and underexposed shadows
In layman's terms, you intentionally overexpose images to capture better details in the dark shadow areas and combine them with intentionally underexposed photos which will capture details better in the bright highlight areas.
You can accomplish this either in the camera with recently released cameras, or you can do it afterwards with HDR software.

Then you combine them using a variety of simple or complex photo editing techniques.
Look at these three nature pictures on the right. Not an award winning subject, but stay with me here for a second.
I combined the underexposed image on top with the overexposed image in the middle to get the photo on the bottom.
I used Adobe Photoshop using a simple masking technique to hide and reveal various parts of the two photographs.
The photographs are layers that are visually stacked on top of each other, exactly registered.
You cannot do this particular technique without a tripod. Any movement of your subject including the movement of leaves caused by the wind will prevent you from using this photography technique.
The overexposed photo in the middle is close to the correct exposure. Some of the highlights where the sun was striking the leaves were overexposed.
The path looked properly exposed. I revealed parts of the underexposed photo in the foliage area, so that the path became more prominent in the finished photograph.
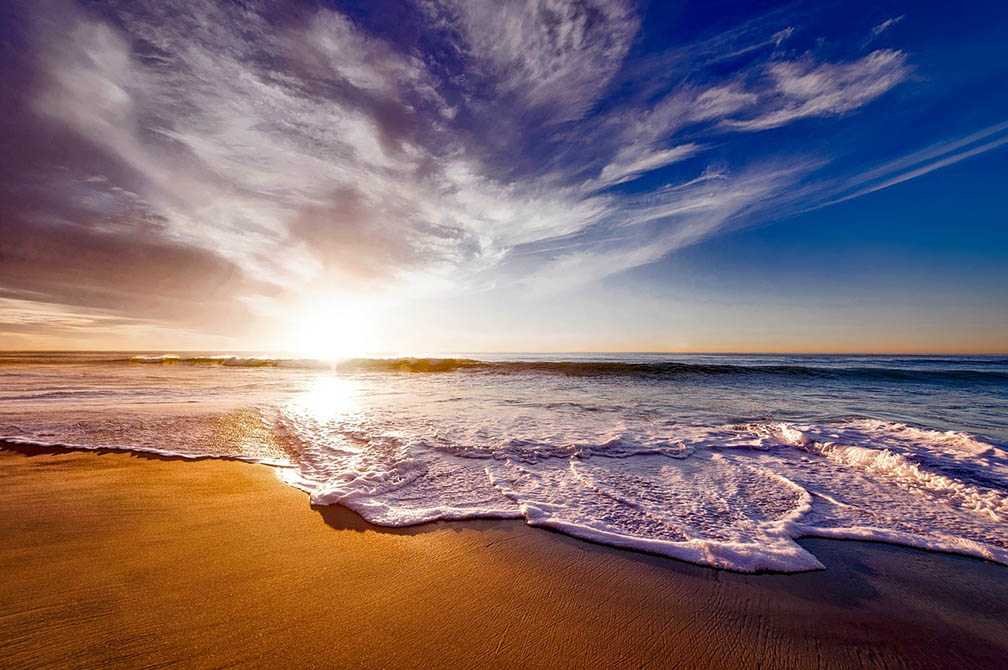
Stunning HDR nature photos
Using the right amount of HDR technique turns an overly contrasty scene into a stunning natural looking image. You can bring out the details in the shadow ares and maintain good details in the highlights at the same time.

software for nature pictures using HDR
This is just an introduction to the concept of HDR. I purchased Photomatrix Pro, which is software designed specifically to handle this technique. I never even opened the box. I was so sick of seeing overdone HDR photos that I was completely turned off to HDR. No offense to the makers of this fine software.
There are several other options that I have been playing around with for HDR photography, most notably right within recent versions of Adobe Photoshop itself.
Many of the very newest digital cameras have HDR capabilities built into their design. You simple set your camera to HDR mode and it will do the blending of exposures automatically. There are a lot of bizarre and unique nature and landscape photos using HDR techniques. Many of them are too surreal in my opinion. Sometimes when a new technology comes along it is at first over-employed.
Just because a technology exists does not automatically mean it is appropriate to use it. Don't get me wrong. Experimentation is a great thing to try. It is the root of expanding your artistic creativity. I recommend you remember what your intended result is, the making of an interesting photograph. It should come from your vision of what you want to express, not necessarily the need to use the latest technique like nature pictures-HDR.
The 3 Biggest Mistakes Photographers Make With HDR Photography
1. Ignoring "Halos" and Processing Artifacts
Halos are the annoying glowing white outlines that appear where a dark object (like a mountain or a building) meets a bright sky. They are a dead giveaway of sloppy HDR processing.
2. Brightness Inversion
"Light Inversion" (Flat Lighting)
With our regular viewing of the world around us, the brightness of things has a hierarchy. The sun is brighter than a tree, and a shadow is darker than a sunlit object. In brightness inversion photographers often brighten the shadows so much and darken the highlights so much that they accidentally invert the light.
This can show up with clouds being darker than the grass, or the inside of a room being brighter than the view out the window. This creates a "flat" image that lacks highlights for the eye to be drawn to.
Tonemap Overload
This is the likely the most common mistake with HDR photos. Tone-mapping is the process used to squash a large amount of contrast into a range your viewing screen can actually display.
Over editing make highlights look gray, shadows look unnaturally bright, and textures appear crunchy or "metallic.
When are hdr nature photos overdone?
HDR nature photos are overdone often when trying the technique for the first time. When the different tones of an image are manipulated too much the resulting photo looks fake and unnatural. If the technique is applied in the right amount, HDR photography will give you beautiful results that otherwise would not be possible when taking just one exposure of a scene.
Fortunately, you have the choice of shooting a regular non-HDR photo, along with also shooting multiple exposures for HDR technique, and achieving the best result in each case.
It's a great time to be interested in photography!


ABOUT BRUCE LOVELACE
Bruce is the publisher of this website. He is the author of the book "Improve Your Photography Instantly." Read more on Bruce on his Bio Page. He's been known as The Traveling Photographer ever since 1994. Read more about this website.
View some of Bruce's photos on Instagram. Visit the Facebook Page. Watch him on YouTube. Bruce runs photo workshops for kids and adults, and provides one-on-one photography coaching.
Digital Photography Education Location on Google My Business
You might also like:
Nature Photography Composition Tips- Guide on How to Nail it Everytime
Read these Nature Photography Composition Tips. Improve your digital photography technique.
Nature Photography And Multiple How To Resources About Nature Photos
There is a lot more to it than just finding the right spot. Use these nature photography tips to improve your photography
Photos of the Loyalsock Trail-Elevation Map and Helpful Information
Not a dedicated photography excursion, but you'll like these photos of the Loyalsock Trail. Loyalsock Trail facts. Video of Loyalsock waterfall photography
How To Take Storm Photos by Embarking on a Storm Chasing Expedition
Collection of remarkable storm photos. Will it be enough to entice you to try a storm chasing expedition and shoot your own breathtaking storm photography
Art Wolfe Books on Photography-The Type of Photography Art Wolfe Does
If you want to improve your nature photography quickly, just take a look at my favorite one of Art Wolfe books? Here's what you will learn from looking at his work

Recent Articles
-
Macro Photography Lighting Tips For Indoor Photography With Flash
Mar 29, 26 11:21 AM
 What is the best macro photo lighting set-up to use? Strobe lighting or spotlight? Several articles covering macro photography lighting tips.
 -
Nature Photography Composition Tips- Guide on How to Nail it Everytime
Mar 28, 26 01:46 PM
 Read these Nature Photography Composition Tips. Improve your digital photography technique.
 -
Are HDR Nature Photos Overdone? Answers to Your Questions About HDR
Mar 27, 26 03:44 PM
 Do you want high-impact HDR images rfor personal use? You're looking for the "wow factor" that High Dynamic Range provides. Is HDR photography still overdone
more posts on nature PHOTOGRAPHY
Improve your photography instantly. Get the 2 most important chapters of my photography book for free.