HOW TO POSTS: LIGHTING AND COMPOSITION
Neutral Density Filter Guide
WRITTEN BY: BRUCE LOVELACE
PUBLISHED ON: NOVEMBER 15, 2023
 My 10-stop ND Filter
This guide to the neutral density filter will answer all your questions. We'll start with the simple answer to the basic questions: what is a neutral density (abbreviated as ND) filter and what does an ND filter do.
A neutral density filter lets you change the amount of exposure in your photo. You reduce the light from reaching the sensor by using an ND filter. You can then use a much slower shutter speed or a much larger lens aperture opening.
Now we'll dive into more detail about why you'd want to use an ND filter, the different types of neutral density filters, and which ones to buy. We'll conclude with some interesting examples with and without filters, and I also share my own personal list of the ND filters that I use.
You'll also find a few helpful videos included on ND filters that are great for getting a better understanding of whether or not they're any good for the type of photography you want to shoot.
what is a neutral density filter?
A neutral density filter is a photographic filter that reduces the amount of light that strikes the sensor by a specific amount and causes no change in the color of the photographic image. ND filters enable photographers to use either a slower shutter speed or a wider aperture or a combination of both.
ND (neutral density) filters are made to equally dim all wavelengths of light. Think of an ND as a pair of sunglasses with a neutral tint that cut down on the amount of light so that you can take more creative photos.
 Exposure time was extended to 8 seconds with a ND filter attached.
This is the kind of interesting effect you can get.
There are 5 main reasons for why you would want to use an ND filter. Simply put, all 5 of these benefits will aid you in improving your photography.
why use an ND filter
You've probably asked this question: when should I use a neutral density filter. Here are the most common situations for you to use neutral density filters.
- To create motion blur in your photo on purpose by using a slower shutter speed. You'll be able to get more creative.
- To let you open up your lens to a wider aperture and reduce the depth of field and a blurry background.
- Photograph an eclipse.
- To slow your shutter speed enough so that you can synchronize the shutter opening with using a flash in brightly lit situations.
- To darken just the sky, you can use a GRADUATED neutral density filter.
how is nd filter strength shown
There are 3 different ways to show you the neutral density strength of a filter. The easiest of them to understand is by how many stops (f-stops) your exposure will have to be adjusted when you use a particular filter.

How much light these filters absorbed is expressed in either absolute density values like 0.3, 0.6, or 0.9, as f-stops like 1-stop, 2-stops, or 3-stops, or actual exposure factors like 2x, 4x, or 8x. They all mean the same thing in terms of how dense they are.
A 1-stop filter lets in 1/2 of the amount of light. A 2-stop filter lets in 1/4 of the light. A 3-stops filters lets in 1/8 of the light. So if you wanted to change slow down your shutter speed by 3 stops, you would use a 3-stop (8x, 0.9) filter.
neutral DENSITY chart
Each single f-stop of exposure adjustment needed could be done by doubling the exposure time or opening the lens aperture 1 full f-stop, like opening up to f/8 from 5/6. You'll really give yourself an advantage in all your photography if you have a deeper understanding of f/stops and aperture. Here is more on f/stops and aperture.

I use the ND 1000 10-stop filter more than any other. Using it will reduce the exposure by about 1000x, which is the equivalency of 10 f-stops of exposure. I like this strength because I can get really long exposures, sometimes up to 30 seconds even in bright conditions to get some really interesting effects.
The weaker strengths that only make up one or two stops of exposure adjustment aren't very popular. You can do just as well with your polarizer filter in many cases.
how does neutral density strength affect exposure times
In the chart below, you can see how each different neutral density filter strength affects exposure time (keeping the aperture constant). This example uses 1/60 second as a starting point and shows how each step in filter density doubles the required exposure time to maintain a properly exposed photo.

As an example of why I really like my 10-stop ND filter, look at the row in the chart above for the 10-STOP strength. Follow the row over to the third column and you'll see the exposure would be for 15 seconds. With no ND filter on the lens, that same exposure would take a shutter speed of 1/60 second. That gives me an idea range for photographing waterfalls, babbling streams, ocean waves, and even daytime pedestrians or automobiles with some interesting blur effects.
tips on how to use a neutral density filter
There are 3 issues that can arise while using ND filters. They involve color balance, focus and exposure. These challenges are usually insignificant when you're using the lower density filters like 1 or 2 stop filters. When you choose to use one of the stronger ND filters, auto-focusing and automatic exposure capabilities of your camera usually fall apart.
1. Adjust color balance
If you are using one of the cheaper ones, you may have to adjust your camera's color balance either before or after you take your photo. If you have time, it's better to adjust the color after shooting a test photo. Depending on how dense of a filter you're using, you may have to shoot using both manual exposure and manual focus. I shoot in RAW format to cover myself no matter what the color balance is.
2. MANUAL focus
Under really dark situations, when your ND filter is attached to your lens, your camera's autofocus likely won't work. You've got to focus manually. The challenge is that it's really difficult to do that if you can't see your subject through the viewfinder.
The solution is to focus manually first without the filter in place. Then carefully attach the filter, without disturbing the lens at all, and make your exposure.
3. exposure adjustment
Your camera's automatic exposure system can also come up short when you have particularly long exposures of several seconds or more. You'll make out better by setting your camera on manual exposure. Again, you can do a test exposure to get a good starting point and then use a chart or the scale below to adjust either aperture or shutter speed, based on the number of F-STOPS your ND filter is rated.
ND filters are rated for approximate exposure factors, but they're not perfect. You can calculate what changes you need to make in your exposure and then adjust, based on viewing your test photo on your LCD screen or using your camera's histogram.
How to adjust your exposure with ND filters
No matter where you start on the shutter speed scale, you would adjust your shutter speed to the right one block for each F-STOP of ND filter.
neutral density shutter speed scale
 Shutter Speed in Seconds and Minutes (MIN)
neutral density filter vs polarizer
Although they both reduce the amount of light getting to your sensor, there is more to neutral density filter and polarizer differences than just strength. Although it's true that you can use a polarizing filter to diminish the amount of light that reaches your sensor, it's not that significant to get the full benefits we just listed. If you only need one or two stops of light reduction, a polarizing filter can be used instead of an actual neutral density one.
 The visual difference between a 10-stop ND filter vs Polarizing filter.
Polarizing filters are more typically used for reducing reflections, darkening a blue skies, and increasing saturation. Polarizers should be the screw-on type so that you can rotate it and adjust how the filter affects the image.
types of nd filters
When it comes to these filters, you have a few options on how you use them and what they actually do for your photography. One such filter is one where the shading "graduates" from one side of the filter to the other.
GRADUATED NEUTRAL DENSITY FILTERS.

Similar to these sunglasses, the graduated ND filters are often made so that the dimming effect starts halfway across the filter. This enables you to darken the sky, but keep the exposure in the foreground unchanged.
These particular sunglass are tinted brown. ND filters have a neutral tint so that the colors in your photo remain accurate.
Just like ND filters, graduated filters come in different strengths. The most popular graduated ND filter absorbs 75% of the light reaching the sensor. In other words only 25% of the light makes it to the sensor. Another way to express this is that it's a 2-stop filter, or a .6 power. The chart below shows the relative popularity of graduated ND filter strengths.
Are graduated Neutral Density Filters Popular?
Graduated ND filters were extremely popular with landscape photographers when they shot with film cameras. Nowadays, many landscape photographers choose to shoot without them and make adjustments to specific areas of the photograph with software.
 The two most popular graduated neutral density filters are 2-stop and 3 stops, which means they reduce the light to 1/4 or 1/8 on the darker end of the filter.
By far, the biggest users of the GRADUATED filters are landscape photographers. Check out the photo of Denali below. I got really lucky, having only been driven by it on the way in and on the way out from Kantishna. I was able to photograph Denali (Mt. McKinley) twice and both times being able to photograph it without cloud cover.

Shooting the photo above without any way to darken the bright sky would have resulted in washed out details in the top of the photo. The "straight" shot I took with no ND filter had no details in the sky. The edited photo is a better rendition of how the scene looked to me when I observed it that day.
screw-on vs. rectangular filters
In terms of how to use ND filters, there are two main types. You can use the type that screw onto the front of your lens just like your typical UV protection filter does. Alternatively you can get a screw on adapter and slide rectangular shaped filters into the holder
 Typical screw-on filter
 Filter Holder
Here is a comparison of the popularity of these two ways to use neutral density filters on your camera.
Gadget geeks prefer the rectangular or square filters that are held in place in front of your lens. You can move them up and down so that you don't have to place the dividing line (usually the skyline) smack dab in the middle of your composition.

RECTANGULAR FILTERS. I find them a bit cumbersome to handle and adjust. I'm a little clumsy at times and it's easy to get fingerprints on the rectangular filters. Sometimes your light changes real fast and you don't want to be fiddling around with awkward accessories when you want to get the shot fast.
A big advantage of the rectangle filters is that you can use them on any of your lenses without worrying about sizing. You'd just need to have the different adapter ring size. For me this would be no issue at all because I only use 2 different zoom lenses and they both are 77mm in size anyway.
The biggest benefit of all is that with rectangular graduated filters you can be precise on adjusting exactly where you want the darkening effect to start within your composition. You can match the gradation to the horizon, which is not necessarily going to be in the middle of your photo.
SCREW-ON FILTERS. Screw-on filters are easier to handle, but give you no flexibility on placing the level where the transition from dark to clear is. Essentially, you have to adjust your composition to match the filter, rather than be able to adjust the filter to your composition. If you have different sized lens barrels, screw n adapters or different sized filteres would have to be used.
Simply put; screw-on filters are more convenient. Rectangular filter are more versatile.
VARIABLE ND FILTERS.
Variable Neutral density filters are a unique option. They have a rotating feature that allows you to essentially dial in the amount of dimming you want. They're not perfect in optical quality, but they are amazingly convenient. This video shows how you can use a variable neutral density filter to help blur the background on purpose.
On a bright day you can use an ND filter to cut down the light so that you can use a wider open aperture to get less depth of field, and blur the background out of focus.
Variable ND filter sometimes will give you a shift in color. They can cost up to $400, but are a great tool for photographers and for videographers who want to shoot correct frame rates and f/stop combinations. I have no personal experience with using the rotating variable ND filters.
nd filter video
If you have a few minutes, this video by my friends over at BHPhotovideo does an outstanding job of giving you a nice explanation of ND filters and your options. The video covers some great tips on how to use a neutral density filter. I'm also biased because they use one of the same cameras that I do, a Canon 70D.
With and without nd comparison
Let's look at a couple of neutral density filter examples. Getting a real long exposure while photographing water is the classic example. Move your cursor on and off the photo below to see the different effect you can achieve by using an ND filter. In the example below the shutter speed without a filter was 1/320 second and all the motion was frozen. The second exposure, with my neutral density filter in place, was 8.0 seconds.

What do you think? You can comment on this post at the end of the article
Photographing water is by far the most common use of using one of these filters. Here's another example of the smooth creamy look you'll get with this technique.
I used a 10-stop ND filter in this photo of the fountain at a nearby park. You'd have to return at nighttime-but the fountains aren't running then-to try and create an image like this if you didn't have an ND filter.

which neutral density filter to buy
It's relatively easy for manufacturers to make them, but it's very challenging to make one of these filters that is perfectly neutral in color. This is particular true with really strong filters like 10 stop filters that reduce the light by a factor of 1,000 or more. This is why these filters can get very expensive. The more expensive ND filters seem to have a thinner profile and a more accurate color transmission.
what lens filters do I personally use?
10-STOP ND FILTER MADE BY BW. I like this amount of density for creamy looking water blur during daylight hours.
3-STOP ND FILTER MADE BY BW. Three stops is just enough when I need a moderate adjustment to shutter speed or aperture.
CIRCULAR POLARIZER MADE BY TIFFEN. Although it can be, I really don't use this filter to slower the shutter speed. I use a polarizer filter to reduce reflections, enhance color and occasionally darken a blue sky.
XUME MAGNETIC LENS FILTER ADAPTERS. I would really hate to shoot daytime extended exposure photos with them. They make attaching and removing your ND filter lighting fast.
LENS FILTER WRENCH.This is a big helper if you get a filter gets stuck on your lens. If you're out in the field and your filter gets jammed onto the lens, you're screwed without one-pun intended.
SOFTWARE "FILTERS" IN ADOBE PHOTOSHOP AND LIGHTROOM. For the ultimate control of adjusting exposure with gradients that can be placed anywhere, adjusted and overlapped. It can be time consuming and the software ain't cheap. If you like playing around with software these filters can be fun. More on this exact topic is next.
Graduated ND filters vs. Photoshop or Lightroom
Some people like their eggs fried and some like them scrambled. Either way they'll be cooked and ready to enjoy. Back in the days when photography used film you had no options. If you wanted to darken the sky, you had to use a graduated neutral density to darken the sky without darkening the foreground.
Despite the emergence of versatile software, many landscape photographers still prefer using graduated filters. To me, a good image is a good image and you can get there either way. Here is a comparison of using a graduated filter versus using software like Photoshop or Lightroom.
use software
- You have control on exactly where the gradient is applied and how strong it is within your composition.
- It take more time to edit your photos, rather than get it right when you make your exposure.
- There's a learning curve on understanding the various settings and how they affect your image.
- You feel like your cheating by manipulating reality into something that really didn't exist.
use a filter
- You don't have to mess around with expensive software on your computer.
- You'd rather spend time with your camera than with your computer.
- You just prefer to get it right "in camera" for the simplicity of the experience.
- You have to carry filters with you, handle them with care, keep them clean, and do your best to avoid any stray reflections.
are magnetic filter rings any good for using nd filters?
Here's a video on how the Xume magnetic filter adapters-that I mentioned earlier-work. You can use them with any of your screw-on filters to make it super fast and easy to add or remove a filter from your lens.
I tried to make this neutral density filter guide as complete as possible. Feel free to leave your comments below. Thank you!

INFORMATIVE
NOT HELPFUL


ABOUT BRUCE LOVELACE
Bruce is the publisher of this website. He is the author of the book "Improve Your Photography Instantly." Read more on Bruce on his Bio Page. He's been known as The Traveling Photographer ever since 1994. Read more about this website.
View some of Bruce's photos on Instagram. Visit the Facebook Page. Watch him on YouTube. Bruce runs photo workshops for kids and adults, and provides one-on-one photography coaching.
Digital Photography Education Location on Google My Business
other camera lens filters
3 Filters For Macro Photography That Will Give You Spectacular Photos
Imagine what it would be like to take your own eye-catching close-ups without having to buy an expensive macro lens.The 3 kinds of filters for macro photography and which ones should you use.
Why Use a Polarizing Filter? Before and After Polarizers Comparison
Polarizing filter explained. What it does and how it affects your pictures. Side by side comparison sample polarized photos
Explanation of Other Photography Definitions
Why One Photographer Will Never use Graduated Filters Again
Recent Articles
-
Macro Photography Lighting Tips For Indoor Photography With Flash
Mar 29, 26 11:21 AM
 What is the best macro photo lighting set-up to use? Strobe lighting or spotlight? Several articles covering macro photography lighting tips.
 -
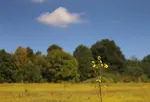
Nature Photography Composition Tips- Guide on How to Nail it Everytime
Mar 28, 26 01:46 PM
 Read these Nature Photography Composition Tips. Improve your digital photography technique.
 -
Are HDR Nature Photos Overdone? Answers to Your Questions About HDR
Mar 27, 26 03:44 PM
 Do you want high-impact HDR images rfor personal use? You're looking for the "wow factor" that High Dynamic Range provides. Is HDR photography still overdone
 -
20 Photography Tips-How To Instantly Improve Your Photography in 2026
Feb 09, 26 07:09 PM
 How to easily get better photos. These simple photography tips will steer you in the right direction for quickly improving your results as a photographer.
 -
How To Fix an Underexposed Photo + Simple Steps to Avoid Dark Photos
Feb 08, 26 07:18 AM
 Dark photos? How to avoid an underexposed photo. 5 simple ways to on how to fix underexposed photosed photos. Easy correction steps

 Graduated Neutral Density Filters
Set Of 3 And Holder
These rectangular graduated filters slide into a holder and let you adjust the transition line up or down to suit the subject best.

Strong neutral density filters give you special effects with long exposure photography. The waves splashing onto these rocks were transformed into a fog during the long exposure.
Improve your photography instantly. Get the 2 most important chapters of my photography book for free.