HOW TO POSTS: LIGHTING AND COMPOSITION
Beginners photo exposure Guide
How shutter speed, ISO, and aperture work together
What is photo exposure? By definition it is the total amount of light allowed to hit your digital camera's sensor. Take just 10 minutes to read this article and you'll get a better understanding of how exposure works in photography.

Photo exposure is controlled by 3 camera settings, shutter speed, aperture and ISO. The length of time of the exposure is called shutter speed. How big the opening is that lets in the light into the camera is called aperture. The sensitivity of the camera sensor to the light is called ISO. These three settings must be balanced with each other for the right exposure.
With digital photography it's critical to start with the right exposure to get the best quality photo in the end. Under exposure can cause reduced sharpness and an increase in digital noise. Over exposure can destroy the highlights and cause an unnatural shift in colors. When too many pixels are overexposed your photo is referred to as blown out.

how to get a good photo exposure with your camera
Whether you adjust your camera to a totally automatic setting, a creative semi-automatic mode or choose to go with a manual camera setting. It will help you if you briefly check out the following posts individually on the 3 photo exposure factors and get a better understanding of each.
- Shutter Speed. How long the shutter is open to let the light into the camera. Understanding shutter speed.
- Aperture. How big the opening is in the camera lens. Detailed Explanation of Aperture
- ISO. How sensitive the sensor is, how much light it needs to get the right exposure. You can use Auto ISO too.
Here's what happens when you change any one of the 3 exposure settings and you keep the other 2 settings unchanged. The correct exposure in shown in the middle section of the photo below.

The section of the photo on the left shows what would happen to the exposure if you increased any one of the 3 exposure settings by a factor of two. In other words, if you doubled the exposure. This is referred to as 1 stop overexposed. This is how you can get an overexposed photo if you made any of the following changes:
- Doubled the aperture opening of the lens. Example: changing the f/stop number from f/8 to f/5.6.
- Slowed down the shutter speed by 1/2. Example: changing the shutter speed from 1/60 to 1/30 second.
- Doubled the ISO setting. Example: Changing the ISO from ISO 400 to ISO 800.
You really need to understand what all the settings on your camera mean and how to use them to your advantage. Here's my advice. Play around with them when your NOT photographing anything important. That's right. Use the 3-step method below to become a master of photo exposure.
- Pick the same subject to photograph using different settings.
- Use your camera manual as a guide to see how you can change your settings.
- Look carefully at the results you get and see how the exposure settings change your photo.
Have fun with this. Adopt the curiosity of a child and make it playful to experiment without any caution. Each of the three exposure variables is explained in more detail below.
You can set your camera to automatically set all of these for you. In most cameras it may be called "Auto" or "P" for Program. However, if you want to become a better photographer, a basic understanding of the three elements that effect your picture exposure will help.
Adjusting any one of these three settings individually on your camera will affect your photo's exposure. See the Photography Exposure Triangle Illustration below.
The words in white, inside the triangle tell you what will be effected by changing that camera setting. All three of the areas inside of the triangle may effect image sharpness in one way or another.
The photo exposure triangle

Shutter speed, aperture and ISO work interdependently on each other to get your exposure right. If you change one of these settings, then you or your camera would have to change one of the other two to maintain the same exposure.
You'll can get a better grasp on how to get the correct exposure in manual mode once you understand the photography exposure triangle.
1. iso affects exposure
You can see in the photo of the exposure triangle that under the ISO is the word NOISE. Digital noise refers to random bits of data that affect the quality of your photo. A higher ISO setting can result in an increase in that digital noise in your images. How much digital noise you can tolerate is subjective. Just know that it's there and increases as your ISO setting increases.
2. how shutter speed affects photo exposure
As the shutter speed slows more light can enter into your camera. Shutter Speed can affect how much or how little blur may occur, pending on how long that window, called the shutter, is open.
A fast shutter speed lets less light into the camera but may stop you from getting blurry photos. Alternatively, you may want to use a slow shutter speed to create blur on purpose to give the feeling of action or speed.
You can see from the 4 photos, of the billiards table below, how shutter speed effects motion blur. All 4 photos were taken almost immediately after impact of the cue ball into the rack of balls on the pool table.
Even though I didn't strike the cue ball very hard to break the rack, I had to use 1/200 of a second to freeze the action. The photo exposure stayed the same because the camera was set on an automatic setting and the camera adjusted the aperture to compensate for the changes in shutter speed.
 Shutter Priority Setting
This camera setting is called Shutter Priority. It's usually marked as an "S' or a "Tv" on your camera mode dial. It means you set the shutter and the camera automatically sets the aperture.
If you are forced to use a slow shutter speed to get a good exposure with your photo, consider using a monopod. It is probably one of the most convenient, but seldom used pieces of photography equipment that beginners don't know much about.
There are a lot of choices available and you should read up a bit on them to get the most out of Using a Monopod.

How shutter speed affects the amount of motion blur
In this setup of the billiard balls, the cue ball came in from the right side of the photo to "break" the rack of balls at a similar speed in each of the four photographs. Once the shutter speed was quick enough, it froze the action and you can't detect any motion blur.
3. aperture and exposure
Closing down the size of the aperture reduces the exposure. An f/stop of f/11 only lets in half as much light as an f/stop of f/8.
 depending on which way you go.") How changing the aperture (f/stop number) affects exposure
How changing the aperture (f/stop number) affects exposureAperture affects the depth of field. Depth of field is the range of close and far things that remain sharp and in focus within your photo. A small aperture is a small opening and will give you a large depth of field. This is a good camera setting when you want things close and far from the camera to be in focus.
 Aperture Priority Setting
Look below to see how the smaller aperture (f/22) gives you more depth of field. Remember that larger f-stop numbers mean smaller apertures. On the left I focused on the male mannequin.
At f/1.8 there is very little depth of field and the female mannequin is completely out of focus. In the middle photo, I focused on the female mannequin, again using a camera setting of f/1.8 for the aperture. Mr. Photo Mannequin is now out of focus.
 and how it affects depth of field.") The size of the aperture affects what stays in focus
The size of the aperture affects what stays in focusOnly at an aperture setting of f-22 were both in focus. To get them both sharp, I actually focused at a distance in between my two subjects using my 85mm f/1.8 lens. This camera setting is called Aperture Priority. It means I set the aperture and the camera automatically sets the shutter speed to get the right photography exposure.
how iso affects photo exposure
ISO means sensitivity to light. It used to be called ASA. Both ISO and ASA are acronyms for organizations that set standards for sensitivity. The only thing you really need to know is that higher ISO means your camera sensor is more sensitive to light. It won't need as much light to get the right exposure.
ISO 100 was considered the normal standard. The advancement in technology and improvements in camera sensors have changed the "normal" ISO to be much higher for digital cameras now. Correct image exposure won't be affected by your ISO setting if you have your camera set on an automatic setting.
High ISO's create digital noise and lesser quality images. Depending on how high you set your ISO, it may not even be noticeable unless you are making very large prints.
 High ISO means lots of digital noise
 Lower ISO such as 100 or 50 will produce the finest quality, grain free images that your camera is capable of. Bigger cameras with larger sensors generally perform better at higher ISO camera settings with less noise.
The variation of brightness in our visual world is amazing. Our eyes do such a great job of adjusting that we don't realize it. If we compare the amount of light when sunshine strikes snow with the amount of light there is in a darkened room , it is literally thousands of times brighter.
Camera sensors do not have as big of an exposure range as we humans do, so it's important to get the correct photo exposure for your pictures to come out their best.
Keep the photo exposure triangle in the back of your mind and you will understand how changing one camera setting will affect another.

Most cameras will give you an adequate photo exposure that is close enough for the average snapshot in the majority of situations.
Remember, if you want to improve your photography in more unusual photographic situations, it is important to understand the photo exposure triangle and how shutter speed, aperture and ISO are related and the effect they have on each photograph. We all want to know how to get the correct exposure in photography. I hope this article helped.
Keep shooting. Keep learning. Keep improving.


ABOUT BRUCE LOVELACE
Bruce is the publisher of this website. He is the author of the book "Improve Your Photography Instantly." Read more on Bruce on his Bio Page. He's been known as The Traveling Photographer ever since 1994. Read more about this website.
View some of Bruce's photos on Instagram. Visit the Facebook Page. Watch him on YouTube. Bruce runs photo workshops for kids and adults, and provides one-on-one photography coaching.
Digital Photography Education Location on Google My Business
You might like these
How To Fix an Underexposed Photo + Simple Steps to Avoid Dark Photos
Dark photos? How to avoid an underexposed photo. 5 simple ways to on how to fix underexposed photosed photos. Easy correction steps
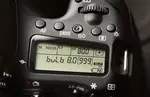
What is Bulb Exposure And How to And Why Use Bulb Mode To Take Photos
What is the bulb exposure mode setting and tips on how to use it. 6 examples of when you should use the "B" bulb setting on your camera for breathtaking photos
What Does Blown Out Photo Mean And How To Fix a Blown Photo
You've heard the expression blown out photo before, but what does blown out mean in photography. Simple explanation and simple fix to blown out pictures

Recent Articles
-
Macro Photography Lighting Tips For Indoor Photography With Flash
Mar 29, 26 11:21 AM
 What is the best macro photo lighting set-up to use? Strobe lighting or spotlight? Several articles covering macro photography lighting tips.
 -
Nature Photography Composition Tips- Guide on How to Nail it Everytime
Mar 28, 26 01:46 PM
 Read these Nature Photography Composition Tips. Improve your digital photography technique.
 -
Are HDR Nature Photos Overdone? Answers to Your Questions About HDR
Mar 27, 26 03:44 PM
 Do you want high-impact HDR images rfor personal use? You're looking for the "wow factor" that High Dynamic Range provides. Is HDR photography still overdone
 -
20 Photography Tips-How To Instantly Improve Your Photography in 2026
Feb 09, 26 07:09 PM
 How to easily get better photos. These simple photography tips will steer you in the right direction for quickly improving your results as a photographer.
 -
How To Fix an Underexposed Photo + Simple Steps to Avoid Dark Photos
Feb 08, 26 07:18 AM
 Dark photos? How to avoid an underexposed photo. 5 simple ways to on how to fix underexposed photosed photos. Easy correction steps
 -
10 Useful Nature Photography Tips For Beginners That You Must Know
Jan 31, 26 08:12 PM
 Want to take better pictures of nature? These simple nature photography tips are sure to help you take better digital photos with your camera.
Improve your photography instantly. Get the 2 most important chapters of my photography book for free.