HOW TO POSTS: LIGHTING AND COMPOSITION
depth of field comparison
WRITTEN BY: BRUCE LOVELACE
PUBLISHED ON: NOVEMBER 10, 2023
So, you want to find a depth of field comparison. This updated article will give you several comparisons of depth of field and give you a simple 3-step method to try it on your own. You'll get a better grasp of this concept if you take a hands-on approach and experiment with a few different situations.
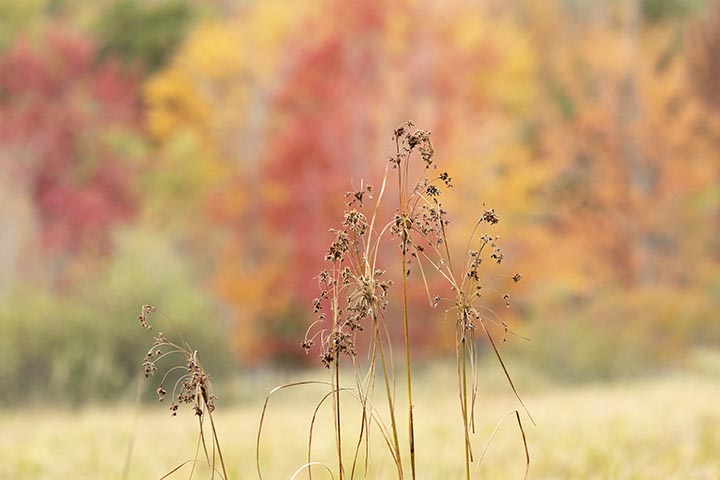
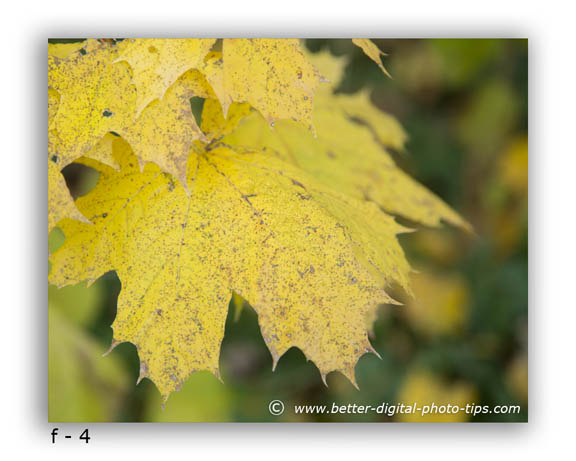
Look at the photo below. It's a great example of a situation where you want a shallow depth of field.
Let's face it, you learn more when you try something yourself, rather than just read about it. Try this with your own camera and you'll find out how a comparison of f/stops will show you the depth of field changes you'll get.
The comparison below was done by using a consistent distance between your camera, subject and background. The only difference in these three photos was the aperture (f/stop ) was changed. The camera automatically adjusted the shutter speed and that does not affect depth of field.
In the 3 photos of the maple leaf below, you can see the background is somewhat out of focus in all 3. This situation is shown in the first diagram shown below these comparison images.
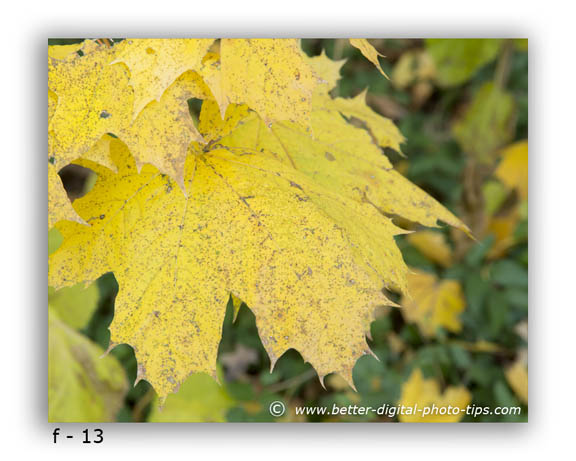 1-Background somewhat sharp
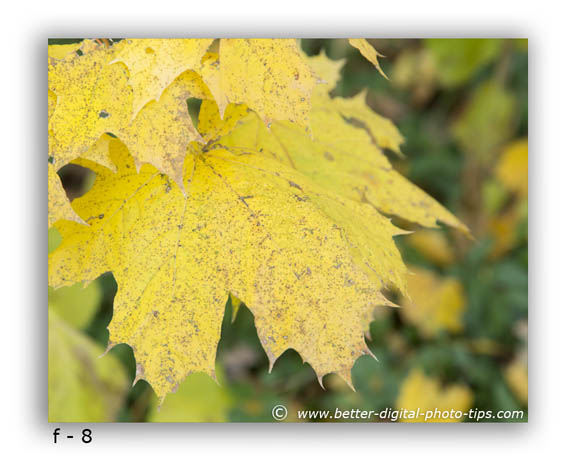 2-background is somewhat blurry
 3-background is blurriest
Despite using a very small aperture of f/13, the background is still somewhat blurred in image #1. The subject is so close to the camera that sharp focus falls off quickly even though the background was only a few feet away.
Look closely at all three leaf photos to really notice the subtle differences in this comparison of depth of field. The differences are caused by only changing the aperture. Changing the aperture is the most often discussed factor when photographers try to control the depth of field because it is often the simplest to change.
The diagram below (1) shows the close camera-to-subject and subject-to-background distances which were present in the maple leaf photos and are also important factors in determining how much depth of field you'll get in your photograph.
 Subject and background are close
Now we'll compare that with a different situation. If both the subject and background were more distant from the camera, as is shown in diagram 2, an aperture of f/13 would render both the subject and the background in sharp focus.
 Subject and background are distant.
Often you get a more pleasing photograph with a blurry background or narrow depth of field because you have created more visual separation between subject and background.
At f-4 you can see the the background is significantly out of focus as well as parts of the main subject, the brightly colored maple leaf. Taking the photo with a full-sized-sensor, Canon 5d Mark III, using a telephoto setting of 105mm at f-4, and having a close subject distance all are contributing factors that give us a shallow depth of field.
In the scenario diagrammed below (3), you would need to use a tiny aperture, have a very small camera sensor like those in a cell phone camera, or have a very wide-angle lens setting to get both subject and background in focus at the same time. Composing with a close subject and a distant background is the technique to use when your really want your background to be significantly out of focus.
 Subject is close. Background is distant.
If this depth of field comparison is all a bit too Geeky for you, you might want to read the page again and try to get just a basic understanding. Other related articles include a samples of deep depth of field and a general discussion about depth of field.
Depth of field comparison simulator
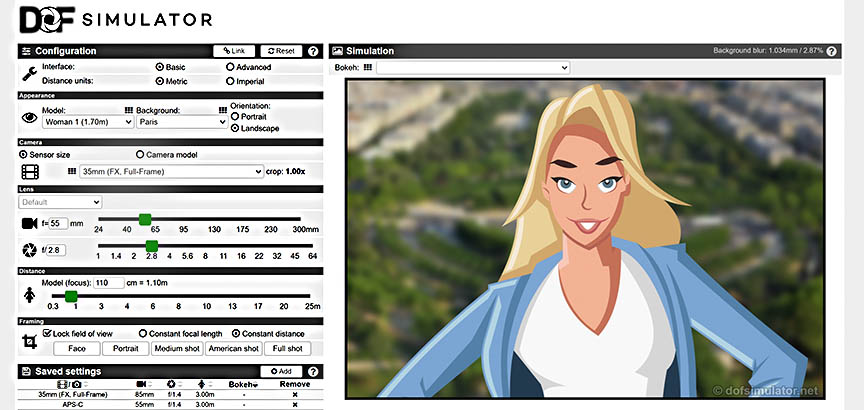
If you'd like to see examples of these different scenarios in real time, I found a great tool to use. You can simulate changes in f/stop, lens focal length, subject, and background distances check out this online depth of field simulator.
The website has a great feature where you can change the settings and save them to an illustration and compare the depth of field with other settings. Somebody put a ton of work into it and you'll find it very useful to visualize how the different factors affect the depth of field.
how to do your own depth of field comparison
Here's the simple 3-step method to doing a comparison of photos with different depth of fields. Try this depth of field experiment. It will help you see how the settings you use with YOUR lens mounted to YOUR camera affect depth of field.
- The best way to frame in your subject the exact same way for each of your test shots is to use a tripod to hold the camera perfectly still.
- Use a shutter cord or the camera's self timer to prevent any motion blur from camera movement.
- Use Aperture priority mode and let you camera pick the correct shutter speed for the right exposure.
1. choose the right subject and background distances
Try photographing a subject that is somewhat close to the camera and where the background is not too far behind that. Use a tripod so that when you try the smallest aperture, the resulting slower shutter speed won't give you any unsharpness from camera movement blur.
 Shoot a photo where both the subject and the background are fairly close.
2. only adjust the aperture
Doing an aperture depth of field comparison is the most common and adjusting the f/stop (aperture) is the most widely used method to control your range of things in focus.
Use an aperture priority camera setting so that you can change the aperture (f/stop number) and your camera will adjust the shutter speed to keep your exposure just right. Shoot 3 photos. Start with one using the smallest f/stop number your lens will go to, then one with the largest f/stop number, and one f/stop that's in the middle of the first two settings.
3. compare the three different DEPTH of field photos
Look at the three photos you took and see how the depth of field changed at the various lens aperture settings. Now, find a new subject or shoot with different subject and background distances. Shoot a few different subjects with various distances using the same technique.
find other articles relating to depth of field comparison
Looking for more articles on other topics? Use the search box below and be specific with your search words or use one of the links below my signature for related articles on this site. Have a blast with your photography!
Search for a new topic on this site:


ABOUT BRUCE LOVELACE
Bruce is the publisher of this website. He is the author of the book "Improve Your Photography Instantly." Read more on Bruce on his Bio Page. He's been known as The Traveling Photographer ever since 1994. Read more about this website.
View some of Bruce's photos on Instagram. Visit the Facebook Page. Watch him on YouTube. Bruce runs photo workshops for kids and adults, and provides one-on-one photography coaching.
Digital Photography Education Location on Google My Business
