HOW TO POSTS: LIGHTING AND COMPOSITION
What is Auto ISO?
 Auto ISO can be found in the
menu under ISO settings.
You've read about it but don't quite understand what, how, and when to use AUTO ISO. You're not the only one with questions about this camera setting.
Auto ISO is a great tool to help you get good exposures in certain unique photographic situations that we'll cover. This post will give you a simple explanation of this underused camera setting and answer those questions in detail. Okay, let's dive in.
1. WHAT IS AUTOMATIC ISO. That's the first question we'll answer.
Auto ISO is a camera setting that automatically chooses the right sensitivity, the best ISO number, to a number that will make your digital photograph come out with the right exposure. It enables photographers to set aperture and shutter speeds to desired settings and lets the camera determine the best ISO for a good exposure.
Setting the ISO to automatic is a powerful tool, but let's start with a basic review of what a regular ISO setting does. It's the setting you choose on how much light your camera sensor needs for a good exposure. Think of ISO as a scale of how sensitive your camera's sensor is to light.
Auto ISO Example for portraits
Here's a perfect example of when I chose the Auto ISO setting for a specific situation. In the photo below, the lighting was dim. I wanted to shoot with the widest aperture possible as well as the slowest shutter speed without triggering any blur from camera movement.
 and a slow shutter speed.")
Using a higher ISO setting is a way to decrease the need for as much light to reach the sensor and still get a good exposure. Setting the ISO to a lower number increases the need for light to reach the sensor and will give you the best quality in your photographic image. The following chart gives you an idea of the typical range of ISO settings that are available to you for DLSR cameras.

You can go into your camera's settings menu and select the ISO you want or you can use the Auto ISO camera setting. Just like it sounds, it means it's the camera setting that enables your camera to automatically pick the ISO setting for you.
Setting your camera's ISO to automatic is a great advantage for you to try in several situations. That helps you pay attention to the other details (control of motion blur and depth of field) when taking your photo and not getting caught up in having to adjust your ISO for each photo you take.

You want to improve your photography to more than just a snapshot level and you also want to move past shooting everything in Auto mode. You can play around with trying aperture priority and shutter priority camera settings, but what about setting both the f/stop and the shutter speed and have the camera choose the ISO setting for you?
2. How does auto iso work with the other camera settings
You can use auto ISO mode with aperture priority, shutter priority, and manual mode. You can review these camera settings here.
 Shutter Priority
SHUTTER PRIORITY is the dominant mode to use for sports and action photos where you want to set the shutter speed to freeze the action or get just the right amount of motion blur intentionally.
If your set on automatic ISO, the aperture (f-stop number) will stay open wide and your camera will decide on the best ISO for a good exposure.
 Aperture Priority
APERTURE PRIORITY is used by portrait photographers and landscape photographers who want to control the range of things in their photos that are in sharp focus, also known as the depth of field.
When you use aperture priority with auto ISO your camera has the shutter set at a speed that's just fast enough to avoid blur from camera shake.
**MANUAL MODE.** This is the best mode to use with Auto ISO setting. Think about this. Wouldn't it be cool to have total creative control and be able to set both the aperture and shutter and get the right exposure in any photographic situation? Well, now you can with Auto ISO. This is what it was designed to do.
Shooting with your camera set on Automatic ISO and manual mode will give you the ability to set your shutter speed exactly where you want it to be, combine that with the f/stop that gives you the right amount depth of field you want, and let your camera do the rest.
This is a great thing for you when you are shooting in rapidly or dramatically changing light conditions. Your camera can automatically adjust much faster than you can and still give you the shutter speed and f/stop you want.
Increasing the ISO is really just increasing the amplification of the signal the sensor got during the exposure of the light that was present. Your camera's lowest ISO setting doesn't use any amplification. At high ISO settings, the amplification is large and increased noise results in the digital photo.
3. when is auto iso good?
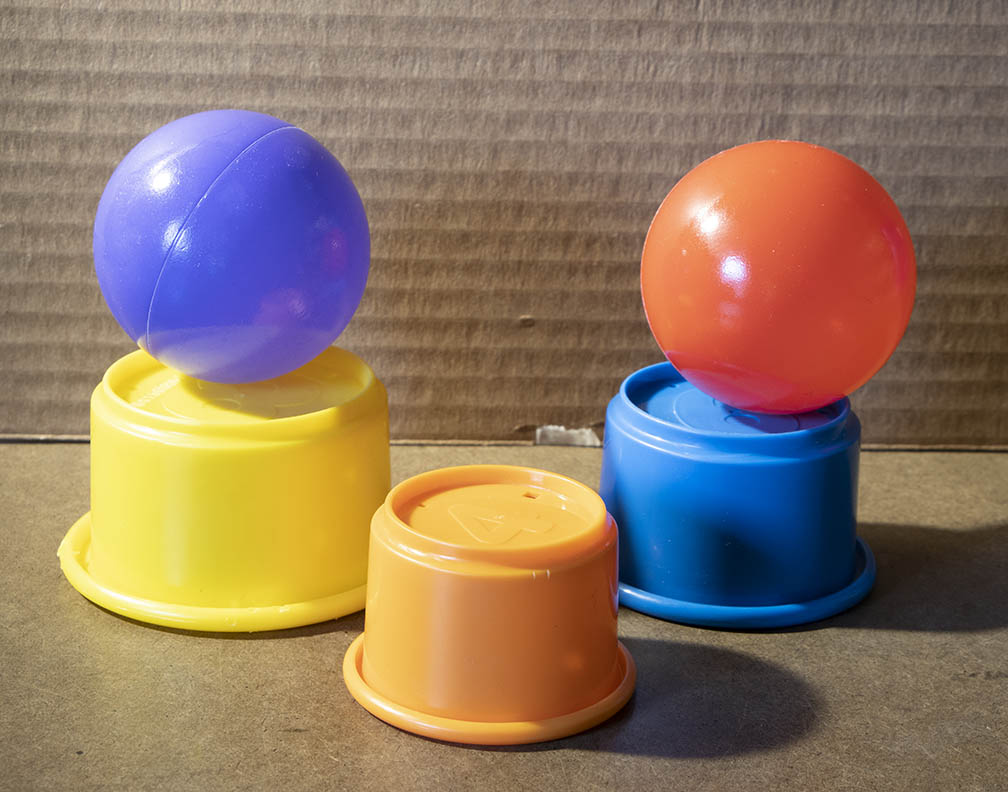
Here is a good example showing you a situation where you would want to have your camera automatically set the best ISO setting. I set my exposure dial to manual because I wanted to set both aperture and shutter speed to create a different effect. See the comparison below
 Aperture=f/13 Shutter speed=2 seconds
(Camera decided on ISO of 320)
SharpEr Subjects with TRIPOD
I used a small aperture to have the billiard balls more in focus and I had a tripod to avoid camera shake so I could use a slow shutter speed of 2 seconds .
 Aperture=f/1.8. Shutter speed=1/320 second
(Camera decided on ISO of 5000)
hand held STILL LIFE
I used a wide open aperture of f/1.8 so that the billiard balls in background were out of focus. I used a fast shutter speed of 1/320 second to freeze any motion blur.
Another good example of when you'd want to use the auto ISO setting is when photographing birds in flight. They're moving real fast and may fly into shade or sun areas or fly to an area with a different background brightness.
 Situation for AUTO ISO
You need your shutter speed at a minimum of 1/000 second to freeze the action. You also want to shoot wide open at the biggest aperture for fear that you'll miss the shot if the lighting conditions aren't great. You could set the f/stop at its widest opening or stop down f/5.6 or f/8 to give yourself a little latitude in depth of field.
Then you can leave the choice of the best ISO setting up to your camera to decide and still get the proper exposure for a successful photograph.
4. when is auto iso bad
Auto ISO is bad when the image quality suffers so much that it detracts from the photo. It's a subjective thing. There may be times when digital noise is desirable, but usually we prefer to have the digital noise from high ISO settings not be noticeable.
Look at the comparison of 2 different ISO sample photos of the same subject below. Moving your computer cursor over the photo reveals the high ISO (25,600) version. Sliding your cursor off of the photo shows you the ISO 250 sample photo. Study them closely.
Shutter speeds were .3 seconds for ISO 250, and 1/320 second for ISO 25,600.
You can also that the super high ISO version has a noticeable color shift. When your camera decides that it needs a extremely high ISO setting to get a good exposure, you'll end up with a loss of quality to some degree.
Super high ISO settings cause your photos to have a lack sharpness and they come out with a lot more digital noise. Digital noise can be described as a grainy look, often with out of place colored pixels.
You can avoid this degradation in quality by limited the maximum ISO in the ISO Range section of your camera's menu system. See the example below on a Canon camera.

You can set both the highest and lowest ISO settings for your camera to use when it's set on Auto ISO.
How much noise is acceptable is very subjective. I rarely go above ISO 500 with my small sensor point and shoot camera, but go much higher with my DSLR cameras. With my full frame sensor camera (up to ISO 2000) and am still very happy with the results for portraits.
5. How to use Auto ISO in Manual Mode
Nikon and Canon menu listings can be seen in this post and it’s beyond the scope of this post to point to every camera model’s exact location. Refer to your owner’s manual for more information on how to set the Auto ISO maximum.
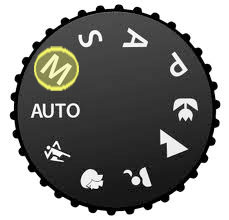
- You first set your camera on manual exposure. Look for the "M" on the mode dial or in your camera's menu.
- Then set both the shutter speed and set the aperture to the settings you want, based on the subject and lighting.
- Finally, dial in your ISO to "A" for auto.
You'll learn more by experimenting and changing either the shutter speed or aperture and observe what happens. You've got this. It take a bit of playing around and you'll learn how your camera responds. Have fun with this!
Your camera will select the needed sensitivity of your sensor to the proper ISO level to get a good exposure. Exposure isn't always perfect. But, just like aperture priority and shutter priority, you can tweak exposure levels if needed with software.
 Exposure Triangle
You can use the automatic ISO setting with aperture and shutter priority too, but you give up the control of that component of exposure and the camera's choice likely won't align with your ideas of what you want to do.
6. how can you Adjust The Range You want in Auto ISO?
 Auto ISO Range Setting
- You can go into your camera's menu and look for "ISO Setting."
- Select "ISO Range" and there is where you can limit the minimum and maximum ISO settings independently.
If you're concerned about image quality at those super high ISO setting you may want to limit the highest ISO in Auto at ISO 1600, rather than the maximum ISO like 25,600. Jump ahead to ISO question #7.
what's The History of Auto ISO?
It's been around since 2004 on Nikon DSLR cameras and Canon followed with this feature on its 7D about 5 years later. Since then, due to the increase in sophistication of digital camera features, auto ISO capability is included on a lot of cameras.
It's only been more recently that it's become more of a topic of discussion on photography blogs and in the world of digital camera talk. There's been an ANTI-AUTO-ISO stigma in the digital photography world for two reasons.
1. AUTO-PHOBIA. Pros and advanced amateurs like us don't want to be accused of using automatic settings. We're control freaks and we want to take control of our camera settings. "Automatic is for amateurs."
Well, really that's what's great about being able to set your f/stop and shutter speed. You've got the creative say in both of these exposure settings.
2. NOISE-PHOBIA. One of the big limitation in the past was the noise and reduction in image quality at higher ISO settings. Not so anymore. The camera sensor technology and post image capture processing has dramatically improved. So much in fact, that you can get great quality at high ISO settings.
The justifiable concern for using an amplified higher ISO is becoming almost a non-issue.
Video on Auto ISO
This video is a little lengthy, but it's really worthwhile to watch if you have a few minutes. It covers a lot of good information on this topic. Steve Perry is Nikon shooter, but we won't hold that against him. ( :-P)
My own Auto ISO Challenge
I've been stuck on aperture priority mode from habit because of all the portraits I shoot. Portrait photographers like to concentrate the control of focus and sharpness on both the subject and the background.
I'm the first one to admit I'm guilty of not venturing out of my comfort zone at times and trying something new. In order to grow as a photographer, I set my cameras ISO setting on "A" for an entire day to force me to learn too.
Does this mean I'll totally convert over to using Auto-ISO entirely? No, but now I've got experience with it so I'm more comfortable to do so when it's called for. Should you switch too? Yes, you should give it a try. I think you'll be pleasantly surprised at how much fun it is to set both f/stop and shutter speed.
7. why set ISO to a low number
There are 3 reasons why you may want to use a low ISO camera setting, whether you set it manually or limit your Auto ISO range to just very low numbers.
a. setting iso low for ACHIEVING a slow shutter speed
 Intentional blur
You want a very slow shutter speed.
This could be because you want a little bit a little bit of blur in your photo, perhaps to create the feeling of motion or speed, or you want that creamy effect when photographing a waterfall.
In brighter situations, even with your lens opening set to its smallest setting, the shutter may have to be fast to get a good exposure and you may want it to be slow for one of the special effects we just mentioned.
b. setting iso low for ACHIEVING a large lens opening (aperture)
You may want to use a large lens aperture to get a shallow depth of field. This is a great way to have your subject in sharp focus, but have the background purposely out of focus.
If your scene is brightly lit, you want your lens sensor to be less sensitive to light so that you can use a wide open lens setting to get a shallow depth of field.
c. highest quality
The most well known reason for using a low ISO setting is to get the highest quality image possible. When your camera is at its lowest ISO setting, you're not amplifying the signal and you will get the best looking image file with good sharpness and without digital noise.
8. WHY SET ISO TO A high NUMBER
Whether you use Auto ISO or set it manually, sometimes you're forced into jacking that baby up high. Generally, you need a high ISO setting under darker shooting conditions. Here are 3 situations where you want to use a high ISO.
a. freeze the action
A higher ISO setting gives you the advantage of being able to use a fast shutter speed to freeze the action because the shutter is open such a shorter time frame.
This helps you with sports and wildlife photography as well as being able to get sharp pictures without using a flash in dimly lit situations.
b. shoot with high depth of field
If you want both close objects and farther away objects to all be within the range of sharply focused objects, you want a large depth of field. You'll have to use the smallest aperture (lens opening) with a large f/stop number, like f/16 or f/22.
Landscape photographer use small apertures in most of their images because they want both the foreground and the distant background to be in good sharp focus.
c. you can't use flash
When it's too dark and you can't or don't want to use flash you've got to increase the sensitivity of your sensor. You should use Auto ISO or set your camera to high ISO manually.
Taking photos at a rock concert or photographing a basketball game or wrestling match are just 3 examples where flash photography may not be possible. Another example is with night time photography where you aren't using a tripod.
9. When You Shouldn't Use Auto ISO
There are only a few specific instances where setting ISO on auto does not serve you well.
- When you use flash it won't work properly.
- When you are controlling the light rather than using existing light, such as when you are shooting photos in a photo studio with strobes or floodlights.
- When it's super bright you're going to be on your camera's lowest ISO setting (often 100) so that your shutter speed and aperture are at reasonable settings.
Summary of Auto ISO
I know this was a lengthy post to the simple question of what is auto ISO. Congrats for making it through! I hope it helped you. You may want to skim over it a second time to reinforce some of the ideas.
Auto ISO makes sense when you, as the creative photographer, want to have control over shutter speed and aperture and don't want to worry about setting the ISO.
To search for any other topic on this website, use the search box below. For related topics to ISO and camera settings you can use the links below my signature.
Search for a new topic on this site:


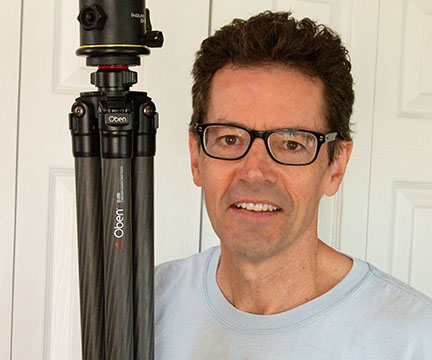
ABOUT BRUCE LOVELACE
Bruce is the publisher of this website. He is the author of the book "Improve Your Photography Instantly." Read more on Bruce on his Bio Page. He's been known as The Traveling Photographer ever since 1994. Read more about this website.
View some of Bruce's photos on Instagram. Visit the Facebook Page. Watch him on YouTube. Bruce runs photo workshops for kids and adults, and provides one-on-one photography coaching.
Digital Photography Education Location on Google My Business
You might like these
Basic Explanation: How Cameras Work For Beginners-Means Better Photos
This simple diagram and explanation will help you take better photos. How Cameras Work. Easy way to understand shutter speed and f/stop.
Which is Sharper, Raw vs JPG? Is Raw Better Than JPG. Simple Answer
You want sharper photos so you need to know which gives you sharper and better photos. Article reveals a surprising suggestion.
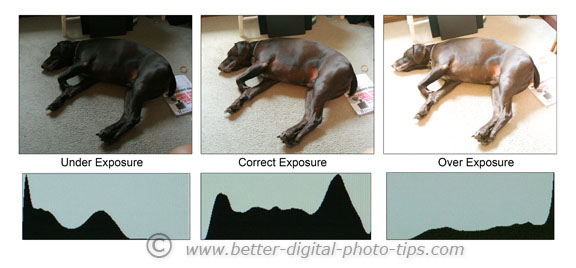
What is a Histogram in Photography And How It Can Be Helpful For You.
Digital photography histograms. Simple explanation of what is a histogram and why you should even care.

Recent Articles
-
No More Blurry Faces! Family Photo Hacks for Sharp & Stunning Photos
Mar 26, 24 08:08 AM
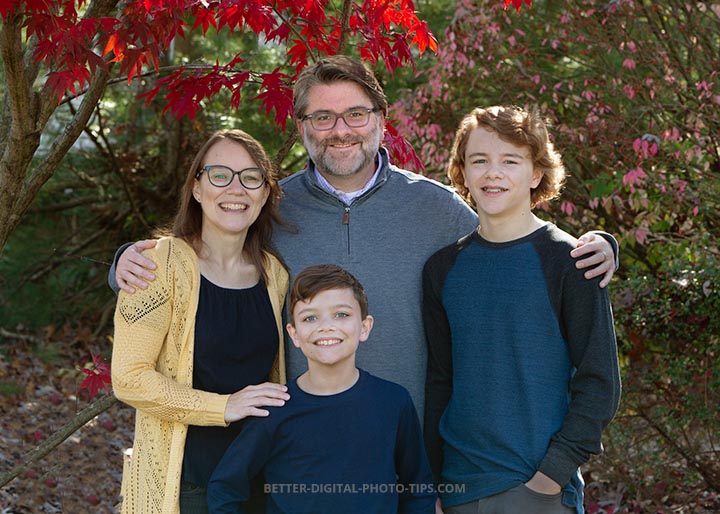 The right camera settings and a little planning will give you stunning sharp family portraits. Helpful guide to sharp family portraits
 -
How To Do Baby Poses (10 Classic Poses For Babies That You Can Copy
Mar 22, 24 07:17 AM
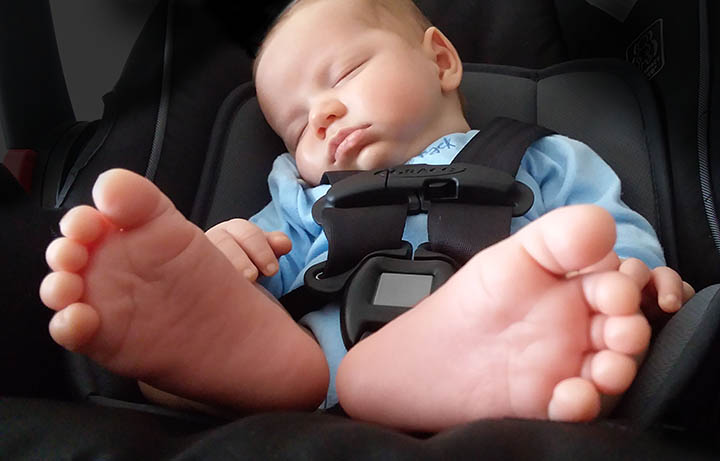 Learn heartwarming newborn baby posing. Simple baby poses you can copy. 10 Easy to copy portrait photography poses of babies
 -
20 Photography Tips-How To Instantly Improve Your Photography in 2024
Mar 21, 24 06:13 AM
 How to easily get better photos. These simple photography tips will steer you in the right direction for quickly improving your results as a photographer.
 -
What Is A Kit Lens Good For And How To Get The Most Out of One
Mar 09, 24 12:39 PM
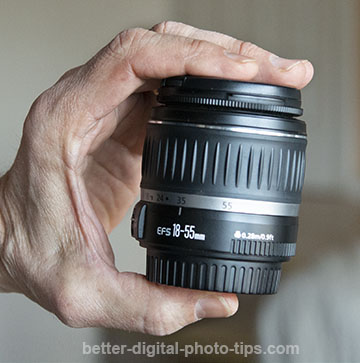 Are kit lenses any good and what are kit lens good for? Advantages and disadvantages. Helpful guide to getting the most out of a kit lens
 -
Why Are USB Flash Drives So Popular. Weird Flash Drives You'll Love!
Mar 06, 24 11:34 AM
 Unique, creative, and weird flash drives. Are they any good and why are flash drives so popular? Helpful guide.
 -
Successful Family Portrait Photography-The Skills You Need to Have
Mar 02, 24 06:19 AM
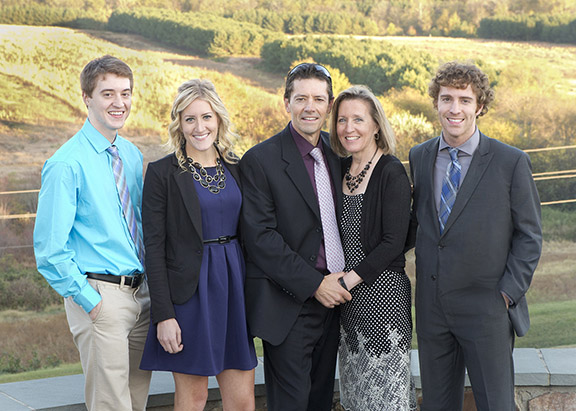 The skills you need to have in order to create great family portrait photography. Beginners guide to the know-how for photographing families.
You might like these
5 Vital Tips For Taking Digital Photography For Beginners To Use First
For beginning photographers, tips on how to start. Improve your photography. Simple tips to start with. Top Five Tips for Taking Digital Photography.
Beginner Tips for Night Photography-Guide To Nightime Camera Settings
Many beginners don't shoot photos at night because night photography seems challenging.Get ideal photos with these settings. Beginner tips for night photography
10 Useful Nature Photography Tips For Beginners That You Must Know
Want to take better pictures of nature? These simple nature photography tips are sure to help you take better digital photos with your camera.
Digitize Old Photos. Seven Great Reasons to Restore Your Old Photos
Seven Reasons to Digitize Old Photos and Restore Them To Live Again.
How to become a concert photographer starting with no experience
It's exciting. It's fun, and you can make some money doing it: How to become concert photographer with no experience
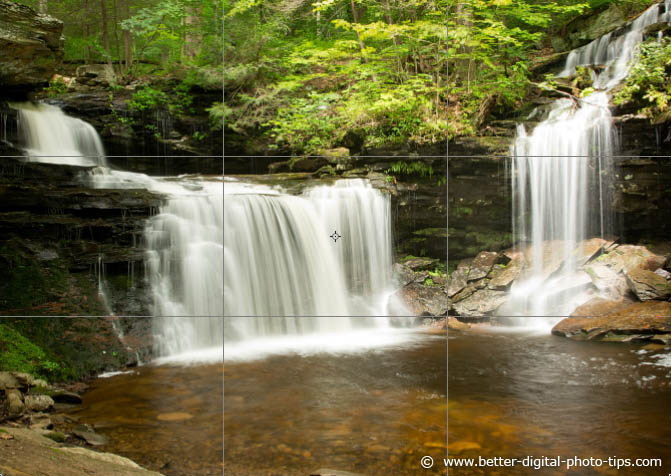
How to Photograph WaterFalls - Two simple Waterfall Photography Tips
It's a common photography subject with some commonly ignored challenges. How to photograph waterfalls-digital photography tips


Improve your photography instantly. Get the 2 most important chapters of my photography book for free.