HOW TO POSTS: LIGHTING AND COMPOSITION
Beginner Tips for Night Photography
This guest post on beginner photography tips for night photography was written by Rebecca Van Ommen. Some images have been added by me.
Shooting photos at night can be challenging for beginners. Your subject won't be as visible in the night as they are in the day. Your camera settings in the day won't be able to capture photos the same way at night.
The transition to night photography means you must fix the settings of your camera and change the way you shoot photos.
How To Shoot Nighttime Photos - Beginner's Video Guide
Watch this helpful video on camera settings to use for night photography. It will give you a great basic understanding before you start shooting nighttime photography on your own.
Here are several ways for beginners to shoot photos well at night:
1. use a tripod and a camera remote to avoid camera shake
 My newest tripod
When you shoot in the day, automatic mode will create decent photos on your camera; all you must do is point-and-click. However, taking excellent night photographs require long exposures which take a longer time to capture. You need to account for the settings of your camera such as the ISO, Aperture and Shutter Speed in order to come out with the best photos at night.
During the day, a photographer may use their body to hold the camera up. At night, using your body to support the camera will result in a blurry photo caused by camera shake. In order to capture the best night photos, you want to make sure that the image is steady and won't be affected by your hands trying to keep the camera up.
Using a tripod and a camera prevent camera shake from appearing in your photos, especially at night.
tripod
Use
a tripod in order to keep your hands free to take the photo and the
images will be free of camera shake. You don't have to worry about
missing a specific shooting angle because the tripod will keep your
camera in the angle you want to shoot from.
 Remote Trigger
Another way to prevent camera shake is with the addition of a camera remote. The camera remote prevents camera shake because your hands are not touching the camera when taking the photo.
You have a remote to take the photo for you. When you take the photo with your hands there is still a possibility that the camera will begin to shake.
There are numerous types of camera remotes you can choose from. Camera remotes are available in wired and wireless forms.
2. Use Manual Mode Instead of Automatic Mode to Capture Your Ideal Photo
There's nothing wrong with using automatic mode at night but, your camera will always try to compensate for the lack of light.
When you use your camera's automatic mode, all you need to do is point at a scene and click the shutter to create a photo. At night, automatic mode will require you to use flash or make your images look low quality and grainy to compensate for the lack of light.
Unlike automatic mode, manual mode gives you more control over the settings of your camera. That means the camera won't overcompensate for the lack of light in your photos or create an image that is pitch black. Using manual mode for your night photos gives you more control over the settings of your camera such as aperture, shutter speed, and ISO.
SHUTTER SPEED. Shutter speed is the amount of time that your camera shutter stays open. Shutter speed is measured in fractions of a second such as 1/4th, 1/250th, 1/500th and so on. However, your camera can also take photos with your shutter open for multiple seconds or even minutes. There are two types of shutter speed:
FAST: A fast shutter speed will make the image look like it's frozen in time. You will usually see images taken with fast shutter speed in sporting events as this involves a lot of motion. However, since the camera is capturing an image quickly, less light enters the camera which may produce an underexposed image.
SLOW: Slow shutter speeds are used for shooting subjects at night because it allows for light to enter the camera. Taking photos with slow shutter speed will allow additional light to enter the frame but subjects may come out blurry especially when the subject is in motion.
APERTURE: The aperture is the opening in your lens that allows light to enter the camera.
We can compare the camera aperture to the pupils of the human eye. The more available light there is, the smaller our pupils get. The less light there is available, the larger our pupils become. The aperture of a camera is measured in f-stops. The higher the number of the f-stop, the smaller the aperture. The lower the number of the f-stop, the larger the aperture.

Here is an example below of the different types of aperture and how it affects an image. A small aperture would show an image that is dark and prevents a large amount of light from entering the camera. When it comes to shooting at night, you want to use a large aperture in order to let the camera take in as much light as possible.
.")
The way you change your aperture settings depends on the brand of camera you have. Read your camera instruction manual to learn how to adjust the aperture of your camera. Then you can use manual mode when you shoot night photography.
3. Apply High ISO Settings to Create Brighter Images...most of the time
The ISO setting determines how sensitive a sensor in your camera will be to light. During the daytime, photographers prefer to use the base ISO setting that is usually at level 100 or 200 because the camera won't be very sensitive to light. Images captured at this setting will be clear but may come out underexposed if not properly set.
When you're shooting at night, using a high ISO setting makes more sense because you want to bring in as much light as possible. However, placing the ISO at the highest setting isn't always a good idea. Increasing your ISO levels also means the image will look grainy and come out at low quality.
To counter the low light and ISO settings, you can make your images brighter by adjusting the Aperture or Shutter Speed. Adjusting the aperture or shutter speed will result in brighter images without sacrificing the quality.
The three factors mentioned: shutter speed, aperture, and ISO all make up the exposure of your photo. Having proper exposure means your image won't look too dark or too bright.
The way to change your ISO settings depends on the brand of your camera. You will have to consult with your camera's instruction manual or check out videos on YouTube that discuss the settings of specific cameras. Here is more on controlling exposure.
4. Shoot Images in Raw Format to Maintain the Image Settings in Your Camera
Many photographers will shoot images and save them in JPEG format because it does not take up space in their memory cards. Many photographers prefer to save their files in RAW file format. Both file types have their pros and cons.
A JPEG formatted picture will decrease the quality of your image. In order to maintain the quality of your image, you want to save your images in RAW file format. However, RAW files are enormous and take up a lot of space in your memory card. The files may be large but, you will be able to maintain the image quality. Just make sure to use a memory card that is large enough to hold your RAW image files.

When
you save your photo as a JPEG file you immediately get a final
product that limits the number of edits you can do. The ISO, Shutter
Speed and Aperture can still be edited when you open a RAW file in
photo editing programs. A RAW photo allows additional post-processing
on the image that was captured. However, for the RAW image to become
visible, you need to convert the file from a RAW file to a JPEG file.
You will have to do a handful of photo editing and retouching in order to bring out the best in your image but, reading up online tutorials will help your photo editing efforts. Read blogs and tutorials from creative agencies that specialize in high-end photo retouching services such as Paper Boat Creative. They have features and tutorials for different kinds of photo editing to help you improve your night photos.
5. Take Test Shots & Adjust Camera Settings Before the Actual Shot
One of the best ways to create any photo is to take tests shots before conducting the actual photograph. The limited amount of light at night means you can't just use automatic mode to point and click with your camera.
You want to take test shots in order to find the right settings for your camera. The first shot may require an increase of shutter speed, decrease in ISO or a larger aperture. Tinkering with your camera settings during test shots will help your photo shoot become a breeze because you won't be spending time adjusting settings later.
If your test shots look too dark at first, you can then spend a few seconds adjusting by making your aperture larger to let in more light or decreasing the shutter speed for more light to enter the camera. Try to avoid increasing your ISO too much because the photo will look grainy.
Keep adjusting the settings of your camera and try another test shot until you have your ideal image for night-time. Here are 10 more helpful nighttime photography techniques.
final remarks on BEGINNER TIPS FOR NIGHT PHOTOGRAPHY
Primed for The Night
The lack of natural light can stand as a challenge for beginners. When you have a better idea of taking photos during the night, you won't experience the same difficulties as before.
Use a tripod and camera remote to keep your camera steady and adjust the settings of your camera as you take test shots. Play around with the holy trinity of photography: Aperture, ISO, and Shutter Speed. Find a good balance that will allow your night photos to come out the way you intend.
The size of your file is also important. You may be able to save space with a JPEG file but, the quality of your image will experience a severe downgrade and limit the edit you can do to photos.
RAW files maintain the high quality of your image and keep the settings of the photo as they were taken. You can conduct more photo editing on a RAW image but, this file type isn't as friendly to audiences.
Once you have your ideal settings, you will be able to capture ideal night photographs. - End of article by Rebecca Van Ommen
Keep shooting. Keep learning. Keep improving.


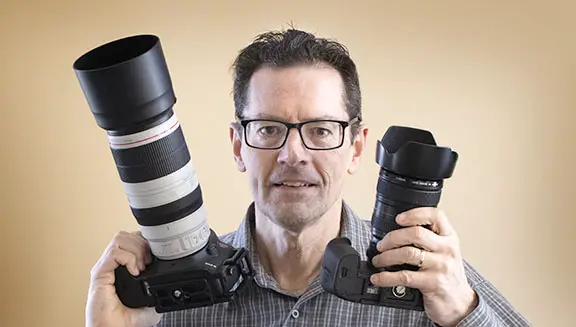
ABOUT BRUCE LOVELACE
Bruce is the publisher of this website. He is the author of the book "Improve Your Photography Instantly." Read more on Bruce on his Bio Page. He's been known as The Traveling Photographer ever since 1994. Read more about this website.
View some of Bruce's photos on Instagram. Visit the Facebook Page. Watch him on YouTube. Bruce runs photo workshops for kids and adults, and provides one-on-one photography coaching.
Digital Photography Education Location on Google My Business

You might like these
What is Auto ISO? Tips On When to use it and When Not to Use Auto ISO
Auto ISO Simple Guide. Questions and answers on when to use AUTO ISO and when not to use it. How you can use it to improve your photography.
What is Bokeh. Why It's So Important And How To Get The Best Bokeh
With multiple meanings and false definitions. Find out what is bokeh in photography. It's a simple way to improve your photos by controlling the out of focus areas of your subject. How to get the best bokeh effect
Basic Explanation: How Cameras Work For Beginners-Means Better Photos
This simple diagram and explanation will help you take better photos. How Cameras Work. Easy way to understand shutter speed and f/stop.
5 Vital Tips For Taking Digital Photography For Beginners To Use First
For beginning photographers, tips on how to start. Improve your photography. Simple tips to start with. Top Five Tips for Taking Digital Photography.
10 Useful Nature Photography Tips For Beginners That You Must Know
Want to take better pictures of nature? These simple nature photography tips are sure to help you take better digital photos with your camera.
Take Better Digital Pictures By Improving on 3 Elements of Photography
10 Photography Composition, Lighting and Exposure Tips. Use these photography tips to Take Better Digital Pictures.
ABOUT the author
Rebecca Van Ommen is the Executive Creative Director of Paper Boat Creative, a creative agency that specializes in high-end photo retouching, photo editing, and more. She was one of the youngest Art Directors for Getty Images in London. Her work has been published through some of the world's largest advertising agencies including Mother, AKQA and BBDO London. Rebecca loves to exercise in her spare time. She also enjoys bringing her daughter to photo shoots for inspiration

%20affects%20exposure%20%23exposuretips%20%23camerasettings%20%23shootmanual%20%23nightphotography)