HOW TO POSTS: LIGHTING AND COMPOSITION
10 Useful Nature Photography Tips For Beginners
This post about nature photography tips is a starting guide to give you some beginning ideas on how to shoot good nature photos. Photographing nature itself is so rewarding, but it is even more fun when your resulting photos look great. I hope you can find some inspiration here.

That's not my definition of nature photography. That's from Wikipedia, but I added the quote on top of a photo that I took on a trip to Alaska. Although you enjoy the great outdoors, realize that you can easily shoot nature photography indoors too. Insects, flowers and plants can all be photographed inside and are part of the natural world. But let's save that topic for a rainy day.
First, the big question about nature photography
Before we dive into the top tips for beginners and experienced nature photographers, we need to address an important question. What kinds of nature photography are available to have fun with and what type are you passionate about?
How do beginners go about taking great nature photos. I know what you're thinking. Nature photography involves anything to do with nature. Well, maybe it's not that simple.

beginners tips for shooting nature
Here are the 5 tips that every beginning nature photographer should follow. They're followed by 5 additional tips that are good for nature photographers at any level of expertise.
tip #1 - use the right lens
 18-200mm Zoom
Start with one good zoom lens. Period. Nature photography includes a huge variety of subjects, sometimes presenting themselves to you just seconds apart. Keep you equipment list short and focus on the photography-pun intended. Sometimes they're close by and sometimes they're more distant. Sometimes you're going to shoot a wide angle and sometimes you're going to choose a narrow angle.
You don't want to miss a shot because you're changing lenses. Although there is a small price you have to pay in image quality, use a lens that has a wide range of zoom capabilities, 7x or more. For APS-C (Canon) cameras or DX (Nikon) you easily find a lens that has an 18-200mm or at least an 18-135mm range.
That range will give you the ability to go very wide or very telephoto without ever having to switch lenses on the fly. Yes, you'll have minimal amounts of distortions or chromatic aberrations with these multi-purpose lenses, but not to the point where you'll feel any disappointment from the nature photos you get.
2. Use one or more COMPOSITION tips
 The Rule of Thirds
I see so many bad examples of composition technique it drives me nuts. All you have to do is learn a few of the many rules of composition. Your photography, whether it's nature or another genre of photography will iprove dramatically.
Really, just 5 minute of reading a good article on composition tips will make a marked difference in how much you like the photos you take. As one example of a useful composition technique, the rule of thirds was used effectively in this sunset photo of the sailboat.
There are several posts covering the rule of thirds on this web site and hundreds you can read elsewhere. When you're interested, I wrote a really in depth article covering the 12 elements of composition and 10 tips you can use right away in your nature photography.
3. it's all about your perspective
Everybody does it. They take the standard shots with camera at eye-level first. Don't get me wrong. That's not a bad place to start and get the "safe shot." But now, it's time to experiment a little. Change your perspective. Lower vantage points are often underutilized. Higher perspectives often require safety precautions and more effort.
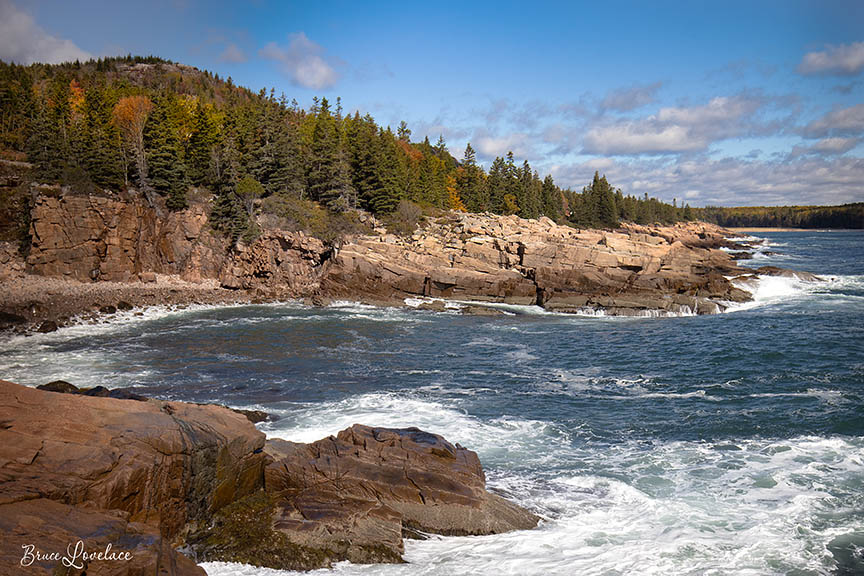
Check it out. Look what a change in position does to this shot of Bubble Rock in Acadia National Park. Look at how the background improves and how the 2nd perspective gives you more depth than the first. Shooting a few extra photos, all with different perspectives gives you several different photos to choose from.
 Perspective #1 - Forest Background
 Perspective #2 - Lake and Mountain Background
Look for taking photos from a different vantage points and also photograph your subject with a different zoom setting. Using a wide angle will exaggerated perspective. Using a telephoto will flatten perspective.
4. Go for simplicity

Great nature photography doesn't always have to be a wide perspective, full of subject matter. Try a few simple subjects that bring out the unique qualities of your subject.
You may not think of this photo of river rocks as a typical nature shot, but whatever nature subjects you choose, try a few simple compositions. In my mind, the color contrast in the reflection of the sky and the mountain was striking.
Some photographers shoot minimalist photography as their own personal style throughout all of the different genres of photography, not just nature photography.
5. Shoot some close-ups

It is easy to get caught up in the immense grandeur of nature and miss out on the macro world right in front of you. No it doesn't have to be a true macro photo, just shoot some of the tiny areas that you;re photographing.
Macro photography is always an option when you're shooting nature. You don't need to have a dedicated macro lens. I don't. I use extension tubes. They're small and very light to carry. Image quality isn't sacrificed and they're very affordable.
nature photography tips for advanced photographers
You've got the basic nature photography tips down, now let's take improve your nature photography even more.
6. look at and study the light that nature brings to you
I was on a photo nature hike. It was a beautiful fall day, with a warm breeze and blue skies and I was deep in the woods. Nothing spectacular here. Just an enjoyable experience!
For the photo above, I came upon an algae covered pond and looked across at a beautiful array of pastel colors, gently highlighted by the brush of a few filtered patches of softened sunlight.
Often the most interesting light is found very early and very late in the day. Photographer's use the term Sweet Light or Golden light for great nature shots and it's good lighting for portrait photography too.
It is a lifelong process. Even when you are not actively photographing nature, if you pay attention to how light is always around you, affecting everything you perceive, you become more skilled at seeing how light creates our interpretation of the visual world.
7. look at the colors nature provides us

I am always intrigued by the naturally occurring range of colors that are represented in nature. Rather than look at what your subject is, it is often helpful to only study the colors that are present in the scene in front of you before you take you photo.
I often create photos that don't have a center of interest, but rather record color patterns and textures.
In the nature photo on the right, I thought it was interesting to compose the picture with the yellow leaves surrounded by the blue sky, which was then framed in by the green leaves.
To get the right exposure, I actually had to underexpose the image. My camera's meter was "fooled" a bit by the dark underside of the shaded green leaves.
It is a common photo mistake to always rely on your camera's auto-exposure system to get the perfect exposure in all lighting conditions.
It analyzed the scene as an average situation and would have lightened the image up too much, resulting in overexposure of the sunlit yellow leaves.
nature photography tip #8
 1.3 Second exposure
Play around with your about shutter speed setting.
Take a second to think about shutter speed before you take your picture. I get it, our normal way of thinking is to want everything in your photo to look sharp. Not true!
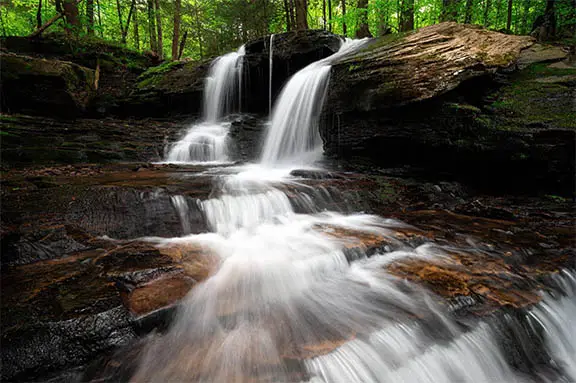
Most of the time you want a fast shutter speed to keep your nature shots tack sharp, but there are exceptions. If you want to capture movement in a picture of nature use a slow shutter speed.
Waterfalls, rivers, waves on the beach, and branches blowing in the wind, are great examples where intentionally having motion blur adds to the appeal of a nature photo. This technique requires a sturdy tripod and a remote trigger or cable release. The photo's exposure can vary from 1/2 second to several seconds, depending on the effect you want and the amount of light that is present.
For a complete understanding of using shutter speed to take you landscape photography to a whole new level you might be interested in this how to post I just wrote on shutter speed and landscape photography.
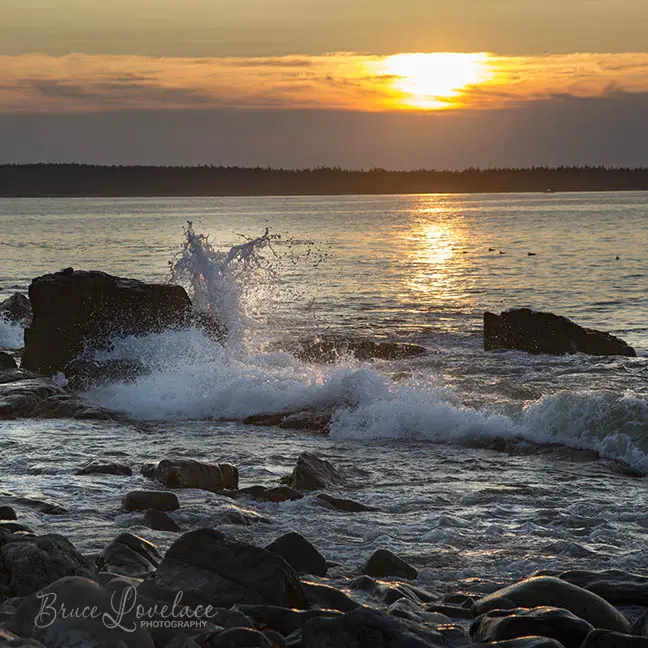
 8.0 Second exposure
One of the nature photography tips I got when attending a workshop with Tony Sweet was around the use of super long exposures. You can create surreal and sometimes abstract nature photos by leaving your camera's shutter open for several seconds.
This photo of the rocks was an 8 second exposure and the small waves that were hitting the shore line. Because of the extended exposure, the waves photographed more like a fog hugging the rocks.
9. nature photography equipment
You don't need specialized equipment to be able to take great pictures of nature. However, there are certain situations that specialized equipment will expand on what you can accomplish. When you graduate past tips for beginner nature photographers
I usually pack 2 Canon DSLR camera bodies with a wide-to-telephoto zoom lens and a longer super telephoto lens for wildlife. If I'm not on long strenuous hikes I add extension tubes for macro photography. I always have a tripod
Have a camera that has a zoom lens with a wide range of zoom. Purists will tell you that a prime lens give you the sharpest results, but for 95% of nature photographers zoom lenses are plenty sharp enough and their more versatile.
A prime lens means it has a fixed focal length-not a zoom. When zoom lenses are constructed there are compromises made in quality to allow it to vary the focal length. Although it's true to the supercritical, most viewers will never be able to tell by looking at a photograph if it was taken using a zoom lens or a prime lens.
Here are my own must-have added nature photography accessories:

A tripod will insure you get razor sharp nature photos. You'll also slow down, take your time composing your shot and learn to evaluate the best way to photograph a subject.

A polarizing filter will give you richer colors, particularly in the sky. I really like to shoot water scenes with and without a polarizer. You'll often get two very different looking images.

A camera backpack will make it easy for you to explore areas to photograph. It will also protect your camera equipment. It can be quite small if you don't need to carry food, water, or a jacket.
10. take the time to get enjoy what nature your experiencing
Why do I say this? Sorry if this questions sounds offensive, but why the hell are you photographing nature anyway? I'm guessing because you enjoy it. Well, don't get so obsessed with your photography that you fail to appreciate what is in front of you.
 Bruce - Enjoying Nature
I know I was very guilty of that when I first started going on solo photo excursions. I was too focused on the photography itself and didn't enjoy the journey enough. Now, I really make it an almost spiritual experience and I think my photography has improved as a result.
You can have a great time taking pictures of nature because you are combining two pleasurable activities: getting out in nature and also experimenting digital photography. If these nature photography tips (or any others on this web site) have helped you in any way, inspired you or have given you at least one valuable idea, please share.
Now let's get out there and make something awesome happen. Start Shooting!


ABOUT BRUCE LOVELACE
Bruce is the publisher of this website. He is the author of the book "Improve Your Photography Instantly." Read more on Bruce on his Bio Page. He's been known as The Traveling Photographer ever since 1994. Read more about this website.
View some of Bruce's photos on Instagram. Visit the Facebook Page. Watch him on YouTube. Bruce runs photo workshops for kids and adults, and provides one-on-one photography coaching.
Digital Photography Education Location on Google My Business
You might like these
Are HDR Nature Photos Overdone? Answers to Your Questions About HDR
What is it HDR photography? Is HDR good for photos. When should you shoot HDR it. When you should not use HDR technique. Are HDR Nature Photos Overdone. Answers
Nature Photography Equipment - Essential Gear You Need For Great Shots
Using the right technique is important, but you need the right gear for taking great nature photos too. Simple guide on the best nature photography equipment
How To Take Storm Photos by Embarking on a Storm Chasing Expedition
Collection of crazy storm photos. Will it be enough to entice you to try a storm chasing expedition and grab your own breathtaking storm photos.
Nature Photography And Multiple How To Resources About Nature Photos
There is a lot more to it than just finding the right spot. Use these nature photography tips to improve your photography
Photos of the Loyalsock Trail-Elevation Map and Helpful Information
Not a dedicated photography excursion, but you'll like these photos of the Loyalsock Trail. Loyalsock Trail facts. Video of Loyalsock waterfall photography
21 Inspirational Nature Photos That Will Help You Improve Your Photos
Inspiring words combined with Inspirational Nature Photos. Take some time to enjoy them together.


Search for a new topic on this site:
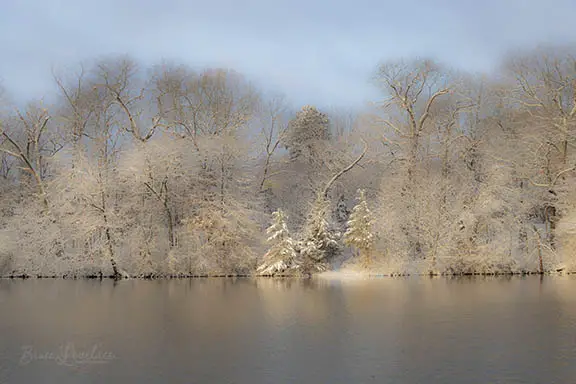
 Sunbathing Dragonfly
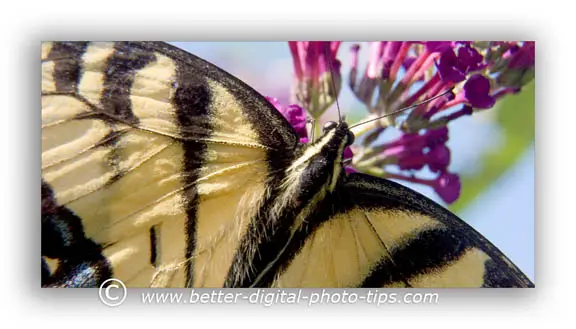
 Busy Butterfly
nature photography book:
Improve your photography instantly. Get the 2 most important chapters of my photography book for free.