HOW TO POSTS: LIGHTING AND COMPOSITION
macro photography tutorial for Point and shoot cameras
(beginners tips)
This article is a macro photography tutorial for you to use with your point and shoot camera or your cell phone. Surprisingly, you can take some great macro photos without having a DSLR. No doubt, there are a few limitations, but you can succeed, with the simple steps in this post.
You're going to follow a simple 4-step method. Alsos included are links to other useful articles on shooting close-ups. Okay, Let's dive in

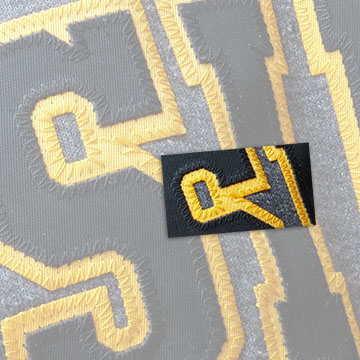
The first three macro shots, the solid yellow daffodil, the white hyacinth, and the college sweatshirt lettering were all shot with a basic point and shoot camera, a Fujifilm EXR, using the same 4 step method.
list of what macro gear you must use
TRIPOD. The only must have macro gear you have to start with is a decent tripod. When you're in real close to your subject, even the slightest bit of camera movement will be magnified and you'll get an unsharp image. Secondly, the depth of field is very shallow when you shoot up close, so your distance to subject must remain constant so that your focus is perfectly placed on the important part of your subject.
There are a lot of articles on tripods on the Better Digital Photo Tips website, but if you need some advice on the best tripod for macro photography here is a good place to start: Macro Tripod.
SUBJECT. Find an interesting subject. Although you can photograph almost anything close up and get some interesting shots, your chance of a really good macro photo is multiplied if you start with an interesting subject. Look for subjects with interesting lines, patterns, or textures. Get some more ideas for macro subjects.
optional macro photography accessories
None of these are necessary, but they are all helpful when you're shooting macro shots with a point and shoot or a DSLR camera. You can make your own reflectors out of any materials you have lying around or buy one specifically designed for macro lighting.
the 4 step method for macro photography with a point-n-shoot-camera
macro photography step 1

1. Attached your camera to a tripod. Not only will this aid you in getting a sharp and focused image, but also frees up your hands to modify the lighting if needed. You'll also want to use the self-timer setting on your point and shoot camera or an app or your cell phone.
Even when your camera is mounted on a tripod, you will cause camera jiggle if you use the shutter button when you make the exposure. Using the timer will allow the camera to fully settle on the tripod before the picture is taken.
step 2 - use macro mode
2. Set your camera to macro mode and aperture priority. Macro mode will give you the ability to get your camera fairly close to your subject. Point and shoot cameras often struggle to find the proper focus when shooting subjects so close. If your camera has a manual focus mode use it.
Having manual focus is a big advantage when shooting close-ups. It allows you to choose exactly what part(s) of the subject will be in focus, independent of where they are within your camera frame.
Set you camera to aperture priority exposure mode. You want to be able to control how much is in sharp focus. It's so important is that you have a basic understand of aperture and depth of field.
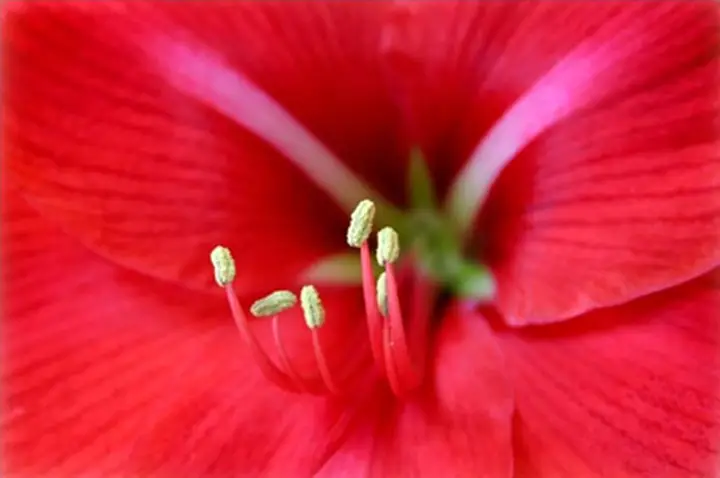
I wanted everything in focus with the close-up of these white hyacinth flowers, so I set the camera on aperture priority and closed down the lens to f/13. Small aperture-they are the larger f/stop numbers-give you the biggest chance of getting closer and farther objects in focus at the same time.

When the subject is almost entirely a very light subject, you may have to add a little exposure compensation (overexpose it) to get it to come out with the proper brightness. The best way to judge exposure when the image is still in the camera is to check out its histogram.
step 3 - Find the right distance

3. Find the minimum focusing distance you can achieve (Get as close as you can and maintain focus). It will vary depending on your zoom setting. Once you find it, back up or zoom out just a little bit farther away. This will insure you're within the right range and your subject will be in focus.
Even though you won't be super close to your subject, you're going to get a great end result using Step 4.
step 4 - crop to perfect it
4. Crop it. Point and Shoot cameras can shoot somewhat close, but really don't give you macro level magnification. It's one of those compromising steps I mentioned earlier.
Whether it's your cell phone or your point and shoot camera, you've got plenty of megapixels in that tiny sensor to drop tightly and get a true close-up. Some cameras will let you crop using your camera, but it is much better to use software on your computer.
You'll be able to create a more pleasing variety of compositions. Essentially, you're shooting a little wider and then fine tuning tighter crops afterwards. This gives you several potential interesting photos from just one exposure.
Detailed close-ups, like this college sweatshirt, show you how macro photography reveals certain fascinating aspects of our visual world that we would otherwise miss in our normal everyday observations.

There are also several links at the end of this article to related articles with tips and techniques, lighting, ideas for advanced and beginners in macro photography.
It is always a great idea to practice your close-up photography indoors, because it is easier to control the lighting, background and subject movement.
4 ELEMENTS of a good macro photograph
Whether you're shooting indoor or outdoor, natural light or artificial light, these are the 4 elements that you must get right in order to have a winning photograph.
FOCUS
LIGHTING
COMPOSITION
BACKGROUND

This photo shows a basic set-up you can use for getting good natural lighting without flash and a solid, non-distracting background. I use two large 32 inch by 40 inch white foam core boards that are readily available at art supply stores.
They act as great reflectors, are firm, lightweight and easy to carry. You can use them for your portrait photography too, but smaller ones are plenty big enough for your macro photography.
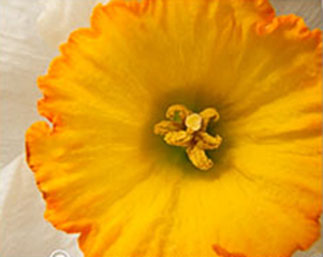
I chose a $100 bill and a daffodil as my subjects when I first wrote this article. This set-up on my dining room table is simple and quick. Note the foam-core board on the table doesn't show in the photos; it only some adds fill light up from the table surface.
There was a triple-wide window behind me, so the existing lighting is very soft, but also very flat and non-directional. Set up your shot near a big window and you'll never have to use flash.
I started the macro photography session with a pink hyacinth, but was not pleased with the results; so I switched the subject of my macro photography tutorial to a $100 bill. (So perhaps this is a hundred dollar idea, instead of a million dollar idea).
 Comparison of the sharper Manual and blurry Auto-focus photos
The Canon G11 really struggled with Auto-focusing set so close on Macro, so I referred to the camera manual on how to use manual focus. Look at the difference in sharpness of the two photos above of the $100 bill.

Once I discovered how to activate it, I found the manual focus easy to use. The sliding distance indicator on the video screen of the camera was extremely helpful.
The folks at a Canon made the g11 with an included magnified snapshot (not shown) on the screen, which really helps with manual focusing. It has a scale that starts with feet, then switches over to inches when doing your macro focusing at super close distances.
Macro flash Photography Tips for Point and Shoot Digital Cameras
 Bounce Your Flash
Avoid using the pop up flash on your point and shoot for lighting up your subject. The results will disappoint you for sure. Some higher end point and shoot cameras have a hot shoe for an external flash gun. If yours does you have a huge advantage.
I used an external flash mounted on top of my Canon G11 and "bounced" it off one of my large 32x40 inch foam-core boards which was on the left side of my set-up.
I set the camera self-timer to 10 seconds so that the camera had plenty of time to settle before the exposure was made.
With electronic flash, you'll freeze any movement by the super fast exposure, but it is always a good practice when using a tripod to use a remote shutter cord or the camera's timer.
The large surface of the foam-core reflected the flash from above, slightly behind, and to the side of the camera.
You can see how this directional, but soft macro lighting brings out the texture and the detail of the inside of this daffodil. I'm not thrilled with how I cropped it back then, but you improve your composition skills by practicing.
macro photography links
Macro Photography Tips. The macro photography tutorial above was written while using my point and shoot Canon camera. You may also be interested in these outdoor macro photos taken with my Canon 5d DSLR.
Macro Photography Technique. If you are not suing a point and shoot camera like the one used in this macro photography tutorial, here are other options to think about for macro equipment.
Macro Photography Lighting. This article has some beautiful examples of good macro photography lighting.
Happy macro shooting!


ABOUT BRUCE LOVELACE
Bruce is the publisher of this website. He is the author of the book "Improve Your Photography Instantly." Read more on Bruce on his Bio Page. He's been known as The Traveling Photographer ever since 1994. Read more about this website.
View some of Bruce's photos on Instagram. Visit the Facebook Page. Watch him on YouTube. Bruce runs photo workshops for kids and adults, and provides one-on-one photography coaching.
Digital Photography Education Location on Google My Business
You might like these
5 Famous Macro Photographers Worth Watching And What Can You Learn
The secret is to specialize in one type of macro photography? Check out the remarkable , unique macro images of these famous macro photographers.
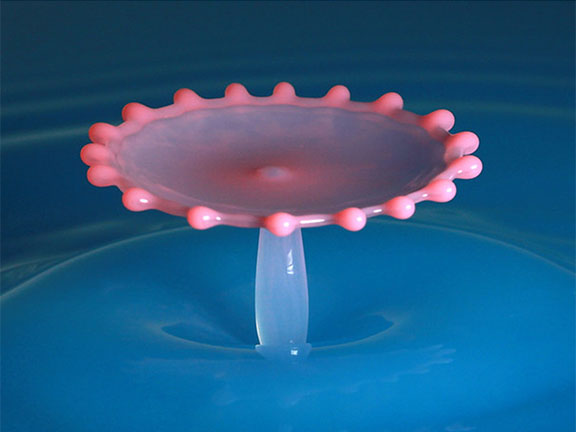
Macro Water Drop Photography- How to Photograph Water Drops + Splashes
4 Simple steps with examples on how to take great water drop macro photography and a surprising macro photography accessory
Cheap Diffuser For Macro Photography. Reviews-Low Cost Recommendations
Should you use household items to make one or buy a low-cost cheap diffuser for macro photography Reviews and do it yourself macro lighting hacks
11 Macro Photography Ideas You've Never Thought Of - How To Find Them
Do you need some macro photography ideas or inspiration? This will help. Look at these sample macro photos.
Definition of Macro Photography. What is Macro Photography.Explore It!
It is often technically mis-used but the precise Definition of Macro Photography isn't that important for most photographers.
How To Take Abstract Macro Photography. Creative Ideas and Examples
Examples, how to tips and definition of what is abstract macro photography. Sample abstract macro photos. You can shoot close-ups anywhere, anytime!


You just need to use a few specific techniques to better your chance of success with close-ups. You can get photos as beautiful as the purple daisy below, but you need to get the 4 essential elements right.

PICK THE BEST ANGLE
GET THE FOCUS RIGHT
CONTROL THE BACKGROUND
USE GOOD LIGHTING
 Fujifilm EXR
This point and shoot camera, the EXR from Fuji, does not have manual focus. I've found that accurate focusing is the biggest challenge when shooting macro photos with a point and shoot camera.
"You may come up short when trying to create a great photo, but it's only a failure if you stop trying" - Bruce Lovelace
ueful macro helpers
 My Favorite Macro Accessory Accessory
 Only use bounced or diffused
flash with macro photography
Improve your photography instantly. Get the 2 most important chapters of my photography book for free.