HOW TO POSTS: LIGHTING AND COMPOSITION
5 tripod stability tips
This post may contain affiliate links and I may be compensated if you make a purchase after clicking one of the links. There is no cost to you.
Use these 5 tripod stability tips and you're guaranteed to get sharper photos.
Have you ever wondered why you can still got blurry photo even though you used your tripod? This article will give you 5 tips on how to keep your camera steady on your tripod. You'll also learn how you can test the stability of your tripod.
It's one of those common mistakes photographers can easily make. You use your tripod and you automatically think you'll get perfectly sharp, blur-free images, right? It's happened to me and I'll bet it's happened to more photographers than you think.
Unfortunately, we've all likely felt the disappointment of getting an unsharp photo even though we used the right accessory for the job at hand, your tripod. Here are the top 5 tripod stability tips to make sure you get the most steadiness out of your tripod.
tripod stability tips - video
Here are the same tips, just put into a video format in case you like watching instead of reading. I played around with some video editing software and this is the first time I've ever spliced so many short clips together. I believe it gets the points across in an easy to understand format.
You may be familiar with a few of them, but if you know about all 5 of these stability techniques, you won't ever have to worry about even the slightest blur in your photos from camera movement, when you use a tripod.
5. don't touch your camera
That is, don't touch the shutter button with your finger when you take your photo. Yes, even when your camera is securely mounted to the top of your tripod.
The pressure from your touch can cause a tiny movement in the camera that can affect sharpness. You may not notice it on the back of your camera's LCD screen, but a lack of sharpness becomes more apparent when you view your photos on a larger screen or on a print.

You can use the camera's self timer, attach a shutter cord, or use a remote shutter trigger. All of these techniques prevent you from causing even a slight camera movement when you capture your image.
 Shutter Cord
 Remote Trigger
4. spread the tripod legs far apart
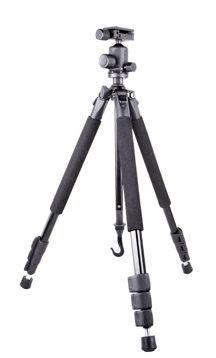
You can increase the stability of your tripod by spreading the legs out far. This lowers the center of gravity of your camera-tripod combination. This is not an option for those of you who have a tripod with leg braces that connect the center pole with the legs
 Spread your tripod legs farther apart for added stability.
You're somewhat limited by the length of the center pole and the space you have available. Tripods without a center pole can spread flat to the ground.
Cheaper tripods come with braces that connect the legs to the center column at the bottom.
This means you don't have the option of spreading the legs out wider. This type of tripod is easily the most affordable to buy.
I call them disposable tripods, because they simply do not last long unless there sitting in the back of the closet collecting dust.
 Tripod With Leg Braces
In my experiences with these tripods, they simply don't hold up with a significant amount of use. They are very affordable, for sure, but a really well built tripod should last a lifetime.
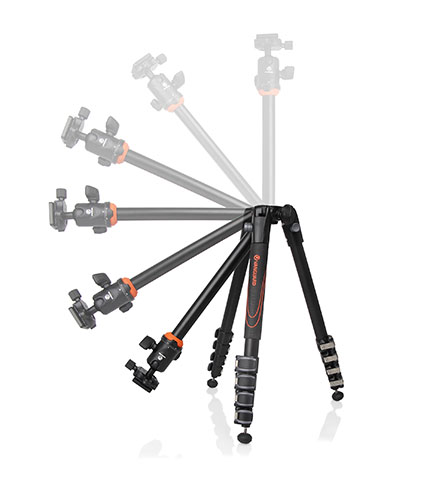
3. extend the thicker legs first and
If you don't have to extend all of your leg section fully, it's best to keep the skinniest tripod leg sections retracted. The thicker, upper leg sections are stronger and give you a slight advantage in tripod stability.
This is particularly important when you have tripods that have 4 or 5 leg sections. Use the upper, thicker tripod legs first and keep the thinner legs retracted.
Secondly, having the legs overlap in equal amounts like the photo above is better when you have to extend several leg sections. Fully extending just one section of a leg completely is less stable than having several sections extended.
 Overlap the tripod leg sections to get more stability.
2. keep the center column down

When it's raised high, your tripod's center pole is more like a monopod. It's not as stable. for the most stability, keep your center pole as low as possible.
You lose a lot of the beneficial stability that you get from 3 legs when you single center pole is sticking up high in the air all by its lonesome self.
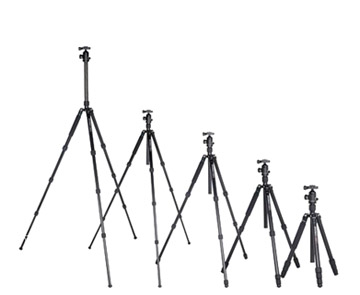
When considering what tripod size to buy, remember it is a nice feature to be able to get your camera high enough without having to fully extend the center column.
1. stability tip
This is perhaps the most underutilized of the tripod stability tips for keeping your tripod steady: Weigh it down. Combined with the 5th stability tip (a remote trigger), you will get the sharpest, blur-free images.
Make your tripod heavier anyway you can. I get it, You want to carry less weight and that's why ultra light tripods have become increasingly popular. The downside to using a light tripod is that they move easier and are less steady.

I've seen a lot of photographers hang their camera bag on the center pole. It makes sense, since you already have your bag with you. You don't have to search around for another object to use. Just make sure everything is zippered and secure. You don't want any of your precious cargo to fall out and get damaged.
You can use anything that's handy or you can buy specific gadgets that are convenient and easy to use. I've used a plastic bag, and inserted a few nearby rocks into the bag. That's a thrifty way add to the overall weight and stability of your tripod.
accessories to make your tripod more stable
Gadgets that attach to all three legs are nice because they don't hang down too low.
They are very light, fold up flat, and can be filled with anything to give you the added weight. I'm cheap when it comes to some tripod accessories and I just use a plastic bag attached to the center pole when I need to add weight for added stability.
 Tripod Pole Clamp
If your tripod center column has no hook, you can also buy a pole clamp to attach extra weight to your tripod.
The advantage to getting one of these is that they have many uses.
I also use this clamp to clip my external flashgun battery to.
Sand bags are versatile to use because they can be used in a variety of ways. They're easy to carry and can be clamped or hung overtop.
Sandbags are great to weigh down light stands. I use mine to prevent my stands from being tipped over by the wind when my large light reflector panels are attached.

other factors that affect tripod stability
WIND. Wind can easily add movement to your tripod and camera during an exposure. This is even more true if you are using technique number 1 and hanging a large object from the center pole.
Sometimes you can block the wind with your body as you shoot. Other times you may just have to wait until the wind dies down before you can take your photo.
DSLR MIRROR BOUNCE. If you have a DSLR camera, it uses a mirror that has to flip up out of the way when a photo is taken. Although it's unusual, this can cause a vibration that could affect sharpness if you have an unstable tripod.
DSLR cameras have a mirror lock-up setting that flips the mirror up and lets it settle before you make the exposure. Surprisingly, this is less of a problem with very long exposures.
CAMERA MOUNT. You'll lose stability if your camera is positioned off-center when shooting a vertical composition. Read up on what an L Bracket is and it would help you improve stability.
how to test your tripod stability
There are a couple of ways you can test the stability of your tripod, but here is the one that I've found out to work the best. You don't have to use a fancy lens sharpness target like the one pictured below. Whatever you do decide to use to check your tripod stability, just make sure the target is very stable with no chance of any movement during your test.
1. Set up you camera on your tripod to photograph a stationary object with distinct, contrasty lines.
2. Use a shutter cord or your camera's self timer function.
 Use a lens sharpness chart for checking stability
3. Set your camera on shutter priority mode.
4. Take a sequence of photos with the shutter speed doubling each time, starting at 1/500, then 1/250, 1/125th etc. all the way down to a full 1 second exposure.
If you see a change in sharpness as the shutter speeds get slower, than you have an issue with blur caused by camera movement and your tripod is not fully stable under the conditions you used in.
To really see analyze the sharpness effectively you'll need to shoot the photos, download them to your computer and look at them in software that lets you zoom in closely. Here's a focusing chart if you want to print one out and use to check the stability of your tripod.
Please consider supporting this site.
As an Amazon affiliate I may receive a small commission from qualifying purchases, at NO added cost to you.
These techniques to keep your tripod steady aren't super complicated, but it's important you understand all of them when you're out on a photo shoot. Having a few options to choose from will give you sharper photos.
Stay inspire. Keep shooting photos!


ABOUT BRUCE LOVELACE
Bruce is the publisher of this website. He is the author of the book "Improve Your Photography Instantly." Read more on Bruce on his Bio Page. He's been known as The Traveling Photographer ever since 1994. Read more about this website.
View some of Bruce's photos on Instagram. Visit the Facebook Page. Watch him on YouTube. Bruce runs photo workshops for kids and adults, and provides one-on-one photography coaching.
Digital Photography Education Location on Google My Business
You might like these
How Tall Should a Tripod Be-Simple 3 Step Method To Find Out
If you're looking for a high enough camera tripod, you need to know how tall should a tripod be first
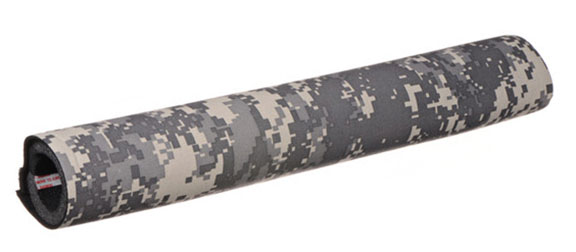
Tripod Leg Covers - Do They Work? A COOL Weather Camera Accessory
Improve your grip,keep your hands warm, and protect your tripod with tripod leg covers. Side by side comparison, features and prices.
The 10 Best Camera Tripods That Crush The Competition-Under 50$, 100$
The 10 best camera tripods under $50, under $100, under $200, and the best place to buy tripods

Recent Articles
-
No More Blurry Faces! Family Photo Hacks for Sharp & Stunning Photos
Mar 26, 24 08:08 AM
 The right camera settings and a little planning will give you stunning sharp family portraits. Helpful guide to sharp family portraits
 -
How To Do Baby Poses (10 Classic Poses For Babies That You Can Copy
Mar 22, 24 07:17 AM
 Learn heartwarming newborn baby posing. Simple baby poses you can copy. 10 Easy to copy portrait photography poses of babies
 -
20 Photography Tips-How To Instantly Improve Your Photography in 2024
Mar 21, 24 06:13 AM
 How to easily get better photos. These simple photography tips will steer you in the right direction for quickly improving your results as a photographer.
 -
What Is A Kit Lens Good For And How To Get The Most Out of One
Mar 09, 24 12:39 PM
 Are kit lenses any good and what are kit lens good for? Advantages and disadvantages. Helpful guide to getting the most out of a kit lens
 -
Why Are USB Flash Drives So Popular. Weird Flash Drives You'll Love!
Mar 06, 24 11:34 AM
 Unique, creative, and weird flash drives. Are they any good and why are flash drives so popular? Helpful guide.
 -
Successful Family Portrait Photography-The Skills You Need to Have
Mar 02, 24 06:19 AM
 The skills you need to have in order to create great family portrait photography. Beginners guide to the know-how for photographing families.
Search for a new topic on this site:

Improve your photography instantly. Get the 2 most important chapters of my photography book for free.